Oh my goodness, let me tell you about my latest obsession! If you’re looking for a treat that’s both ridiculously simple and incredibly satisfying, then you absolutely HAVE to try this Banana Nice Cream. Seriously, it’s a game-changer! I stumbled upon the idea a few years back when I was trying to cut down on processed sugars but still craved something sweet and creamy after dinner. I was skeptical, I’ll admit, thinking, “How good can frozen bananas *really* be?” Boy, was I wrong!
This isn’t just a healthy alternative; it’s genuinely delicious. It’s got that smooth, soft-serve texture you dream of, but it’s packed with natural goodness. It completely transformed my dessert routine, and now I always have a stash of frozen bananas in my freezer, just waiting to be blended into this magical Banana Nice Cream. It’s become my go-to for a guilt-free indulgence, and I just know you’re going to fall in love with it too!
Why You’ll Love This Banana Nice Cream
Okay, so why should you drop everything and make this Banana Nice Cream right now? Well, for starters, it’s ridiculously easy – we’re talking minimal effort for maximum reward! It’s also incredibly versatile; you can play around with flavors and add-ins to make it exactly what you’re craving. Plus, it’s naturally sweet, so you don’t need to add a ton of sugar, which is a huge win in my book. It’s perfect for a quick snack, a light dessert, or even a healthy breakfast if you load it up with some granola. Trust me, it’s going to become your new favorite!
The Pure Joy of Banana Nice Cream
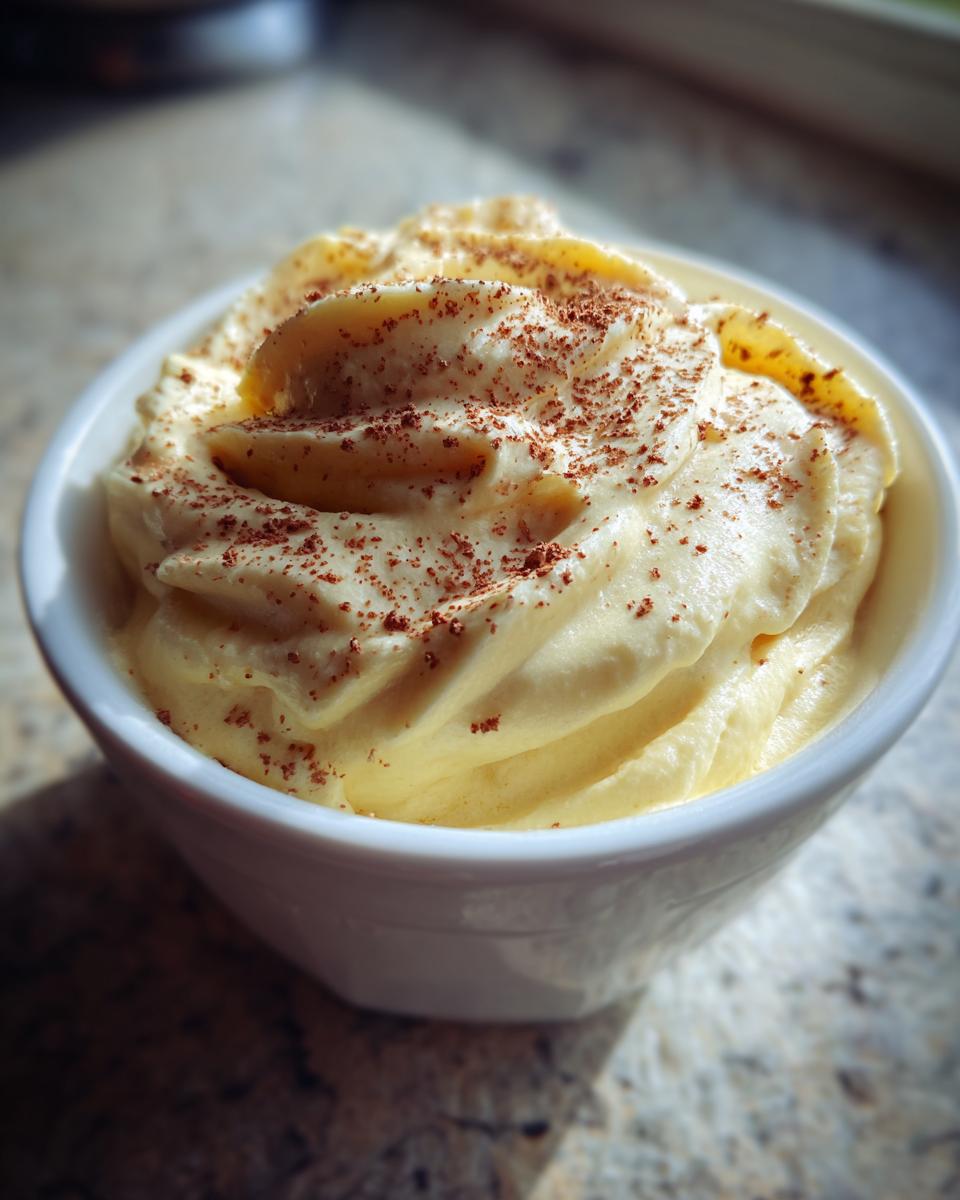
Oh, the taste! It’s like a hug in a bowl – sweet, creamy, and utterly satisfying. This Banana Nice Cream hits all the right notes without any of the guilt. That smooth, soft-serve texture just melts in your mouth, making every spoonful a little moment of bliss. It truly is a treat you can feel good about!
Essential Equipment for Banana Nice Cream
You don’t need a fancy chef’s kitchen to whip up amazing Banana Nice Cream, but a couple of key tools will make all the difference in getting that dreamy, creamy texture we’re aiming for. Having the right gear means less frustration and more deliciousness, and honestly, who wants to struggle when dessert is involved? These aren’t just suggestions; they’re pretty vital for success here!
Blender or Food Processor for Banana Nice Cream
This is where the magic happens, folks! You absolutely need a powerful blender or a sturdy food processor. Trying to make nice cream with a weak, old blender is like trying to stir concrete with a spoon – it just won’t work! The stronger the motor, the smoother and quicker your nice cream will come together. Look for something with at least 800 watts if you can; it’ll make blending those rock-hard frozen bananas a breeze.
Ingredients for Perfect Banana Nice Cream
Alright, let’s talk ingredients! The beauty of this Banana Nice Cream is how few things you actually need, but each one plays a super important role. We’re keeping it simple, fresh, and totally delicious. Here’s what you’ll want to gather:
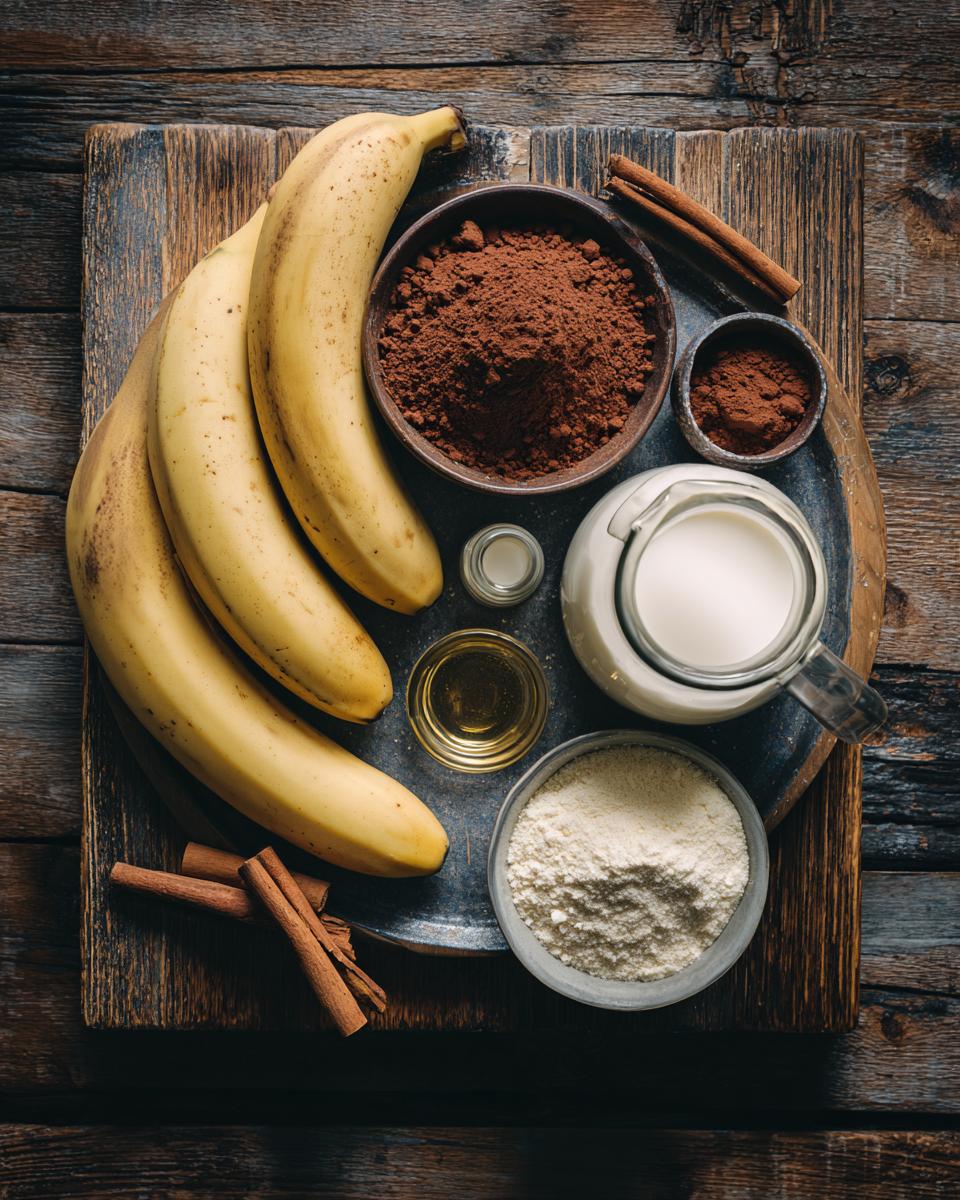
- 2 ripe bananas, sliced and frozen: This is your star ingredient, friends! Make sure they’re perfectly ripe before freezing for the best flavor and sweetness. We’re talking yellow with a few brown spots, not green!
- 1 tablespoon unsweetened cocoa powder (optional, for chocolate flavor): If you’re a chocolate lover like me, don’t skip this! It transforms your nice cream into a decadent, guilt-free chocolate dream.
- 1 teaspoon alcohol-free vanilla extract (optional): Just a little splash adds a lovely depth of flavor that really rounds out the sweetness.
- 1-2 tablespoons plant-based milk (almond, soy, or oat), as needed: This is your secret weapon for getting that creamy, dreamy texture. Start with a little, you can always add more!
Selecting the Best Bananas for Banana Nice Cream
Listen up, this is CRUCIAL! The secret to truly amazing Banana Nice Cream starts with your bananas. You want them RIPE—like, yellow with plenty of brown freckles ripe. This means they’re at their sweetest, which is key since we’re not adding extra sugar. Once they’re perfectly ripe, peel them, slice them into coin-sized pieces, and spread them out on a plate or baking sheet. Pop them in the freezer for at least 4-6 hours, or until they’re solid. Trust me, it makes all the difference!
How to Make Banana Nice Cream
Okay, you’ve got your perfectly frozen bananas and your trusty blender ready to go! Now for the fun part – turning those icy slices into a luscious, creamy treat. Don’t worry, it’s super straightforward, but there are a couple of little tricks to ensure you get that dreamy, soft-serve consistency every single time. Just follow these steps, and you’ll be enjoying your homemade Banana Nice Cream in no time!
- Get Ready to Blend! First things first, toss those frozen banana slices right into your food processor or high-speed blender. If you’re adding cocoa powder or alcohol-free vanilla extract, go ahead and add those in now too.
- Start Processing: Now, hit that pulse button or start blending on a low setting. At first, it’s going to look like a crumbly, chunky mess – almost like frozen banana gravel. Don’t panic! This is totally normal. You might need to stop and scrape down the sides of your blender a few times.
- Add a Splash of Milk: This is where we start getting creamy! Once the bananas are mostly broken down but still crumbly, add 1 tablespoon of your plant-based milk. Just one! You can always add more, but you can’t take it away.
- Blend Until Smooth: Keep blending, stopping and scraping down the sides as needed. You’ll see it transform! It’ll go from crumbly to thick, and then suddenly, it’ll start to swirl and look just like soft-serve ice cream. If it’s still too thick or not blending well, add another tablespoon of milk, but be careful not to add too much, or it’ll become more like a smoothie.
- Serve Immediately: The absolute best way to enjoy Banana Nice Cream is right after you make it, when it’s at its creamiest. Grab a spoon and dig in!
Blending Your Banana Nice Cream to Perfection
Achieving that perfect, velvety smooth Banana Nice Cream texture is all about patience and a little technique. When you first start blending, those frozen bananas are going to resist, and your blender might sound like it’s working hard. Just keep pulsing and scraping down the sides. It might take a few minutes, but suddenly, it’ll “catch” and start swirling. That’s your cue! Add the plant-based milk one tablespoon at a time. The goal is to add just enough liquid to get it moving and creamy, but not so much that it turns into a liquid smoothie. You’re looking for something that holds its shape like soft-serve. If it gets stuck, turn off the blender, push the mixture down, and give it another go!
Pro Tips for the Best Banana Nice Cream
Okay, now that you know the basics, let me share some of my favorite little tricks to take your Banana Nice Cream from good to absolutely *amazing* every single time. These aren’t just random ideas; they’re things I’ve learned through countless batches, and they really do make a difference. Trust me, a little extra care here will pay off big in flavor and texture!
- Don’t Skimp on Ripeness: Seriously, I can’t stress this enough! Those brown-spotted bananas are your best friends. They’re naturally sweeter and blend into a creamier consistency.
- Freeze Flat: When you freeze your banana slices, spread them out on a baking sheet first. This stops them from clumping together, making them much easier to blend. Once solid, you can transfer them to a freezer-safe bag.
- Start with Less Liquid: Always, always start with just one tablespoon of plant-based milk. You can always add more if it’s too thick, but you can’t take it away if it’s too runny!
- Scrape, Scrape, Scrape: Be patient and use that spatula! Scrape down the sides of your blender or food processor frequently to ensure everything gets evenly blended.
- Chill Your Bowl: If you’re serving it immediately, pop your serving bowl in the freezer for a few minutes beforehand. It’ll keep your nice cream colder for longer!
Adjusting Consistency for Your Banana Nice Cream
The beauty of Banana Nice Cream is that you can totally customize its texture to your liking! Want it super thick, like a scoopable ice cream? Use the absolute minimum amount of plant-based milk possible – just enough to get it blending. If you’re craving something a little softer, more like a traditional soft-serve or even a thick milkshake, just add another tablespoon or two of milk until you hit that perfect consistency. It’s all about personal preference, so don’t be afraid to experiment!
Banana Nice Cream Storage and Serving
Okay, so you’ve whipped up this amazing Banana Nice Cream, and maybe, just maybe, you have a little bit leftover (though I doubt it!). If you do, don’t fret! Just scoop any extra into an airtight container and pop it back in the freezer. It’ll firm up quite a bit, almost like a solid block. When you’re ready for more, let it sit out on the counter for about 10-15 minutes to soften slightly, or you can even give it another quick whirl in your blender to bring back that lovely soft-serve texture. It’s best enjoyed fresh, but it’ll keep well for a week or two for those emergency dessert cravings!
Frequently Asked Questions About Banana Nice Cream
Got questions about this amazing Banana Nice Cream? You’re not alone! It’s such a simple concept, but people always have a few things they wonder about. I’ve gathered some of the most common questions I get, so hopefully, this helps you on your journey to making the best frozen banana dessert ever. If you have any others, just ask!
Can I use fresh bananas for Banana Nice Cream?
Oh, definitely not! Using fresh bananas won’t give you that creamy, ice cream-like texture. Frozen bananas are absolutely essential for making true Banana Nice Cream; they provide the coldness and thickness needed.
What are some variations for Banana Nice Cream?
The possibilities are endless! Try adding a spoonful of nut butter, a sprinkle of cinnamon, or even other frozen fruits like berries or mango for different flavors. A little splash of coffee or peppermint extract can also be fun!
Estimated Nutritional Information for Banana Nice Cream
I know some of you like to keep an eye on what you’re eating, so here’s a quick peek at the estimated nutrition for one serving of this delightful Banana Nice Cream. We’re looking at around 105 calories, just 0.4g of fat, about 1.3g of protein, and 27g of carbohydrates. Remember, these numbers are estimates and can totally vary depending on the exact size of your bananas and the brand of plant-based milk you use, but it gives you a good idea of this healthy treat!
PrintBanana Nice Cream

This simple recipe creates a delicious and healthy banana ‘nice’ cream, perfect for a quick dessert or snack.
- Prep Time: 5 minutes
- Cook Time: 0 minutes
- Total Time: 5 minutes
- Yield: 1-2 servings 1x
- Category: Dessert
- Method: Blended
- Cuisine: American
- Diet: Vegan
Ingredients
- 2 ripe bananas, sliced and frozen
- 1 tablespoon unsweetened cocoa powder (optional, for chocolate flavor)
- 1 teaspoon vanilla extract (optional)
- 1–2 tablespoons plant-based milk (almond, soy, or oat), as needed
Instructions
- Place the frozen banana slices in a food processor or high-speed blender.
- Add the cocoa powder and vanilla extract, if using.
- Begin to process the bananas. They will initially look crumbly.
- Add plant-based milk, 1 tablespoon at a time, and continue processing until the mixture becomes smooth and creamy, resembling soft-serve ice cream.
- Serve immediately or transfer to an airtight container and freeze for a firmer consistency.
Notes
- For a thicker consistency, use less plant-based milk.
- Experiment with different add-ins like nut butter, cinnamon, or other frozen fruits.
- Ensure bananas are very ripe before freezing for the sweetest flavor.
Nutrition
- Serving Size: 1 serving
- Calories: 105
- Sugar: 14g
- Sodium: 1mg
- Fat: 0.4g
- Saturated Fat: 0.1g
- Unsaturated Fat: 0.1g
- Trans Fat: 0g
- Carbohydrates: 27g
- Fiber: 3g
- Protein: 1.3g
- Cholesterol: 0mg


