Oh my goodness, friend, if there’s one dessert that just screams “indulgence” and “pure happiness” to me, it has to be a glorious, perfectly creamy Chocolate Cheesecake! Seriously, the way that rich, velvety chocolate just melts in your mouth, combined with that satisfying crunch of the cookie crust? It’s pure magic. I remember the first time I nailed this recipe for a family gathering – everyone was absolutely speechless, just savoring every single bite. The silence was the highest compliment, let me tell you! This isn’t just any dessert; it’s an experience, a moment of blissful escape. My goal today is to share all my secrets so you can create that same show-stopping, utterly decadent Chocolate Cheesecake right in your own kitchen. Trust me, it’s easier than you think, and the payoff is unbelievably delicious!
Why You’ll Love This Chocolate Cheesecake
You are absolutely going to adore this chocolate cheesecake recipe, I promise! It’s seriously one of my go-to’s for so many reasons. First off, it’s surprisingly simple to put together, even if you’re not a seasoned baker. But don’t let that fool you – the flavor is incredibly rich and complex, tasting like you spent hours slaving away. Plus, it’s just so versatile! Perfect for a fancy dinner party, a casual get-together, or honestly, just because you deserve a treat. This chocolate cheesecake truly delivers on all fronts!
The Ultimate Chocolate Cheesecake Experience
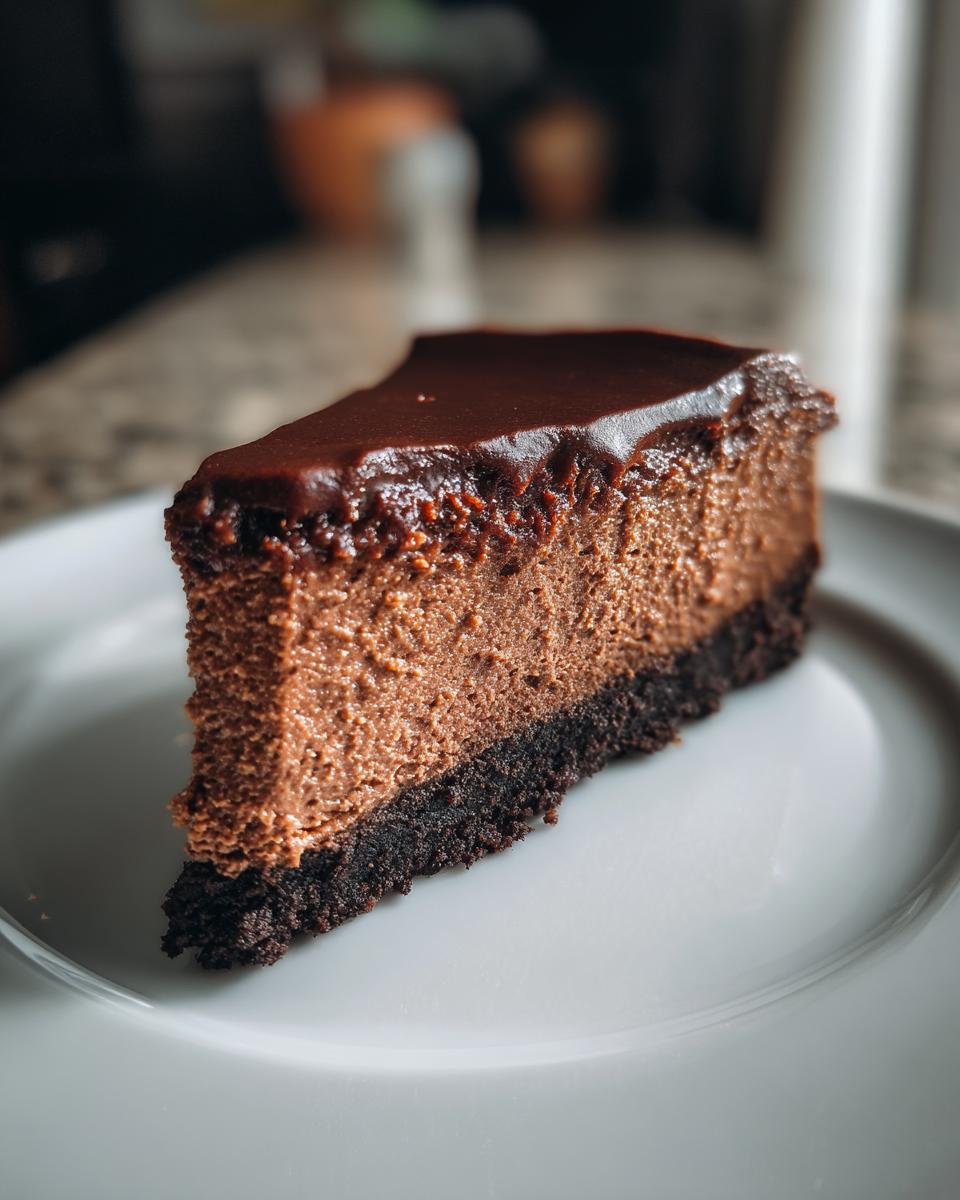
Imagine sinking your fork into that smooth, dense, yet unbelievably creamy filling. The deep, bittersweet chocolate notes mingle perfectly with just the right amount of sweetness, all cradled by that crunchy, buttery cookie crust. Every single bite of this chocolate cheesecake is pure bliss, a complete sensory explosion that leaves you feeling utterly satisfied and totally spoiled. It’s truly an experience, not just a dessert!
Essential Tools for Your Chocolate Cheesecake
Okay, so before we dive into the deliciousness, let’s talk gear! You don’t need a professional kitchen, but having the right tools makes a huge difference in getting that perfect chocolate cheesecake. Trust me, I’ve tried to MacGyver it in the past, and it just leads to frustration! These are the absolute must-haves that will make your life so much easier and ensure your cheesecake comes out looking and tasting incredible.
Must-Have Equipment for Perfect Chocolate Cheesecake
First up, a 9-inch springform pan is non-negotiable for this chocolate cheesecake. It’s how you get those beautiful, clean sides without destroying your masterpiece! You’ll also want an electric mixer – either a stand mixer or a hand mixer – to get that cream cheese super smooth. A sturdy mixing bowl, a rubber spatula, and a good measuring cup and spoons round out your essential toolkit for this chocolate cheesecake adventure.
Ingredients for a Heavenly Chocolate Cheesecake
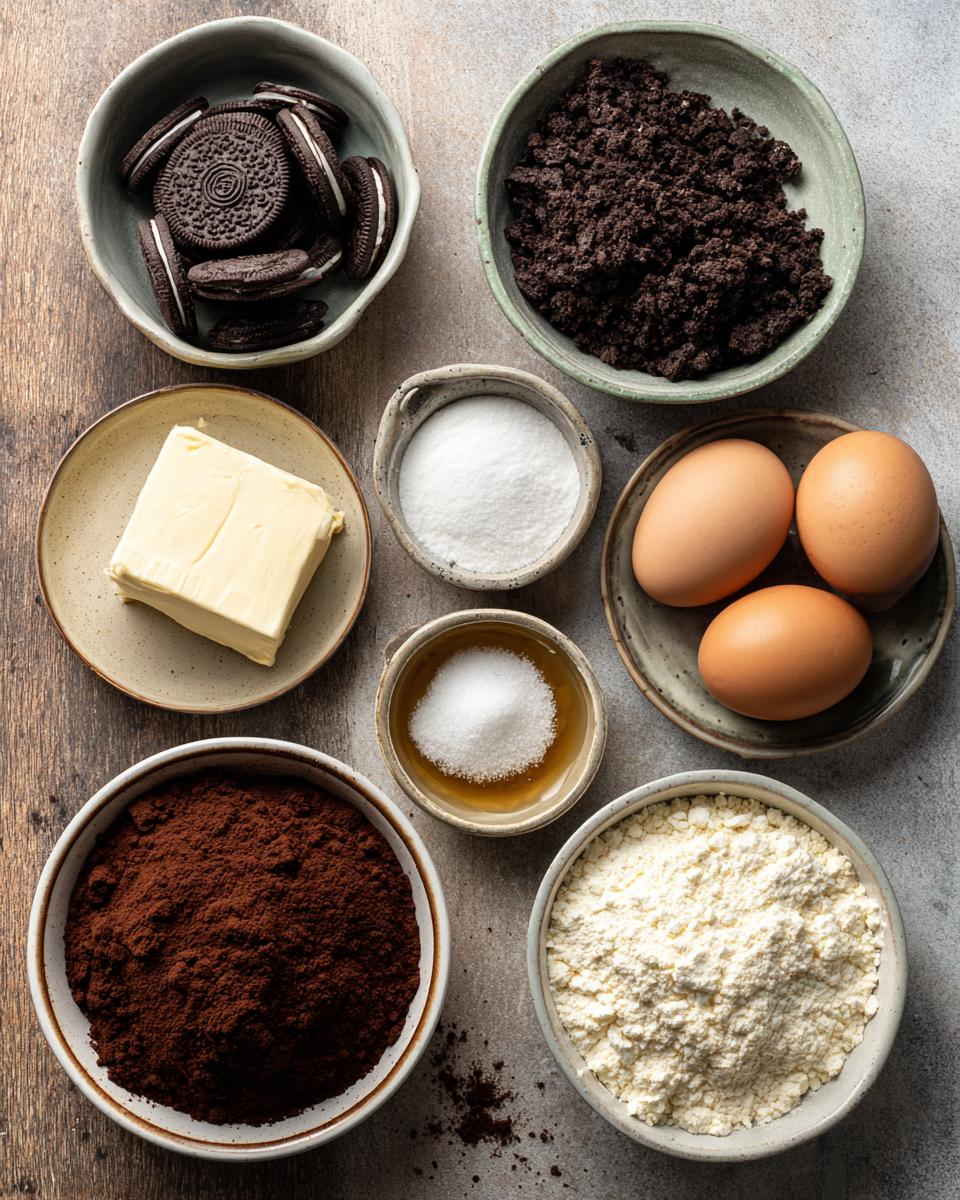
Alright, my friend, let’s gather our treasures for this heavenly chocolate cheesecake! Here’s what you’ll need to create this magic. For the crust, snag 1 1/2 cups of chocolate cookie crumbs (that’s about 24 of those classic chocolate sandwich cookies, crushed up real nice) and 1/4 cup of unsalted butter, melted. Now for the star, the filling: grab three 8-ounce packages of cream cheese, softened, 1 1/4 cups of granulated sugar, and 1/4 cup of unsweetened cocoa powder. You’ll also need 1 teaspoon of vanilla extract, 3 large eggs, 1/2 cup of sour cream, and finally, 4 ounces of bittersweet chocolate, melted and cooled. See? Simple, but oh-so-effective!
Selecting the Best Ingredients for Your Chocolate Cheesecake
Trust me on this one: good ingredients make all the difference for an amazing chocolate cheesecake. Always, always go for full-fat cream cheese – it gives you that luscious, rich creaminess we’re aiming for. And don’t skimp on the chocolate! A high-quality bittersweet chocolate will truly elevate the flavor. For the vanilla, an alcohol-free extract is my secret for a pure, sweet aroma. These little choices ensure your chocolate cheesecake is absolutely divine!
Crafting Your Perfect Chocolate Cheesecake: Step-by-Step Instructions
Okay, deep breath! This is where the magic really happens, and I’m going to walk you through every single step to make sure your chocolate cheesecake turns out absolutely perfect. Don’t rush, enjoy the process, and soon you’ll have a show-stopping dessert that everyone will rave about. We’ll start with that delightful crust, move onto the silky filling, and then get it baked to perfection. You’ve got this!
Preparing the Chocolate Cheesecake Crust
First things first, let’s get that oven preheated to 350°F (175°C). While it’s warming up, grab your 9-inch springform pan and lightly grease it. Now, in a medium bowl, just toss together your chocolate cookie crumbs and that melted butter. Mix it well until it looks like wet sand. Then, press that mixture firmly and evenly into the bottom of your prepared pan. This is your foundation!
Mixing the Creamy Chocolate Cheesecake Filling
Now for the good stuff! In a big bowl, beat your softened cream cheese and sugar with your electric mixer until it’s super smooth and creamy – no lumps allowed! Next, beat in the cocoa powder and that lovely vanilla extract until everything is perfectly combined. Here’s a crucial tip: add your eggs one at a time, beating just until each one is incorporated. Seriously, don’t overmix here; we want a tender cheesecake, not a tough one! Finally, stir in the sour cream and your cooled melted chocolate until it’s all smooth and glossy. Wow, right?
Baking and Cooling Your Chocolate Cheesecake
Alright, pour that gorgeous filling over your cookie crust in the springform pan. Pop it into your preheated oven and bake for about 50-60 minutes. You’ll know it’s ready when the edges are set and look firm, but the center still has a slight jiggle to it when you gently nudge the pan. Don’t open the oven door during the first 40 minutes, okay? That’s a crack-prevention secret! Once it’s baked, turn off the oven, crack the door open a bit, and let the cheesecake cool in there for a whole hour. This gentle cooling prevents cracking. Then, take it out, let it cool completely on a wire rack, and then, the hardest part: refrigerate it for at least 4 hours, or even better, overnight!
Expert Tips for Chocolate Cheesecake Success
Okay, you’re almost a chocolate cheesecake master! To make sure your creation is absolutely flawless every single time, here are a few extra nuggets of wisdom from my kitchen. First, and this is a big one: make sure ALL your cold ingredients, especially that cream cheese, are at room temperature. Seriously, pull them out a few hours before you start! It makes for a silky-smooth batter with no lumps. Also, resist the urge to overmix once the eggs go in; that’s a common culprit for cracks. And, oh, don’t peek in the oven too much! Patience is a virtue when baking this chocolate cheesecake.
Common Questions About Chocolate Cheesecake
Q1. Can I make Chocolate Cheesecake ahead of time?
Absolutely! In fact, I highly recommend it. This chocolate cheesecake actually tastes even better the next day once all those flavors have had a chance to meld together in the fridge. Just cover it loosely with plastic wrap once it’s fully cooled and chill it for up to 3-4 days. It’s a fantastic make-ahead dessert for parties!
Q2. How do I prevent cracks in my Chocolate Cheesecake?
Ah, the dreaded cracks! The biggest secrets are making sure your ingredients are at room temperature for a smooth batter, not overmixing once the eggs are added, and most importantly, that slow, gentle cooling process. Leaving it in the turned-off oven with the door ajar is key to preventing a sudden temperature shock that causes those cracks. Trust me on the slow cool!
Q3. What are good garnishes for Chocolate Cheesecake?
Oh, the possibilities are endless for dressing up your chocolate cheesecake! I love a simple dusting of cocoa powder or some elegant chocolate shavings. A dollop of freshly whipped cream is always a winner, or for a burst of freshness, some bright red raspberries or sliced strawberries are just divine. A drizzle of chocolate ganache or caramel sauce also takes this chocolate cheesecake to the next level!
Serving and Storing Your Chocolate Cheesecake
Once your beautiful chocolate cheesecake has had its long, well-deserved chill in the fridge, it’s ready for its moment in the spotlight! For serving, I love to dress it up a bit. A simple dusting of cocoa powder or some elegant chocolate shavings always looks stunning. Fresh berries, like raspberries or strawberries, add a lovely pop of color and a touch of tartness that balances the richness perfectly. As for leftovers (if there are any!), just cover your chocolate cheesecake tightly with plastic wrap and pop it back in the fridge. It’ll stay delicious for up to 3-4 days. No reheating needed – this baby is best served cold!
Estimated Nutritional Information for Chocolate Cheesecake
Just a quick heads-up on the numbers for this chocolate cheesecake! While I’ve included estimated nutritional information, please remember these are just that—estimates. The actual calorie, sugar, and fat content can totally swing depending on the specific brands of ingredients you use and how precise your measurements are. Think of it as a general guide, not a strict rule!
PrintCreamy Chocolate Cheesecake
A rich and creamy chocolate cheesecake with a chocolate cookie crust, perfect for any special occasion or a decadent treat.
- Prep Time: 25 minutes
- Cook Time: 60 minutes
- Total Time: 5 hours 25 minutes
- Yield: 12 servings 1x
- Category: Dessert
- Method: Baking
- Cuisine: American
- Diet: Vegetarian
Ingredients
- 1 1/2 cups chocolate cookie crumbs (about 24 chocolate sandwich cookies, crushed)
- 1/4 cup unsalted butter, melted
- 3 (8 ounce) packages cream cheese, softened
- 1 1/4 cups granulated sugar
- 1/4 cup unsweetened cocoa powder
- 1 teaspoon vanilla extract
- 3 large eggs
- 1/2 cup sour cream
- 4 ounces bittersweet chocolate, melted and cooled
Instructions
- Preheat oven to 350°F (175°C). Lightly grease a 9-inch springform pan.
- In a medium bowl, combine cookie crumbs and melted butter. Press mixture evenly into the bottom of the prepared springform pan.
- In a large bowl, beat cream cheese and sugar with an electric mixer until smooth.
- Beat in cocoa powder and vanilla extract until well combined.
- Add eggs one at a time, beating just until incorporated after each addition. Do not overmix.
- Stir in sour cream and melted chocolate until smooth.
- Pour filling over the cookie crust in the springform pan.
- Bake for 50-60 minutes, or until the edges are set and the center jiggles slightly.
- Turn off the oven and let the cheesecake cool in the oven with the door ajar for 1 hour.
- Remove from oven and cool completely on a wire rack.
- Refrigerate for at least 4 hours, or preferably overnight, before serving.
Notes
- For best results, use full-fat cream cheese.
- Ensure all ingredients are at room temperature for a smooth batter.
- Do not open the oven door during the first 40 minutes of baking to prevent cracking.
- Garnish with chocolate shavings, whipped cream, or fresh berries if desired.
Nutrition
- Serving Size: 1 slice
- Calories: 450
- Sugar: 35g
- Sodium: 250mg
- Fat: 32g
- Saturated Fat: 19g
- Unsaturated Fat: 10g
- Trans Fat: 0.5g
- Carbohydrates: 38g
- Fiber: 2g
- Protein: 8g
- Cholesterol: 110mg


