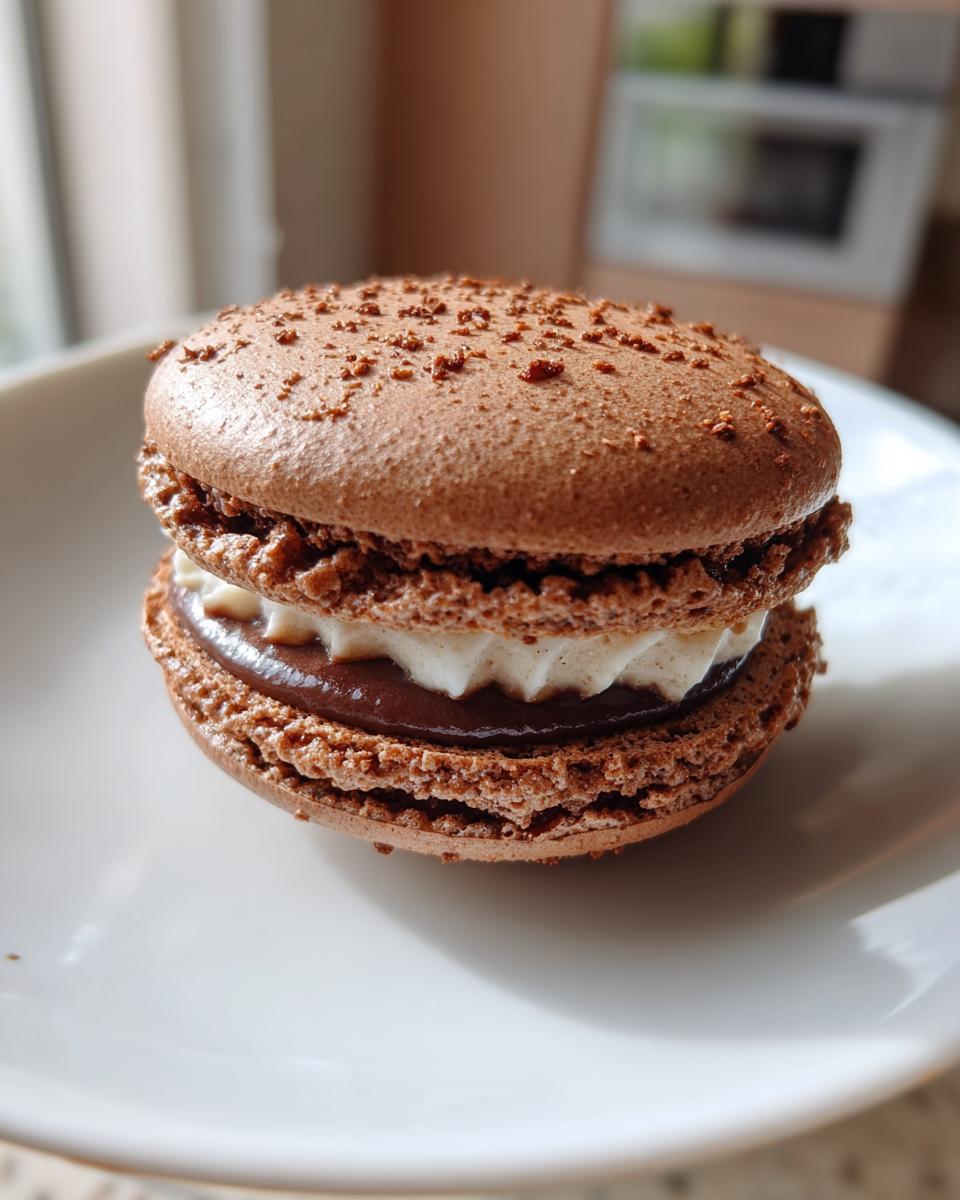
Oh my gosh, friends, if there’s one dessert that just screams “fancy pants but totally doable,” it’s chocolate macarons! These little French beauties are pure magic, aren’t they? Crispy, delicate shells hugging a luscious, rich chocolate ganache – seriously, what’s not to love? I remember the first time I *really* nailed a batch; it was for my sister’s birthday, and everyone thought I’d bought them from some fancy patisserie! That feeling of pride? Unbeatable!
There’s something so incredibly satisfying about mastering these elegant treats. You get those perfect, shiny shells with their adorable “feet” and then bite into that smooth, intense chocolate filling. It’s like a little piece of edible art, and honestly, they elevate any special occasion from “nice” to “WOW!” Trust me, once you get the hang of it, you’ll be making these chocolate macarons for every celebration, and maybe just for a Tuesday treat, too!
Why You’ll Love These Chocolate Macarons
Okay, so you might be thinking, “Macarons? Aren’t those super hard?” And sure, they have a reputation, but trust me, the payoff is HUGE! You’re not just baking; you’re creating little edible jewels. These chocolate macarons aren’t just delicious; they’re a statement. They’re fresher, more flavorful, and honestly, so much more satisfying than anything you’d ever buy from a store. Plus, you get to brag a little, and who doesn’t love that?
The Allure of Homemade Chocolate Macarons
There’s just something magical about pulling a tray of your very own chocolate macarons out of the oven. The smell, the sight of those perfect little “feet”—it’s an experience! When you make them yourself, you control every single ingredient. That means fresher almond flour, richer chocolate for the ganache, and that incredible, melt-in-your-mouth texture that store-bought just can’t quite capture. It’s like the difference between a homemade hug and a handshake – both are nice, but one just hits different!
Perfect for Special Occasions
Honestly, these chocolate macarons are instant crowd-pleasers. Bring a platter of these to any gathering, and you’ll be the hero! They look so elegant and sophisticated, making any birthday, anniversary, or even just a fancy brunch feel extra special. They’re tiny works of art that say, “I put love and effort into this for you!”
A Rewarding Baking Experience
I won’t lie, the first time you get those perfect shells, you’ll feel like a total baking rockstar! There’s a real sense of accomplishment that comes with mastering something as delicate as chocolate macarons. It’s a challenge, yes, but a fun one, and when you bite into that perfectly chewy, chocolatey goodness, all the effort feels totally worth it. It’s a skill you’ll be proud to show off!
Essential Equipment for Perfect Chocolate Macarons
Alright, so before we dive into the deliciousness, let’s talk tools! You really can’t just wing it with macarons, bless their delicate little hearts. Having the right gear makes all the difference between a sad, flat cookie and those gorgeous, footed beauties. Don’t worry, most of these are kitchen staples, but a couple are non-negotiable for macaron magic!
Must-Have Tools for Chocolate Macarons Success
First up, a kitchen scale is your absolute best friend here. Seriously, don’t even think about using measuring cups for these! Macarons are super finicky, and grams give you the precision you need. Next, a good stand mixer (or a really strong arm and hand mixer!) is crucial for whipping those egg whites into stiff, glossy peaks. You’ll also need a piping bag with a round tip – this is how we get those perfectly uniform circles. And finally, either a dedicated silicone macaron mat or good quality parchment paper with drawn circles will guide you to perfectly sized chocolate macarons every time. Trust me, these tools make the journey so much smoother!
Ingredients for Delicious Chocolate Macarons
Okay, now for the good stuff – what we’re actually putting into these little bites of heaven! Precision is key with macarons, so I’m going to give you exact measurements. Don’t eyeball it here, sweet friend, grab that kitchen scale we just talked about! Every ingredient plays a crucial role in getting those perfect chocolate macaron shells and that dreamy ganache.
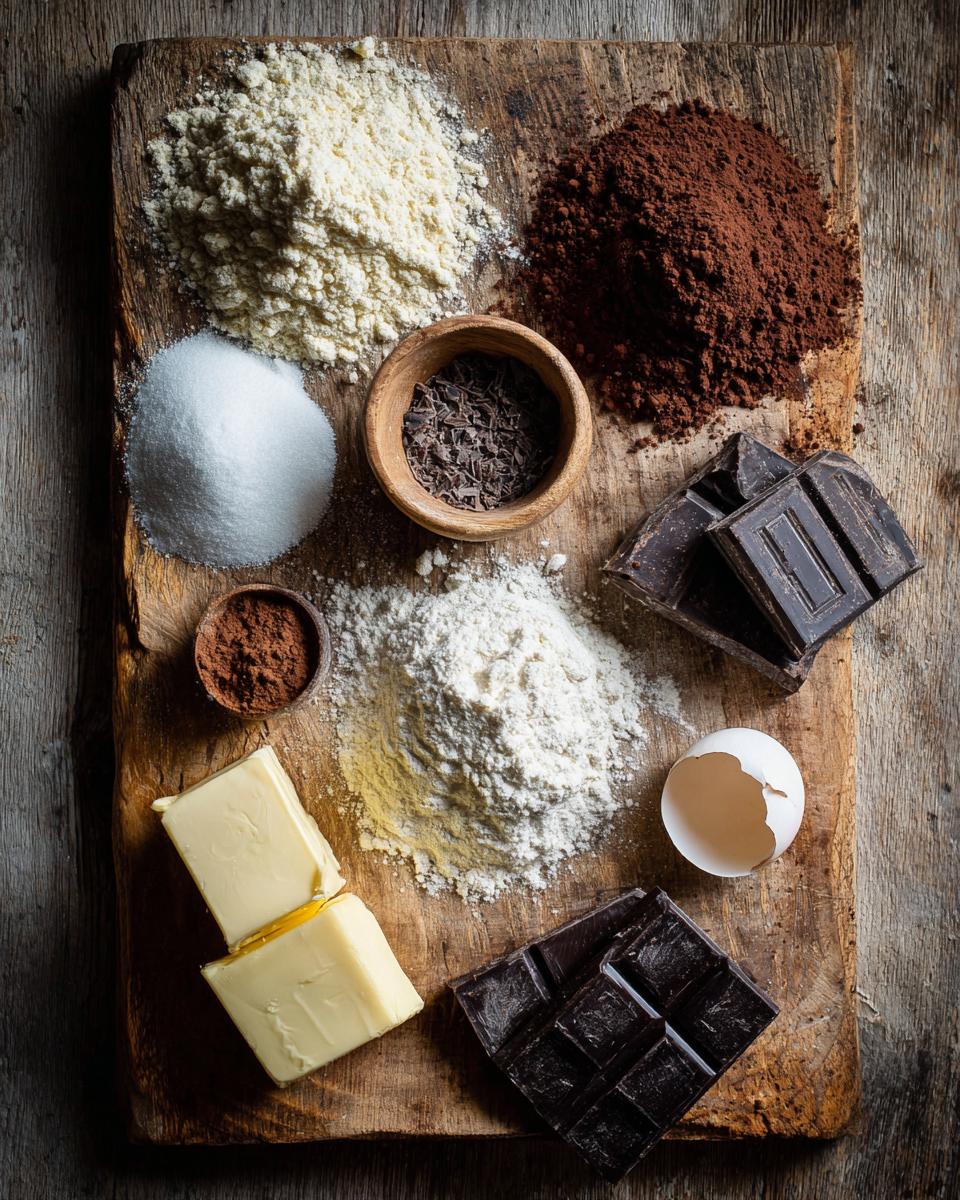
What You’ll Need for Your Chocolate Macarons
- 100g almond flour, super finely ground. Sift it, please!
- 100g powdered sugar, also sifted to get rid of any lumps.
- 75g granulated sugar – this is for our beautiful meringue.
- 50g large egg whites, and this is important: they need to be aged at room temperature. I usually separate them the day before!
- 5g unsweetened cocoa powder, for that rich chocolatey shell!
- Pinch of fine sea salt, just a tiny bit to help those egg whites whip up.
And for that luscious, melt-in-your-mouth ganache filling:
- 100g dark chocolate, high quality and finely chopped. The better the chocolate, the better the ganache, trust me!
- 100ml heavy cream (at least 35% fat, we want it rich!).
- 10g unsalted butter, softened to room temperature. This adds a lovely shine and richness.
Step-by-Step Guide to Making Chocolate Macarons
Alright, my fellow baking adventurers, this is where the magic happens! Don’t be intimidated; we’re going to break down every single step for these chocolate macarons. Just follow along, and you’ll be a macaron master in no time. It’s all about technique and a little bit of love, just like Grandma always said!
Preparing Your Chocolate Macarons Batter
First things first, let’s get our dry ingredients ready. Grab that super fine almond flour, powdered sugar, and your cocoa powder. Sift them together, *twice* if you can, into a bowl. This gets rid of any pesky lumps and ensures a super smooth macaron shell. Trust me, you don’t want lumpy bits in your delicate chocolate macarons! Set that aside.
Now for the meringue! Take those aged egg whites (remember, room temperature is key!) and a tiny pinch of salt. Start whipping them on medium speed until they get nice and foamy, like a bubble bath. Then, gradually, *slowly*, start adding your granulated sugar, a spoonful at a time. Crank up the speed to high and keep whipping until you get stiff, glossy peaks. When you pull the whisk out, that peak should stand tall and proud, not flop over like it’s tired. This meringue is the backbone of your chocolate macarons!
Here’s the crucial part: the macaronage! Gently, ever so gently, fold your sifted dry ingredients into that beautiful meringue in three additions. Use a spatula and a folding motion, bringing the batter from the bottom up and over. Don’t go crazy stirring; we want to keep all that lovely air in there! The batter should eventually flow like lava off your spatula, forming a ribbon that slowly melts back into itself within about 10-15 seconds. This is the perfect consistency for your chocolate macarons, not too thick, not too runny.
Piping and Resting Chocolate Macarons
Time to pipe! Load that gorgeous chocolate macaron batter into your piping bag, fitted with a round tip. Hold the bag straight up, about half an inch above your prepared baking sheet (with your macaron mat or parchment circles). Pipe 1.5-inch circles, then quickly flick your wrist to stop the flow. Don’t worry if they’re not absolutely perfect; practice makes perfect!
Once your tray is full, here’s a super important step: tap that baking sheet firmly on your counter a few times. This helps release any trapped air bubbles that could cause cracks. You’ll see little bubbles rise to the surface; pop any big ones with a toothpick. Now, for the rest! Let those chocolate macarons sit at room temperature for 30-60 minutes, or until you can gently touch one without any batter sticking to your finger. This forms a “skin,” which is absolutely vital for developing those adorable “feet” in the oven!
Baking Your Chocolate Macarons to Perfection
While your chocolate macarons are resting, preheat your oven to 150°C (300°F). Once they’ve formed that lovely skin, pop them in! Bake for about 12-15 minutes. Around halfway through (say, 7-8 minutes), rotate your baking sheet for even baking. You’ll know they’re done when they’ve developed their characteristic “feet” (those ruffled edges at the bottom) and don’t wobble when you gently touch them. If they wobble, give them another minute or two. Let them cool completely on the baking sheet before even thinking about touching them!
Crafting the Rich Chocolate Ganache
While your chocolate macaron shells are baking and cooling, let’s make that dreamy ganache! Finely chop your dark chocolate and put it in a heatproof bowl. In a small saucepan, heat your heavy cream until it just starts to simmer around the edges – don’t let it boil! Pour that hot cream over your chopped chocolate and let it sit for about 2 minutes. This lets the heat melt the chocolate.
Now, gently stir with a whisk or spatula from the center outwards until it’s completely smooth and glossy. If it looks a little separated, keep stirring; it’ll come together! Stir in your room temperature unsalted butter until it’s fully melted and combined. This adds extra richness and a beautiful sheen. Let your ganache cool and thicken up. You want it to be spreadable but firm enough to hold its shape when piped. If it’s too thin, pop it in the fridge for a bit, stirring every 10 minutes. If it’s too thick, a quick zap in the microwave for 5-10 seconds will loosen it up.
Assembling and Storing Your Chocolate Macarons
Okay, your chocolate macaron shells are cool, your ganache is perfect – it’s assembly time! Carefully peel your cooled shells off the parchment paper. Now, play matchmaker! Find shells that are roughly the same size. Pipe a dollop (or a nice swirl!) of that luscious chocolate ganache onto the flat side of one shell, then gently top it with its matched partner. Give it a little twist to spread the filling, but don’t squish it too hard!
Once all your chocolate macarons are assembled, the hardest part: patience! Store them in an airtight container in the refrigerator for at least 24 hours before serving. I know, I know, it’s torture! But this “maturation” time allows the filling to soften the shells just slightly, creating that perfect chewy-soft texture that makes macarons so irresistible. Trust me, they taste *so* much better the next day!
Tips for Achieving Flawless Chocolate Macarons
Alright, you’ve got the steps down, but let’s talk about those little insider secrets that turn good chocolate macarons into *flawless* chocolate macarons. These are the things I’ve learned (sometimes the hard way, oops!) that really make a difference. Don’t skip these, my friend!
Secrets to Perfect Chocolate Macarons Every Time
First up, those aged egg whites? They’re not just a suggestion; they’re a *must*. Separating them a day or two in advance and letting them sit at room temperature helps them whip up better and creates a more stable meringue. Trust me on this one!
Next, mastering the macaronage consistency is key. Remember how I said “lava-like ribbon”? That’s exactly what you’re aiming for. It should flow slowly off your spatula and melt back into itself in about 10-15 seconds. Too stiff, and your chocolate macarons will be lumpy; too runny, and they’ll be flat pancakes. It takes a bit of practice, but you’ll get a feel for it!
And don’t underestimate the power of the tray tap! Those firm taps on the counter are crucial for releasing air bubbles that can cause cracked shells. Pop any stubborn ones with a toothpick. Lastly, keep an eye on the weather! Humidity is the macaron baker’s nemesis. On very humid days, the drying time for your chocolate macarons will be longer, sometimes significantly so. If it’s super sticky outside, you might need an extra hour (or even more!) for that skin to form properly. Patience, my dear, patience!
Frequently Asked Questions About Chocolate Macarons
Okay, I get it! Macarons can throw a few curveballs sometimes. Don’t worry, these are super common questions, and I’ve got answers for you. We’ll troubleshoot these little beauties together so you can get back to making perfect chocolate macarons!
Why are my Chocolate Macarons hollow?
Oh, the dreaded hollow macaron! It’s super common, so don’t beat yourself up. Usually, hollow chocolate macarons come from a few culprits. Sometimes it’s overmixing the batter during the macaronage stage – you lose too much air, and the shells can’t rise properly. Other times, it’s underbaking; they look done but the inside hasn’t fully set. Or, it could be an incorrect oven temperature – too high, and they’ll rise too fast and collapse. My advice? Make sure your macaronage is just right (that lava flow!), bake them until they don’t wobble, and definitely use an oven thermometer to ensure your temperature is accurate!
Can I make Chocolate Macarons in advance?
Absolutely, yes! In fact, I highly recommend it. Chocolate macarons actually taste *better* the next day after they’ve had a chance to “mature” in the fridge. The filling softens the shell just a bit, creating that perfect chewy-soft texture. You can store your assembled chocolate macarons in an airtight container in the refrigerator for up to a week. If you want to really plan ahead, you can even freeze them (unfilled shells or filled ones!) for up to a month. Just let them thaw in the fridge before serving!
How do I get consistent “feet” on my Chocolate Macarons?
Ah, the “feet”—the signature of a well-made macaron! Getting those consistent ruffly edges comes down to a few key things. First, proper macaronage is crucial. If your batter is too thick, they won’t spread enough to form feet; too thin, and they’ll be flat. Second, and super important, is sufficient drying time. That skin needs to form so the air pushes out the bottom, creating those feet. Don’t rush this! Finally, an accurate oven temperature is vital. If your oven is too cool, they might not rise enough; too hot, and they can crack. So, get that macaronage right, let them rest, and check your oven temp!
Nutritional Information for Chocolate Macarons
Estimated Nutritional Values for Chocolate Macarons
Just a quick heads-up, sweet friends! The nutritional info for these chocolate macarons is an estimate. It can totally change based on the specific brands you use for your ingredients and how big you pipe your macarons. So, please take these numbers with a grain of salt!
Your Chocolate Macarons Journey Continues
Share Your Chocolate Macarons Creations
So, there you have it, my friend! Your very own delicious chocolate macarons, made with love and a little bit of baking magic. I am *so* excited for you to try this recipe! Now, here’s the fun part: I want to see your creations! Seriously, snap a pic, tag me on social media, leave a comment below, and tell me how it went. Did you get amazing feet? Did your ganache come out perfectly? Your feedback and photos absolutely make my day, and it helps other bakers too. Happy macaron-making!
PrintChocolate Macarons with Ganache Filling
Chocolate macarons are delicate French confections. They feature crispy shells and a rich chocolate ganache filling. These treats are perfect for special occasions or a sweet indulgence.
- Prep Time: 45 minutes
- Cook Time: 15 minutes
- Total Time: 1 hour 45 minutes
- Yield: 20-25 macarons 1x
- Category: Dessert
- Method: Baking
- Cuisine: French
- Diet: Vegetarian
Ingredients
- 100g almond flour
- 100g powdered sugar
- 75g granulated sugar
- 50g egg whites (aged at room temperature)
- 5g cocoa powder (unsweetened)
- Pinch of salt
- For the ganache:
- 100g dark chocolate (finely chopped)
- 100ml heavy cream
- 10g unsalted butter (room temperature)
Instructions
- Sift almond flour, powdered sugar, and cocoa powder together. Discard any large pieces.
- Whip egg whites with a pinch of salt until foamy. Gradually add granulated sugar and continue whipping until stiff, glossy peaks form.
- Gently fold the dry ingredients into the meringue in three additions. Be careful not to deflate the mixture.
- Transfer the batter to a piping bag with a round tip. Pipe 1.5-inch circles onto a baking sheet lined with parchment paper.
- Tap the baking sheet firmly on the counter a few times to release air bubbles. Let the macarons rest at room temperature for 30-60 minutes, or until a skin forms and they are no longer sticky to the touch.
- Preheat oven to 150°C (300°F). Bake for 12-15 minutes, rotating the tray halfway. Macarons are done when they have developed ‘feet’ and do not wobble.
- For the ganache: Heat heavy cream in a saucepan until simmering. Pour over chopped dark chocolate and let sit for 2 minutes. Stir until smooth. Add butter and stir until melted and combined. Let cool and thicken.
- Once macarons are completely cool, match them into pairs. Pipe ganache onto one shell and top with another.
- Store macarons in an airtight container in the refrigerator for at least 24 hours before serving for best flavor and texture.
Notes
- Aged egg whites work best for stable meringue.
- Do not overmix the batter; it should flow like lava.
- Humidity can affect macaron drying time.
- Ensure macarons are fully cooled before filling.
- Macarons taste better the next day.
Nutrition
- Serving Size: 1 macaron
- Calories: 120
- Sugar: 12g
- Sodium: 10mg
- Fat: 8g
- Saturated Fat: 4g
- Unsaturated Fat: 3g
- Trans Fat: 0g
- Carbohydrates: 15g
- Fiber: 1g
- Protein: 2g
- Cholesterol: 15mg


