If you’ve ever needed a dessert that feels fancy but secretly couldn’t be easier, these chocolate mousse cups are about to become your new best friend. I’ve been perfecting this recipe for years—since that time I accidentally brought a runny, sad mousse to a dinner party (we don’t talk about that). Now, this rich, cloud-like chocolate mousse is my go-to for last-minute guests or when I just need a little chocolate therapy.
The magic? Just six simple ingredients transform into something that tastes like it came from a Parisian patisserie. What I love most is how these individual cups make everyone feel special—no messy slicing, and they look gorgeous lined up on a tray. Plus, the mousse actually gets better as it chills, making it the ultimate make-ahead dessert for holidays or dinner parties.
Trust me, once you master folding in those fluffy egg whites (don’t worry, I’ll walk you through it), you’ll be making these chocolate mousse cups on repeat. They’re the kind of dessert that has friends begging for the recipe—not that I’d know from experience or anything…
Why You’ll Love These Chocolate Mousse Cups
This recipe is my dessert MVP for so many reasons—here’s why it’ll become yours too:
- No oven required: Perfect for hot days or when you just can’t deal with baking (we’ve all been there).
- Luxuriously rich: That velvety texture and deep chocolate flavor feel downright indulgent.
- Looks fancy with zero effort: Serve them in pretty glasses or teacups for instant dinner party vibes.
- Pantry-friendly ingredients: You probably have everything except maybe the cream—no specialty store runs needed!
Seriously, it’s the dessert that keeps giving—easy to make, impossible to resist.
Ingredients for Chocolate Mousse Cups
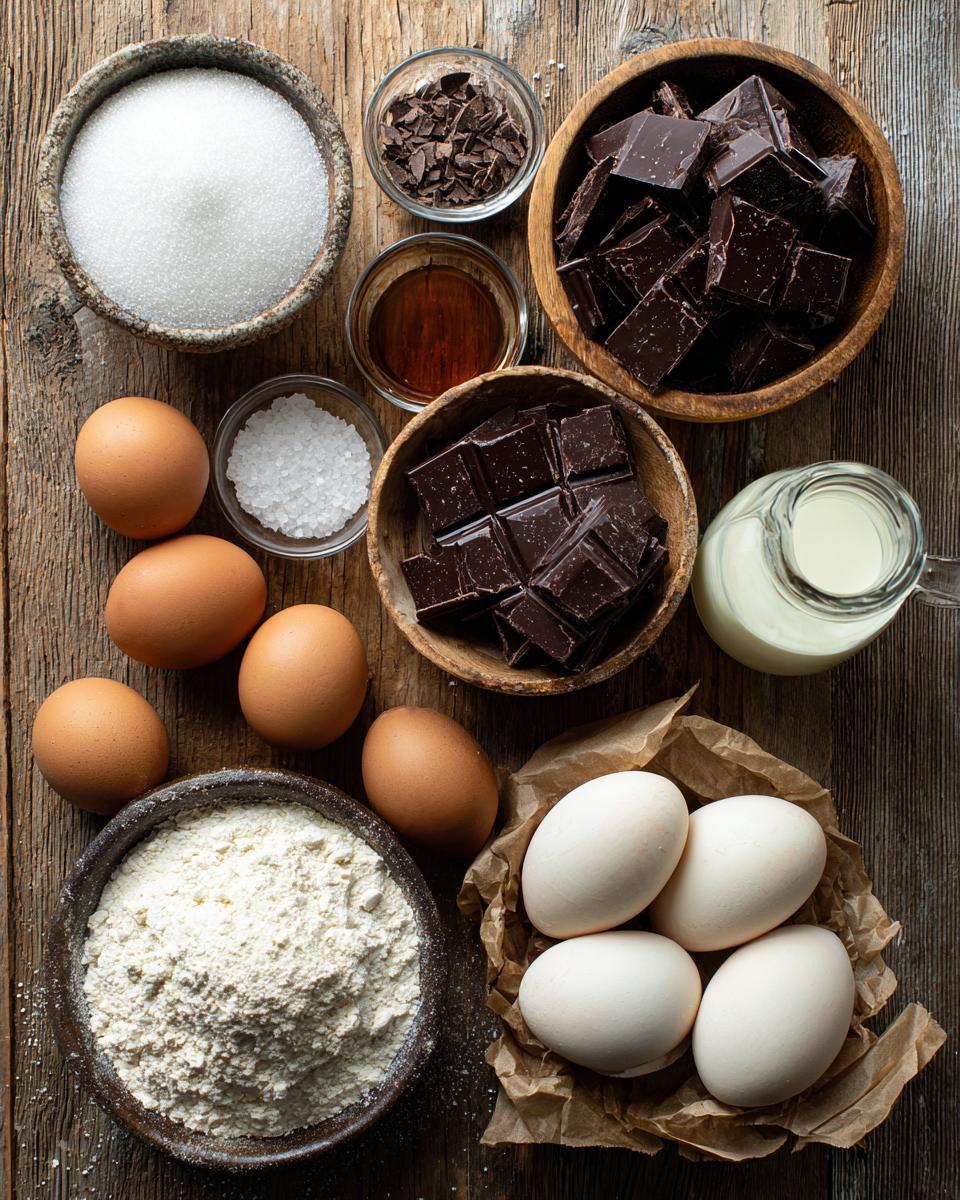
Gather these simple ingredients—quality matters most here:
- 200g dark chocolate (chopped): Use 70% cocoa for the perfect balance of richness. No chips—they don’t melt as smoothly!
- 3 large eggs (separated): Room temperature whites whip up fluffier (trust me on this).
- 50g granulated sugar: Split between yolks and whites for the right sweetness.
- 1 tsp alcohol-free vanilla extract: Or scrape a vanilla bean for extra luxury.
- 200ml heavy whipping cream (min 35% fat): The higher fat content means better peaks.
- Pinch of salt: Just a dash makes the chocolate flavor pop.
That’s it! Six pantry staples for the creamiest mousse you’ll ever taste.
Step-by-Step Chocolate Mousse Cups Instructions
Now for the fun part—let’s turn these simple ingredients into dreamy chocolate clouds! I’ll walk you through each step like I’m right there in your kitchen with you. The key is taking your time (and not stressing if things aren’t perfect—my first attempt looked like chocolate soup).
Melting the Chocolate
First things first: the chocolate. I always use a double boiler (just a heatproof bowl over a pot of simmering water—don’t let the bowl touch the water!). Toss in your chopped chocolate and stir occasionally until it’s about 75% melted, then take it off the heat. Residual heat will finish the job without burning it.
Here’s my trick: let it cool until it’s just warm to the touch (about 5 minutes). Too hot, and you’ll scramble the egg yolks when you mix them in. Learned that the hard way—my poor eggs looked like breakfast!
Whipping Cream and Egg Whites
While the chocolate cools, grab two clean bowls. I mean spotless—any grease ruins egg whites. For the cream, whip it to soft peaks (when the beaters leave trails that slowly disappear). Overdo it, and you’ll get butter—ask me how I know!
Now the egg whites: beat them with a pinch of salt until foamy, then gradually add half the sugar. Keep going until stiff peaks form—when you lift the beaters, the peaks should stand straight up without drooping. This is your mousse’s lift-off!
Combining and Chilling
Time to bring it all together! Whisk the egg yolks with the rest of the sugar until pale, then gently stir into the cooled chocolate. Fold in the whipped cream with a rubber spatula—go slow to keep it airy.
Now the egg whites: add about a third first to loosen the mixture, then fold in the rest gently. Imagine you’re turning the bowl and scooping from the bottom—no vigorous stirring! Pour into cups and chill at least 4 hours (overnight is even better). The wait is torture, but oh, the payoff!
Tips for Perfect Chocolate Mousse Cups
After making these more times than I can count (and yes, a few flops along the way), here are my can’t-skip tips:
- Eggs must be room temp: Cold yolks seize up with chocolate, and whites won’t whip as high. Just leave them out 30 minutes first!
- Fold like you mean it: Gentle figure-eight motions keep the air in—stirring deflates your mousse. Think “soft clouds,” not “cement mixer.”
- Chill thoroughly: I know it’s tempting, but that full 4 hours lets the flavors meld and texture set properly.
- Bonus pro tip: Run your knife under hot water before slicing chocolate—clean cuts every time for garnishes.
Follow these, and you’re golden. Or should I say, chocolate-y?
Ingredient Substitutions
Ran out of something? No worries—here’s how to adapt these chocolate mousse cups with what you’ve got (though the texture might change slightly):
- Heavy cream swap: Coconut cream (chilled overnight) whips up beautifully for a dairy-free version—just skip the watery part at the bottom of the can.
- Sugar alternative Maple syrup or honey work, but reduce other liquids slightly since they add moisture.
- Egg-free option Replace the whites with whipped aquafaba (3 tbsp per egg white)—it won’t be as rich, but still delicious!
My rule? The closer you stick to the original, the more luxurious the mousse—but sometimes improvisation leads to happy accidents!
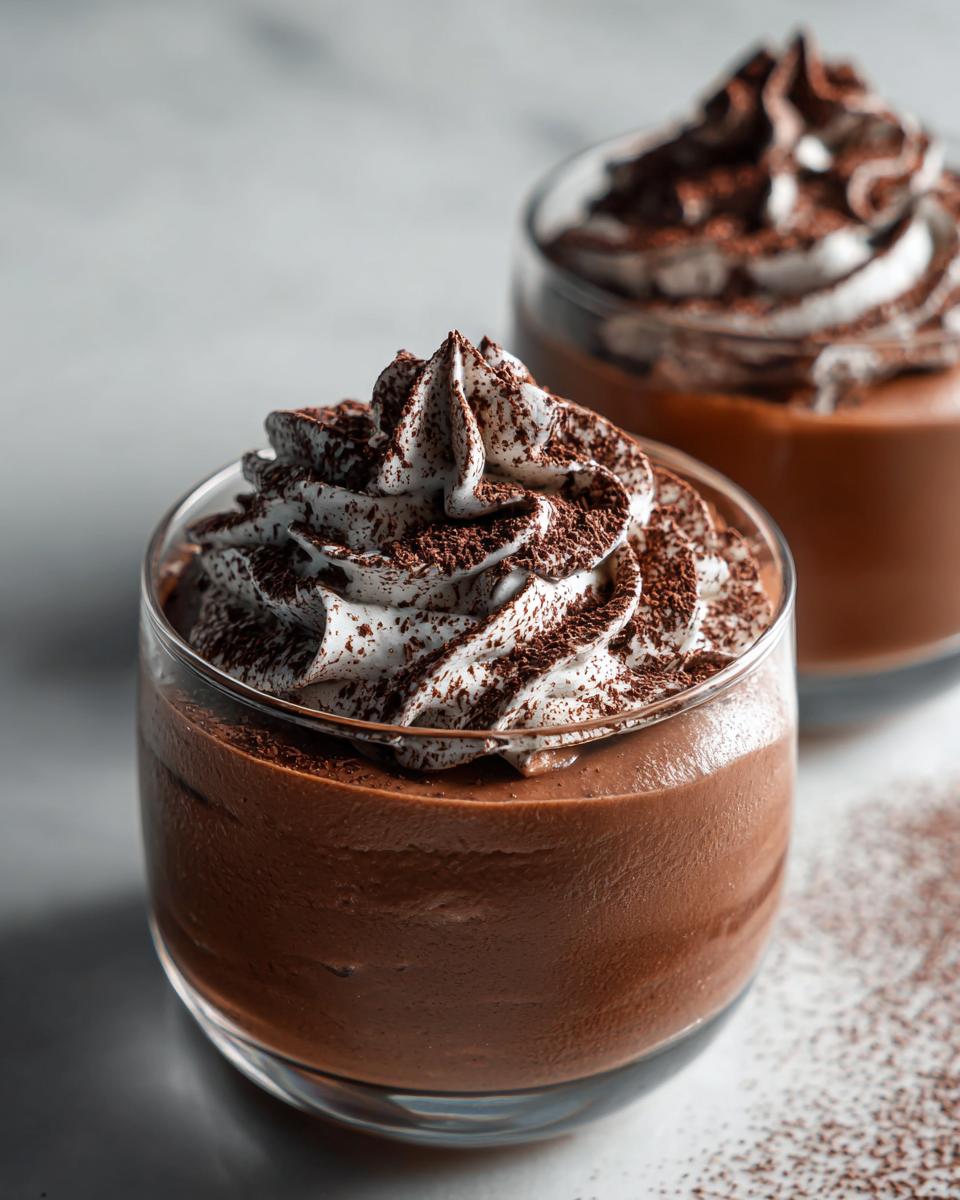
Serving Suggestions for Chocolate Mousse Cups
Oh, the fun part—dressing up these chocolate mousse cups! I love serving them in clear glasses to show off those gorgeous layers. Top each with a few fresh raspberries (that tart pop against the rich chocolate is *chef’s kiss*), or try a sprinkle of sea salt for a fancy touch. Crushed toasted hazelnuts add the perfect crunch, and a sprig of mint makes it look straight from a cafe. For parties, I do mini versions in espresso cups—just right for one perfect bite. Trust me, nobody ever says no to seconds!
Storing Chocolate Mousse Cups
These little cups of joy keep beautifully in the fridge for up to 3 days—just cover them tightly with cling film (press it right against the mousse surface to prevent any skin from forming). Pro tip: If you’re stacking them, put a sheet of parchment between layers so they don’t stick together. And whatever you do, don’t freeze them—trust me, the texture turns grainy and sad. I learned this the hard way after trying to stash some for “emergencies”… let’s just say chocolate soup wasn’t the vibe I was going for!
Chocolate Mousse Cups Nutritional Information
Just so you know what you’re diving into (no judgment—I won’t tell if you eat two!), here’s the scoop on our chocolate mousse cups. Values are estimates; exact nutrition depends on brands you use. Per serving:
- Calories: 320
- Fat: 24g (14g saturated)
- Sugar: 22g
- Protein: 6g
Worth every bite if you ask me—it’s basically chocolate-flavored happiness with a side of antioxidants!
FAQs About Chocolate Mousse Cups
Can I use milk chocolate instead of dark?
Absolutely! Just reduce the sugar by half—milk chocolate is already sweeter. The texture might be slightly softer, but it’ll still be delicious. My kids prefer it this way (and who am I to argue with chocolate experts?).
How far in advance can I make these?
They’re perfect for prepping ahead! The mousse cups actually taste better after chilling overnight—just cover them well. I’ve made them up to 24 hours before serving, and they held up beautifully. The only hard part is resisting sneaking spoonfuls before your guests arrive!
Help! My mousse collapsed—what went wrong?
Oh no! Most likely, the egg whites were overmixed when folded in or the chocolate was too warm. Next time, fold gently (think “hugs, not handshakes”) and let the chocolate cool more. My first batch did this too—we called it “chocolate pudding” and ate it anyway!
Try this recipe and share your results in the comments—I’d love to hear how your chocolate mousse cups turn out!
PrintChocolate Mousse Cups
A rich and creamy chocolate mousse served in individual cups, perfect for a dessert or special occasion.
- Prep Time: 20 minutes
- Cook Time: 10 minutes
- Total Time: 4 hours 30 minutes
- Yield: 4 servings 1x
- Category: Dessert
- Method: No-bake
- Cuisine: French
- Diet: Vegetarian
Ingredients
- 200g dark chocolate (chopped)
- 3 large eggs (separated)
- 50g granulated sugar
- 1 tsp vanilla extract (alcohol-free)
- 200ml heavy cream
- Pinch of salt
Instructions
- Melt the dark chocolate in a heatproof bowl over simmering water. Set aside to cool slightly.
- In a separate bowl, whisk the egg yolks with half the sugar until pale and thick.
- Gently fold the melted chocolate into the egg yolk mixture.
- In another bowl, whip the heavy cream until soft peaks form.
- In a clean bowl, beat the egg whites with a pinch of salt until foamy. Gradually add the remaining sugar and beat until stiff peaks form.
- Fold the whipped cream into the chocolate mixture, then gently fold in the egg whites.
- Spoon the mousse into individual cups and refrigerate for at least 4 hours before serving.
Notes
- Use high-quality dark chocolate for the best flavor.
- Ensure all bowls and utensils are clean and dry when beating egg whites.
- Chill the mousse for at least 4 hours, or overnight for a firmer texture.
Nutrition
- Serving Size: 1 cup
- Calories: 320
- Sugar: 22g
- Sodium: 45mg
- Fat: 24g
- Saturated Fat: 14g
- Unsaturated Fat: 8g
- Trans Fat: 0g
- Carbohydrates: 28g
- Fiber: 3g
- Protein: 6g
- Cholesterol: 120mg


