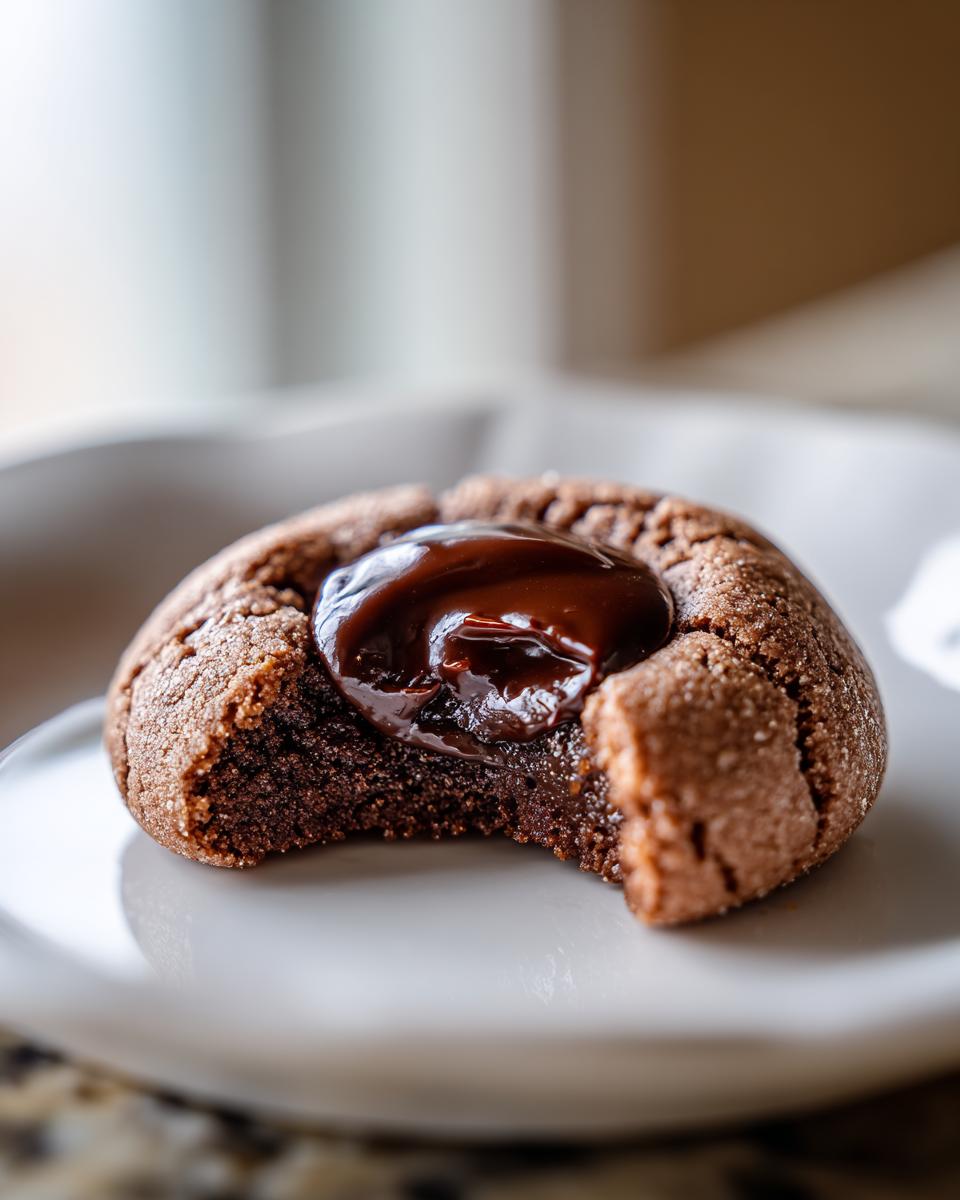
Oh, friend, there’s just something magical about baking, isn’t there? The way the kitchen fills with warmth, the scent of vanilla and chocolate swirling around… it just makes my heart happy! And when it comes to classic cookies, nothing quite hits the spot like a perfectly made Chocolate Thumbprint Cookie. They’re like a little hug in edible form, seriously!
I remember the first time I tried to make these. I was probably way too ambitious, but even with my slightly lopsided cookies, the pure joy of that soft, chewy texture meeting the rich, melty chocolate center was just… *chef’s kiss*! They quickly became my go-to for holiday cookie platters, but honestly, any day that ends with a thumbprint cookie is a good day in my book. Whether you’re looking for that perfect treat to share, or just a little something special for yourself, you’ve come to the right place. Today, I’m going to spill all my secrets for making the absolute best Chocolate Thumbprint Cookies you’ve ever tasted!
Why You’ll Love These Chocolate Thumbprint Cookies
Oh, these aren’t just cookies, my friend, they’re an experience! Every bite is a little piece of heaven. You’ll be absolutely smitten with how simple they are to whip up and how utterly delightful they taste. Trust me, once you try these, they’ll become a permanent fixture in your baking rotation!
The Irresistible Charm of Chocolate Thumbprint Cookies
What makes these little gems so special? It’s that perfect harmony of a tender, buttery cookie base meeting a luscious, rich chocolate filling. It’s a match made in dessert heaven, and here’s why you’ll adore them:
- Soft and Chewy Texture: Imagine sinking your teeth into a cookie that’s perfectly tender, with just the right amount of chew. Pure bliss!
- Rich Chocolate Flavor: We’re talking deep, satisfying chocolate here. Not too sweet, just incredibly decadent.
- Simple to Make: Don’t let their fancy looks fool you! These are surprisingly straightforward, even for a beginner baker.
- Perfect for Any Occasion: From cozy weeknights to festive holiday gatherings, these cookies fit right in.
- Customizable: Want to get creative? There are tons of fun ways to tweak these to make them your own!
Essential Ingredients for Perfect Chocolate Thumbprint Cookies
Alright, my friend, let’s talk ingredients! This is where the magic truly begins. You don’t need anything super fancy, but using good quality ingredients really makes a difference here. Trust me, these humble items come together to create something truly spectacular. Make sure everything is measured precisely – baking is a bit of a science, after all!
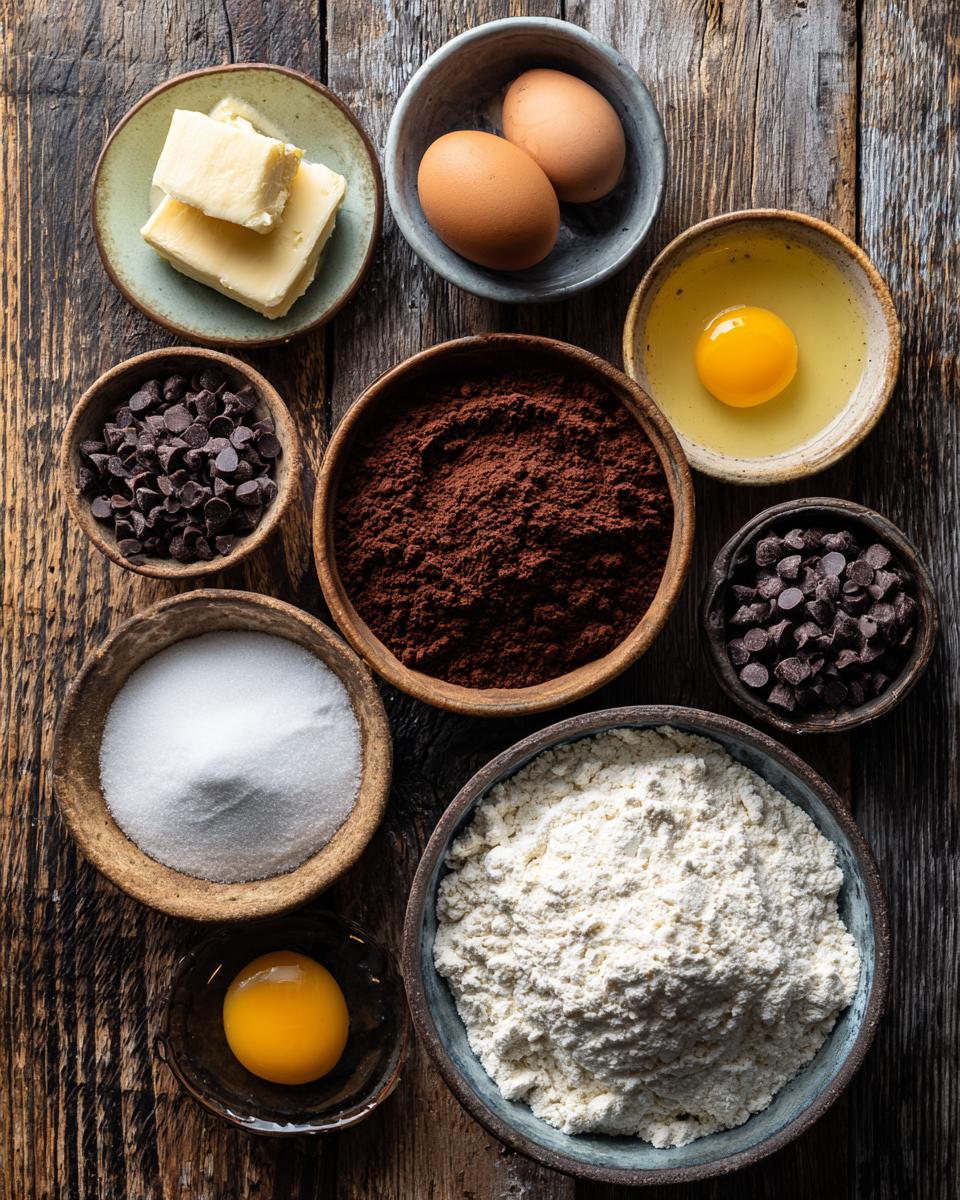
- 1 cup (2 sticks) unsalted butter, softened: This is HUGE! Make sure it’s properly softened, not melted. It should give slightly when you press it.
- 1/2 cup granulated sugar: Just your regular white sugar, for that perfect sweetness.
- 1 large egg yolk: The yolk is key for richness and binding. Save the white for an omelet!
- 2 teaspoons pure vanilla extract: Go for pure vanilla, it makes all the difference in flavor.
- 2 cups all-purpose flour: Standard flour, nothing tricky here.
- 1/4 cup unsweetened cocoa powder: This gives us that lovely deep chocolate cookie base.
- 1/4 teaspoon salt: A little pinch to balance all that sweetness and chocolate.
- 1/2 cup semi-sweet chocolate chips, melted for filling: We’ll melt these down later for that glorious center!
Gather Your Tools for Chocolate Thumbprint Cookies
Before we dive into mixing, let’s get our little baking station ready! Having everything laid out just makes the whole process so much smoother and more enjoyable. You probably have most of these beauties already:
- Baking Sheets: You’ll need a couple so you can bake in batches.
- Parchment Paper: My absolute best friend in baking! No sticking, easy cleanup.
- Large Mixing Bowls: One for wet, one for dry, and a bigger one to bring them together.
- Electric Mixer (Handheld or Stand): Makes creaming butter and sugar a breeze!
- Measuring Cups and Spoons: Precision is our friend!
- Whisk: For blending those dry ingredients perfectly.
- Small Spoon (for indentations): If you don’t want to use your thumb, a little measuring spoon works wonders.
- Wire Cooling Rack: Essential for letting those cookies cool properly and prevent sogginess.
- Microwave-Safe Bowl: For melting our chocolate filling later.
Step-by-Step Guide to Making Chocolate Thumbprint Cookies
Okay, my friend, this is the fun part! We’re about to turn those simple ingredients into something truly delicious. Don’t worry, I’ll walk you through every single step, just like I’m right there in your kitchen with you. Baking these chocolate thumbprint cookies is so rewarding, and you’ll be amazed at how quickly they come together!
First things first, let’s get that oven preheating to 350°F (175°C). And grab those baking sheets and line them with parchment paper – trust me, it makes cleanup a dream and prevents any sticking. Ready? Let’s bake!
Preparing Your Dough for Delicious Chocolate Thumbprint Cookies
This is where we build the foundation for our amazing cookies! In a big bowl, get that softened butter and granulated sugar together. Now, beat them with your electric mixer until they’re light and super fluffy. This creaming step is so important for a tender cookie! Next, pop in that egg yolk and the pure vanilla extract, and beat it until everything is beautifully combined. It should look smooth and creamy, almost like a dream.
In a separate bowl, whisk together your flour, cocoa powder, and salt. Make sure it’s all mixed really well so you don’t get any pockets of un-mixed ingredients. Now, gradually add these dry ingredients into your wet mixture, mixing on low speed until just combined. You want a soft, pliable dough, so be careful not to overmix! Overmixing can make your cookies tough, and we definitely don’t want that.
Forming and Baking Your Chocolate Thumbprint Cookies
Now that we have our beautiful dough, it’s time to shape these little beauties! Roll the dough into 1-inch balls – you can use a small cookie scoop if you want them all perfectly uniform, or just eyeball it like I usually do! Place them onto your prepared baking sheets, leaving a little space between each one.
Here comes the “thumbprint” part! Using your thumb (or the back of a small measuring spoon if you prefer, or even the end of a wooden spoon), gently make an indentation right in the center of each cookie. Don’t go all the way through, just a nice little well for our chocolate filling. Pop those trays into your preheated oven and bake for about 10-12 minutes. You’ll know they’re ready when the edges are just set. As soon as they come out of the oven, quickly re-press those indentations if they’ve puffed up a bit. This ensures we still have a perfect spot for our chocolate!
Filling and Finishing Your Chocolate Thumbprint Cookies
Once your cookies are baked, let them cool on the baking sheets for just a few minutes before you carefully transfer them to a wire rack to cool completely. This part is important – you don’t want to fill them when they’re warm, or your chocolate will just melt all over the place! While they’re cooling, grab your semi-sweet chocolate chips and melt them. You can do this in a microwave-safe bowl in 30-second intervals, stirring in between, or over a double boiler. Once the cookies are totally cool, spoon that lovely melted chocolate into each indentation. Let the chocolate set up completely before you start devouring them. Patience is a virtue, especially when it comes to chocolate!
Tips for Success with Your Chocolate Thumbprint Cookies
Alright, my baking buddy, you’re almost a thumbprint cookie pro! But even the best recipes have little tricks that make them *perfect*. Here are my absolute favorite tips to make sure your chocolate thumbprint cookies turn out amazing every single time:
- Use Room Temperature Butter: Seriously, this isn’t just a suggestion! Softened butter creams beautifully with sugar, incorporating air and giving your cookies that wonderfully tender texture. Cold butter will give you a lumpy mess, and melted butter will make your cookies spread too much.
- Don’t Overmix the Dough: Once you add the flour and cocoa, mix *just* until everything is combined. Overmixing develops the gluten in the flour, and that leads to tough, chewy cookies – not the soft ones we’re aiming for!
- Evenly Sized Cookies: For uniform baking (and pretty presentation!), try using a small cookie scoop or even a tablespoon to portion out your dough balls. This way, they all bake at the same rate.
- Re-indent Immediately: Those little indentations can puff up a bit in the oven. The second those cookies come out, give them a quick, gentle re-press with your thumb or spoon. This ensures a nice, deep well for all that glorious chocolate!
- Let Chocolate Set: I know, it’s hard to wait! But letting the chocolate filling completely set before stacking or serving means no messy smudges. You can even pop them in the fridge for a few minutes to speed this up.
Creative Variations for Your Chocolate Thumbprint Cookies
Now, while the classic chocolate thumbprint cookie is pure perfection, sometimes you just want to get a little wild and creative, right?! That’s the beauty of baking – you can totally make these your own. Here are some super fun ideas for switching things up without losing that amazing thumbprint cookie charm:
- White Chocolate or Milk Chocolate Filling: Don’t feel tied down to semi-sweet! Melt some creamy white chocolate or sweet milk chocolate for a different, equally delicious, twist in the center.
- Espresso Powder: Oh, this is a secret weapon! Add a tiny pinch (about 1/2 teaspoon) of espresso powder to your cookie dough with the dry ingredients. It won’t make your cookies taste like coffee, but it will seriously deepen and enhance that chocolate flavor. Trust me on this one!
- Nutty Topping: While the chocolate is still wet in the center, sprinkle on some finely chopped walnuts, pecans, or even pistachios. It adds a lovely crunch and a whole new layer of flavor.
- Peppermint Extract: For a festive touch, especially around the holidays, add a drop or two of alcohol-free peppermint extract to your melted chocolate filling. It’s like a little minty chocolate dream!
Storing and Reheating Your Chocolate Thumbprint Cookies
Okay, so you’ve made a batch (or three!) of these amazing chocolate thumbprint cookies, and now you want to make sure they stay fresh and delicious for as long as possible. Good news, they store beautifully! Here’s how I keep mine perfect:
- Airtight Container: This is your best friend for cookie storage! Pop your cooled cookies into an airtight container. This keeps them from drying out and getting stale.
- Room Temperature: For up to 5 days, these cookies are perfectly happy hanging out on your counter at room temperature. Just keep them sealed up tight!
- Freezing Baked Cookies: Want to make them ahead or save some for later? You absolutely can! Once the chocolate filling is completely set, place your cookies in a single layer on a baking sheet and freeze until solid. Then, transfer them to a freezer-safe bag or container. They’ll keep for up to 2-3 months! Just thaw them at room temperature when you’re ready for a treat.
Frequently Asked Questions About Chocolate Thumbprint Cookies
Got questions about these delightful chocolate thumbprint cookies? Don’t you worry, I’ve got answers! Baking can sometimes throw us curveballs, but with a little know-how, we can tackle anything. Here are some common questions I hear about making these tasty treats, along with my best advice:
Why are my Chocolate Thumbprint Cookies spreading too much?
Ah, the dreaded spread! This usually happens for a few reasons. Your butter might have been too soft, almost melted, which makes the dough too loose. Or, you might have overmixed the dough, developing too much gluten. Make sure your butter is just softened (press it, and it should indent slightly) and mix the dough only until combined. Chilling the dough for 15-20 minutes before rolling can also help prevent spreading!
Can I make the dough for Chocolate Thumbprint Cookies ahead of time?
Absolutely, you clever baker, you! You can totally make the dough for your chocolate thumbprint cookies ahead of time. Just wrap the dough tightly in plastic wrap and pop it in the fridge for up to 2-3 days. When you’re ready to bake, let it sit out at room temperature for about 15-20 minutes to soften slightly, then roll and bake as usual. You can even freeze the dough for up to a month!
What can I use if I don’t have a thumb for the indentation?
No problem at all! While the “thumbprint” is classic, you definitely don’t have to use your actual thumb. I often grab the back of a small measuring spoon – a 1/2 teaspoon or 1 teaspoon works perfectly! You could also use the end of a wooden spoon or even a clean, round bottle cap. Just make sure whatever you use creates a nice, deep well for that yummy chocolate filling!
Estimated Nutritional Information for Chocolate Thumbprint Cookies
Okay, for those of you who like to keep an eye on what you’re eating (and no judgment here, we all do!), I’ve got some estimated nutritional info for these chocolate thumbprint cookies. Remember, these are just estimates, and they can totally change depending on the exact brands you use and how big you make your cookies. But it gives you a good idea!
- Serving Size: 1 cookie
- Calories: 150
- Sugar: 10g
- Sodium: 30mg
- Fat: 8g
- Saturated Fat: 5g
- Unsaturated Fat: 3g
- Trans Fat: 0g
- Carbohydrates: 18g
- Fiber: 1g
- Protein: 2g
- Cholesterol: 25mg
Share Your Chocolate Thumbprint Cookie Creations
Alright, my amazing bakers, you’ve done it! You’ve whipped up a batch (or two!) of these incredible chocolate thumbprint cookies, and now it’s time to show them off! I absolutely *adore* seeing your creations. So, please, don’t be shy! Leave a comment below and tell me how they turned out, what variations you tried, or any little tips you discovered along the way. And if you snap a photo, share it on social media and tag me! I can’t wait to celebrate your baking triumphs with you!
PrintChocolate Thumbprint Cookies

These classic chocolate thumbprint cookies are soft and chewy, with a rich chocolate center. They are perfect for holiday baking or any time you crave a sweet treat.
- Prep Time: 20 minutes
- Cook Time: 12 minutes
- Total Time: 32 minutes
- Yield: 24 cookies 1x
- Category: Dessert
- Method: Baking
- Cuisine: American
- Diet: Vegetarian
Ingredients
- 1 cup (2 sticks) unsalted butter, softened
- 1/2 cup granulated sugar
- 1 large egg yolk
- 2 teaspoons pure vanilla extract
- 2 cups all-purpose flour
- 1/4 cup unsweetened cocoa powder
- 1/4 teaspoon salt
- 1/2 cup semi-sweet chocolate chips, melted for filling
Instructions
- Preheat your oven to 350°F (175°C). Line baking sheets with parchment paper.
- In a large bowl, cream together the softened butter and granulated sugar until light and fluffy.
- Beat in the egg yolk and vanilla extract until well combined.
- In a separate bowl, whisk together the flour, cocoa powder, and salt.
- Gradually add the dry ingredients to the wet ingredients, mixing until just combined and a soft dough forms.
- Roll the dough into 1-inch balls and place them on the prepared baking sheets.
- Using your thumb or the back of a small spoon, make an indentation in the center of each cookie.
- Bake for 10-12 minutes, or until the edges are set.
- Remove from the oven and immediately re-press the indentations if they have puffed up.
- Let the cookies cool on the baking sheets for a few minutes before transferring them to a wire rack to cool completely.
- Once fully cooled, fill the indentations with melted chocolate chips.
- Allow the chocolate to set before serving.
Notes
- For extra flavor, add a pinch of espresso powder to the cookie dough.
- You can use white chocolate or milk chocolate for the filling instead of semi-sweet.
- Store these cookies in an airtight container at room temperature for up to 5 days.
Nutrition
- Serving Size: 1 cookie
- Calories: 150
- Sugar: 10g
- Sodium: 30mg
- Fat: 8g
- Saturated Fat: 5g
- Unsaturated Fat: 3g
- Trans Fat: 0g
- Carbohydrates: 18g
- Fiber: 1g
- Protein: 2g
- Cholesterol: 25mg


