Oh my goodness, let me tell you, there’s nothing quite like whipping up a dish that tastes like it took hours but actually comes together in a flash, right? That’s exactly how I feel about this amazing Kung Pao Shrimp recipe. It’s seriously one of my absolute favorites for those busy weeknights when I’m craving something super flavorful but just don’t have a ton of time. We’re talking succulent shrimp, that perfect balance of sweet and savory with just a little kick of spice, and those delightful crunchy peanuts!
I’ve been tinkering with East Asian-inspired recipes for years, trying to get that restaurant-quality taste right in my own kitchen, and this one? This one is a winner, trust me. It hits all the right notes – that umami depth, a hint of ginger, and that gorgeous glossy sauce that coats everything beautifully. If you’re looking for a quick dinner that doesn’t skimp on flavor and will totally impress your family (or just yourself!), then you’ve come to the right place. I’m going to walk you through exactly how to make the best Kung Pao Shrimp you’ve ever had, super easy, super delicious!
Why You’ll Love This Kung Pao Shrimp Recipe
Okay, so why should *this* be your go-to Kung Pao Shrimp recipe? Honestly, it’s a total game-changer for busy folks who still want amazing food. You get all that incredible restaurant flavor without all the fuss. It’s fast, it’s easy, and it tastes absolutely divine! Trust me, once you try this, you’ll be making it again and again.
The Irresistible Appeal of Kung Pao Shrimp
What’s not to love? You’ve got those perfectly cooked, juicy shrimp, coated in a sauce that’s just the right blend of sweet, savory, and a little bit spicy. Then there’s the crunch from the peanuts – oh my goodness, that texture contrast is everything! Every bite is an explosion of flavor and a party in your mouth. It truly is a dish that satisfies all your cravings.
Quick and Easy Kung Pao Shrimp for Weeknights
This recipe is a lifesaver when you’re short on time but still want a homemade meal that feels special. We’re talking minimal prep and cook time, seriously! You can have this delicious Kung Pao Shrimp on the table faster than you can order takeout. It’s perfect for those crazy weeknights when you need something quick but refuse to compromise on taste. Easy peasy, lemon squeezy!
Essential Ingredients for Kung Pao Shrimp
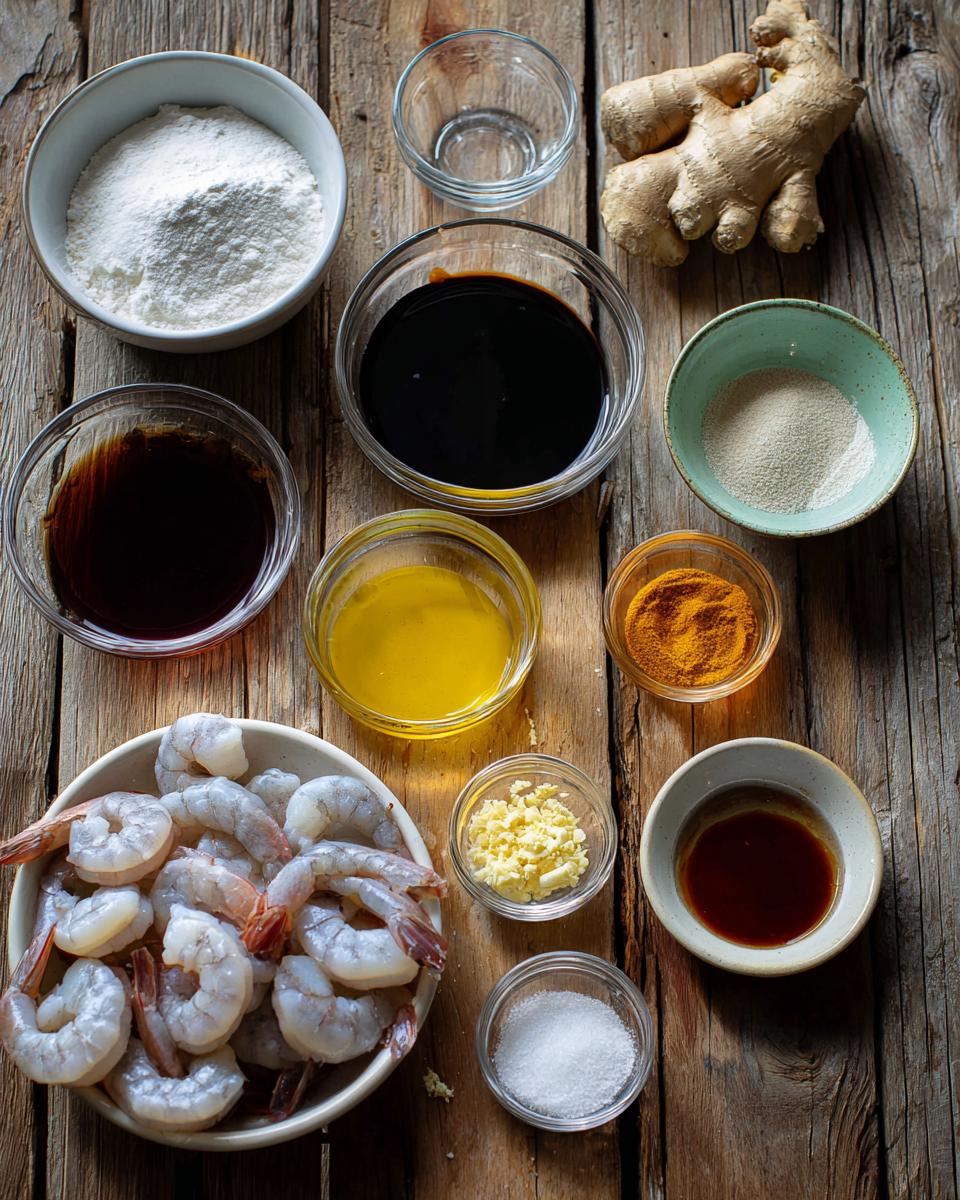
Alright, let’s talk ingredients! Crafting the perfect Kung Pao Shrimp starts with having the right stuff, and knowing *why* each one matters makes all the difference. We’re not just throwing things in a pan here; each ingredient plays a crucial role in building that amazing flavor profile we’re after. Don’t worry, it’s all pretty straightforward stuff you can find at any grocery store!
Preparing Your Kung Pao Shrimp Ingredients
First up, the star of the show: your shrimp! You’ll want about a pound of large shrimp, already peeled and deveined. If they’re not, no worries, it’s super easy to do yourself – just a quick slit down the back and pull out that little dark vein. Then, we’re giving them a light coating of cornstarch; this is our secret weapon for giving them a lovely, slightly crisp exterior and helping the sauce cling beautifully. For the aromatics, you’ll need fresh ginger, grated to really release its zesty, warm flavor, and a couple of cloves of garlic, finely minced. And don’t forget those vibrant green onions, sliced and ready to add a fresh, mild oniony bite at the end!
Crafting the Perfect Kung Pao Shrimp Sauce
Now for the magic potion – the sauce! This is where all the sweet, savory, and tangy notes come together. We’ll start with rice wine vinegar for that essential tang, balanced by soy sauce for savory depth. Hoisin sauce adds a fantastic richness and a touch of sweetness, while a drizzle of honey boosts that sweetness and gives the sauce a lovely glaze. A tiny bit of sesame oil brings in that unmistakable nutty aroma, and then, of course, our grated ginger and minced garlic add incredible warmth and zing. We’ll also have some chicken broth on hand to help thin the sauce and keep everything juicy, and if you like a little heat (which I definitely do!), a pinch of red pepper flakes is a must!
How to Make Kung Pao Shrimp: Step-by-Step Instructions
Alright, let’s get cooking! Don’t be intimidated, this Kung Pao Shrimp comes together faster than you think. I’m going to walk you through each step, just like I would if we were cooking side-by-side in my kitchen. The key is having everything prepped and ready to go before you even turn on the stove – that’s the secret to any good stir-fry, trust me!
Preparing the Shrimp for Kung Pao Shrimp
First things first, grab those beautiful peeled and deveined shrimp. We’re going to give them a little cornstarch hug! In a medium bowl, just toss the shrimp with about 1 tablespoon of cornstarch. Make sure each shrimp gets a nice, even coating. This cornstarch isn’t just for show; it’s going to give our shrimp a lovely, slightly crispy texture when it cooks, and it helps the sauce stick to them later. Set these aside while we get the sauce ready.
Cooking the Kung Pao Shrimp and Building the Sauce
Now, let’s get saucy! In a *separate* small bowl, whisk together your rice wine vinegar, soy sauce, hoisin sauce, honey, that delicious sesame oil, and your grated ginger and minced garlic. Give it a good whisk until everything is nicely combined and set that aside too. This is your flavor powerhouse! Next, heat up 2 tablespoons of vegetable oil in a large skillet or wok over medium-high heat. Once it’s shimmering, add your cornstarch-coated shrimp in a single layer. Don’t overcrowd the pan, or they’ll steam instead of sear! Cook them for just 2-3 minutes per side, or until they’re pink and opaque. They cook super fast, so keep an eye on them! Once they’re done, scoop them out and set them aside on a plate.
Now for the sauce magic! Into that same skillet (don’t clean it, those browned bits are flavor!), pour in your 1/2 cup of chicken broth and, if you’re using them, those red pepper flakes for a little kick. Let it come to a simmer, and use a spoon or spatula to scrape up all those delicious browned bits from the bottom of the pan – that’s called deglazing, and it adds so much depth! Once it’s simmering, pour in your whisked sauce mixture. Stir it constantly for about 1-2 minutes. You’ll see it start to thicken up beautifully. That’s the cornstarch from the shrimp doing its job, making a gorgeous, glossy sauce!
Finishing Your Delicious Kung Pao Shrimp
Almost there! Return your cooked shrimp to the skillet with the now thick and luscious sauce. Add in your roasted peanuts – oh, that crunch is going to be amazing! – and your sliced green onions. Toss everything together gently, making sure every piece of shrimp and every peanut is coated in that incredible sauce. Just heat it through for another minute or so, until everything is warm and perfectly combined. You don’t want to overcook the shrimp here, remember! Serve it up immediately over fluffy rice or your favorite noodles, and get ready to dive into some seriously delicious Kung Pao Shrimp!
Tips for Perfect Kung Pao Shrimp
Okay, so you’ve got the basic steps down, but if you want your Kung Pao Shrimp to go from “good” to “OH MY GOSH, AMAZING!”, I’ve got a few extra tips up my sleeve. These little tricks are what make all the difference, trust me. It’s all about nailing those textures and getting the flavor just right for *you*!
Achieving the Best Texture for Your Kung Pao Shrimp
The number one rule for succulent shrimp? Don’t overcook them! They cook super fast, usually just 2-3 minutes per side until they turn pink and opaque. As soon as they hit that point, get them out of the pan. Overcooked shrimp are rubbery, and nobody wants that! Also, that cornstarch coating on the shrimp and in the sauce is your friend. Make sure the sauce simmers long enough to thicken, but don’t let it get *too* thick; it should be glossy and coat a spoon, not gluey. If it gets too thick, a tiny splash of broth or water can save it!
Customizing the Spice Level of Your Kung Pao Shrimp
This is where you get to be the boss of your own dinner! The recipe calls for 1/4 teaspoon of red pepper flakes, which gives it a nice, subtle warmth. But if you’re like me and love a bit of a kick, feel free to add more! Start with 1/2 teaspoon, then taste and add another pinch if you dare! If you’re cooking for little ones or those who prefer things mild, you can totally skip the red pepper flakes altogether. The dish will still be incredibly flavorful without the heat. It’s all about making it perfect for your palate!
Serving Suggestions for Kung Pao Shrimp
Now that you’ve got this incredible Kung Pao Shrimp, what do you serve it with? My absolute favorite is a big bowl of fluffy white rice – it’s perfect for soaking up all that amazing sauce! But honestly, this dish is super versatile. If you’re looking for something different, try it with some perfectly cooked noodles, like lo mein or even thin spaghetti. And for a little extra freshness, a simple side salad with a light vinaigrette or some steamed broccoli always hits the spot!
Storing and Reheating Your Kung Pao Shrimp
If you happen to have any glorious leftovers (which rarely happens in my house!), you can store your Kung Pao Shrimp in an airtight container in the refrigerator for up to 3 days. When you’re ready to enjoy it again, reheat it gently in a skillet over medium-low heat with a tiny splash of water or broth to loosen the sauce. You can also microwave it, but the stovetop really helps keep those shrimp tender!
Frequently Asked Questions About Kung Pao Shrimp
Got questions about making your perfect Kung Pao Shrimp? Don’t worry, I’ve got answers! It’s totally normal to wonder about substitutions or how to tweak things to your liking. Here are a few common questions I get asked about this delicious dish:
Can I substitute other proteins in my Kung Pao Shrimp recipe?
Absolutely! While Kung Pao Shrimp is a classic, this sauce is so versatile. You can totally swap out the shrimp for other proteins if you prefer. Diced chicken breast or thigh works wonderfully for Kung Pao Chicken, just make sure to cook it through. If you’re looking for a plant-based option, pressed and cubed tofu is fantastic! Just pan-fry the tofu until golden and crispy before adding it to the sauce. It’ll absorb all those amazing flavors beautifully!
What if I don’t have rice wine vinegar for Kung Pao Shrimp?
Oh, that happens to all of us! If you’re out of rice wine vinegar for your Kung Pao Shrimp, don’t fret. You can use apple cider vinegar as a pretty good substitute; it has a similar tang, though it might be slightly stronger, so start with a little less and taste. White wine vinegar or even a squeeze of fresh lemon juice can also work in a pinch to provide that essential acidic balance to the sauce.
How can I make my Kung Pao Shrimp spicier?
If you’re a heat-seeker like me and want to kick your Kung Pao Shrimp up a notch, there are a few ways! Beyond just adding more red pepper flakes to the sauce (which is always a good start!), you can also throw in a few dried chili peppers (like arbol chilies) directly into the oil when you’re cooking the shrimp. Just be careful not to burn them! A dash of chili oil at the very end when serving also adds a fantastic, fiery finish and a lovely color.
Estimated Nutritional Information for Kung Pao Shrimp
Just so you know, here’s a general idea of the nutritional breakdown for one serving of this delicious Kung Pao Shrimp. Remember, these are estimates and can vary based on exact ingredients and portion sizes, but it gives you a good ballpark!
Share Your Kung Pao Shrimp Experience
I absolutely can’t wait to hear how your Kung Pao Shrimp turns out! Please leave a comment below and let me know your thoughts, or even better, snap a pic and share your delicious creation on social media. Don’t forget to tag me!
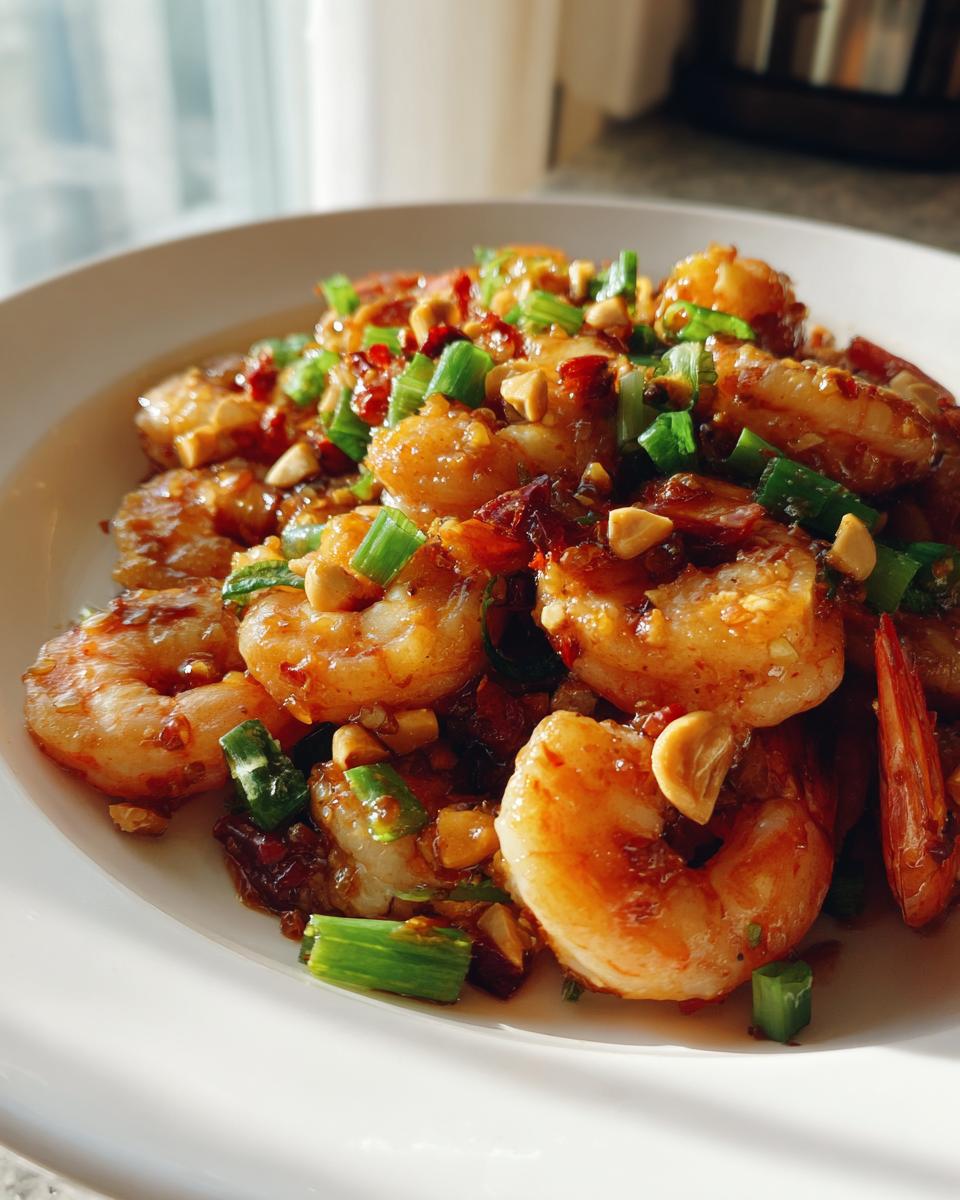
PrintKung Pao Shrimp for Weeknights

This Kung Pao Shrimp recipe delivers a flavorful and satisfying meal with succulent shrimp, crunchy peanuts, and a sweet and savory sauce. It is quick to prepare and perfect for a weeknight dinner.
- Prep Time: 15 minutes
- Cook Time: 10 minutes
- Total Time: 25 minutes
- Yield: 4 servings 1x
- Category: Main Course
- Method: Stir-fry
- Cuisine: Chinese
- Diet: Low Calorie
Ingredients
- 1 pound large shrimp, peeled and deveined
- 1 tablespoon cornstarch
- 1 tablespoon rice wine vinegar
- 1 tablespoon soy sauce
- 1 tablespoon hoisin sauce
- 1 tablespoon honey
- 1 teaspoon sesame oil
- 1 teaspoon ginger, grated
- 2 cloves garlic, minced
- 1/2 cup roasted peanuts
- 1/4 cup green onions, sliced
- 2 tablespoons vegetable oil
- 1/2 cup chicken broth
- 1/4 teaspoon red pepper flakes (optional)
Instructions
- In a medium bowl, toss the shrimp with cornstarch until evenly coated.
- In a small bowl, whisk together the rice wine vinegar, soy sauce, hoisin sauce, honey, sesame oil, ginger, and garlic. Set aside.
- Heat vegetable oil in a large skillet or wok over medium-high heat. Add the shrimp and cook for 2-3 minutes per side, or until pink and cooked through. Remove shrimp from the skillet and set aside.
- Add the chicken broth and red pepper flakes (if using) to the skillet. Bring to a simmer, scraping up any browned bits from the bottom of the pan.
- Stir in the reserved sauce mixture and cook for 1-2 minutes, until thickened.
- Return the shrimp to the skillet. Add the peanuts and green onions. Toss to combine and heat through.
- Serve immediately over rice or noodles.
Notes
- Adjust red pepper flakes to your preferred spice level.
- For extra vegetables, add bell peppers or broccoli florets during the sauce simmering step.
- Ensure peanuts are unsalted if you are monitoring sodium intake.
Nutrition
- Serving Size: 1 serving
- Calories: 350
- Sugar: 12g
- Sodium: 700mg
- Fat: 15g
- Saturated Fat: 2g
- Unsaturated Fat: 10g
- Trans Fat: 0g
- Carbohydrates: 25g
- Fiber: 3g
- Protein: 30g
- Cholesterol: 200mg


