There’s something magical about the smell of warm spices and pumpkin wafting through the kitchen when autumn rolls around. These Old Fashioned Pumpkin Bars have been my go-to fall treat since I was a kid – my mom would always make them for our Halloween parties and Thanksgiving potlucks. That first bite of spiced pumpkin cake with creamy frosting still takes me right back to those crisp October afternoons, watching leaves fall outside while sneaking bites of batter from the mixing bowl. Simple, comforting, and packed with seasonal flavor, this recipe proves some classics never go out of style.
Why You’ll Love These Old Fashioned Pumpkin Bars
Listen, I’m not exaggerating when I say these pumpkin bars disappear faster than Halloween candy! Here’s why they’re absolutely irresistible:
- Moist like grandma’s secret recipe – that perfect balance between cakey and dense that makes you want seconds (or thirds)
- Warm spices that hug your tastebuds – cinnamon, nutmeg and cloves singing together like autumn’s greatest hits
- Easiest dessert you’ll make all season – one bowl, no fancy techniques, just dump and bake goodness
- The ultimate crowd-pleaser – works for book club, Thanksgiving dessert tables, or your 3pm snack attack
Trust me, after one bite, you’ll understand why this recipe has stuck around for generations!
Ingredients for Old Fashioned Pumpkin Bars
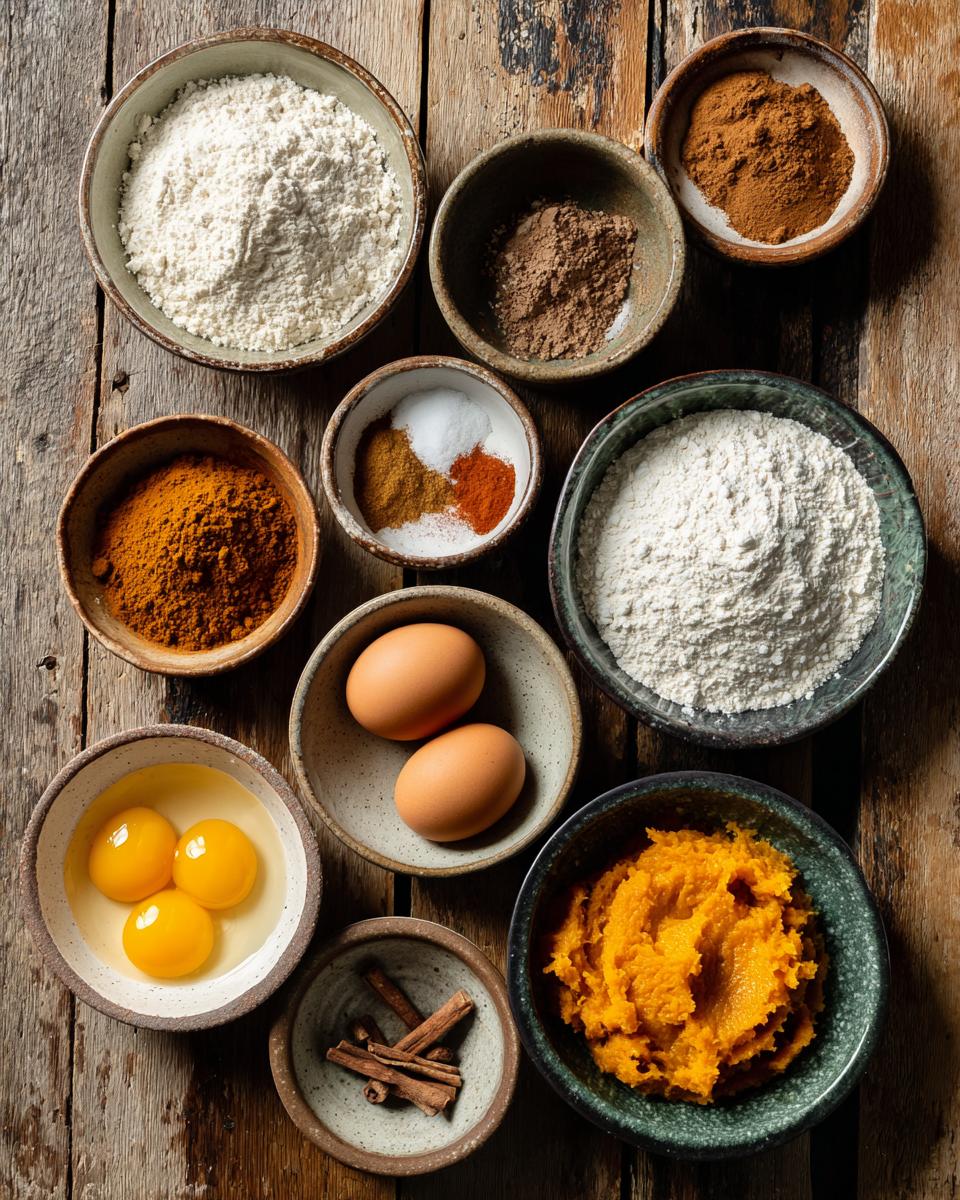
Okay, let’s talk ingredients – and I mean the good stuff! The magic of these pumpkin bars comes from simple, honest ingredients that work together like your favorite fall sweater and jeans. I’ll walk you through everything you’ll need, sorted so you can grab and go. Pro tip: measure everything before you start – it makes baking so much easier when you’re not scrambling mid-recipe!
Dry Ingredients
- 1 cup all-purpose flour (spooned and leveled – don’t pack it down!)
- 1 teaspoon baking powder (make sure yours is fresh – it should fizz when you test it with water)
- 1/2 teaspoon baking soda (the secret to that perfect rise)
- 1 teaspoon ground cinnamon (the more fragrant, the better)
- 1/2 teaspoon ground nutmeg (freshly grated if you’re feeling fancy)
- 1/4 teaspoon ground cloves (just enough to give it that special something)
- 1/4 teaspoon salt (balances all those sweet flavors beautifully)
Wet Ingredients
- 2 large eggs (room temperature – they mix in so much better this way)
- 1 cup granulated sugar (yes, the full cup – we’re making dessert here!)
- 1 cup pumpkin puree (not pie filling – see my note below!)
- 1/2 cup vegetable oil (or melted coconut oil if you’re feeling adventurous)
- 1 teaspoon pure vanilla extract (the real stuff makes all the difference)
Now, about that pumpkin puree – this is crucial. You want 100% pure pumpkin, not the pre-spiced “pumpkin pie filling.” Libby’s is my go-to brand, but any pure puree will work. And if you’re using homemade puree, make sure it’s thick like the canned stuff – too watery and your bars won’t set right. Oh, and don’t even get me started on people who try to substitute applesauce – we’re making pumpkin bars here, people!
Equipment You’ll Need
Grab these basics – you probably already have most in your kitchen:
- 9×13-inch baking pan (my trusty metal one works perfectly)
- 2 mixing bowls (one for dry, one for wet ingredients)
- Whisk and spatula (the dynamic duo of baking)
- Measuring cups and spoons (no eyeballing the spices!)
That’s it – no fancy gadgets required for these pumpkin bars!
How to Make Old Fashioned Pumpkin Bars
Alright, let’s get baking! These pumpkin bars couldn’t be simpler to make – I’ve been doing it since I was tall enough to reach the counter. Just follow these easy steps, and you’ll have a pan of autumn-spiced goodness in no time.
Preparing the Batter
First things first – preheat that oven to 350°F (175°C). While it’s heating up, let’s mix our ingredients. Here’s my golden rule: always combine dry ingredients first. Grab your biggest mixing bowl and whisk together the flour, baking powder, baking soda, cinnamon, nutmeg, cloves, and salt. Get those spices evenly distributed – you don’t want any clumps!
Now for the wet ingredients. In another bowl, beat the eggs lightly before adding the sugar, pumpkin puree, oil, and vanilla. Mix until everything is smooth and gorgeous – it’ll look like a pumpkin-colored dream. Here’s where I always sneak a taste (don’t tell anyone!).
Gently fold the dry ingredients into the wet mixture. And when I say gently, I mean it! Overmixing is the enemy of tender pumpkin bars. Just stir until you don’t see any flour streaks – a few lumps are totally fine.
Baking and Cooling
Pour that beautiful orange batter into your greased 9×13-inch pan. Use a spatula to spread it evenly – we want every bite to be perfect. Pop it in the oven and set your timer for 25 minutes.
Now, here’s a trick my mom taught me: start checking at 25 minutes with a toothpick. If it comes out clean (or with just a couple moist crumbs), you’re golden! If not, give it another 2-3 minutes. Mine usually take about 28 minutes total.
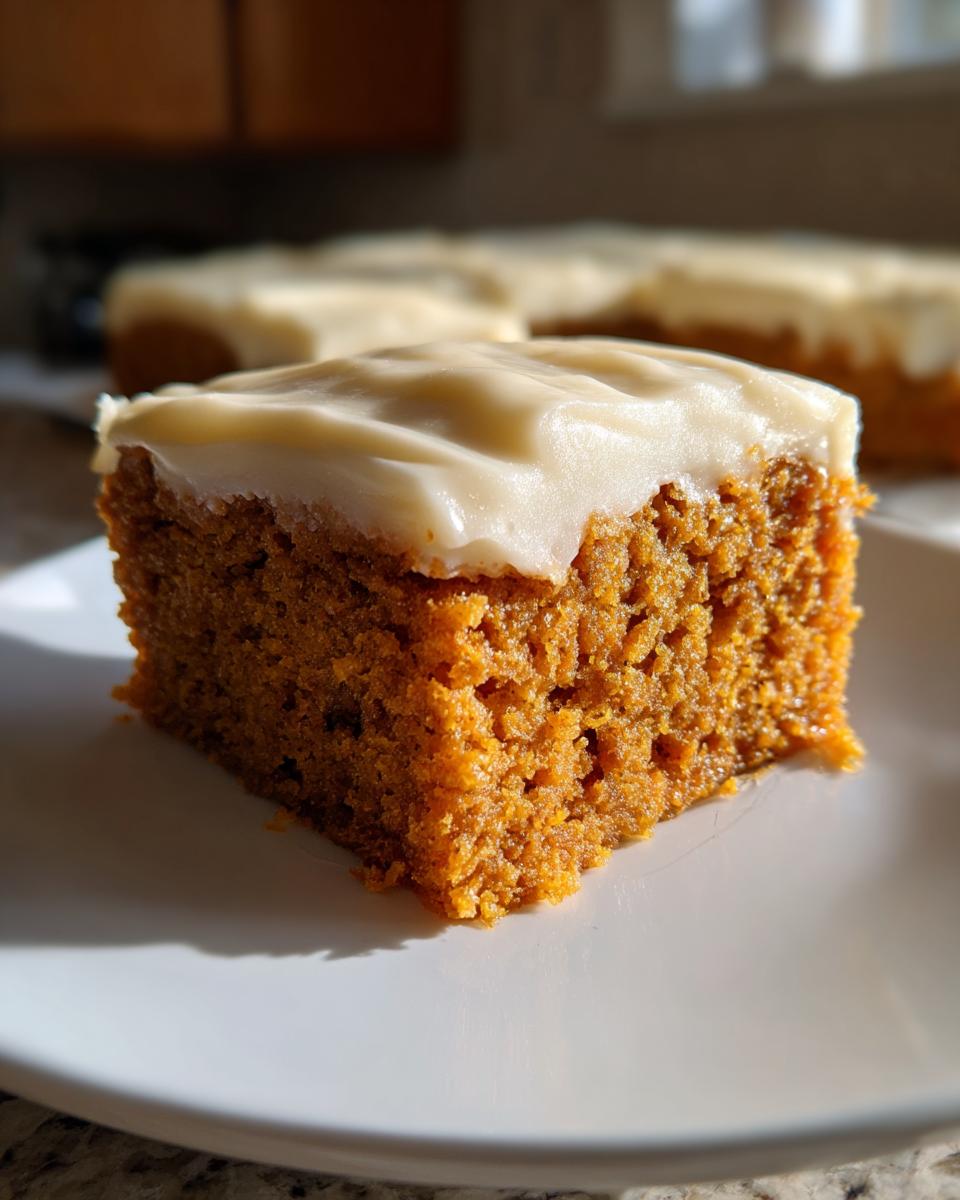
Once baked, let the pan cool completely on a wire rack. I know, I know – waiting is the hardest part! But trust me, frosting warm bars leads to melty disaster. The anticipation makes that first frosted bite even more magical.
Cream Cheese Frosting for Old Fashioned Pumpkin Bars
Oh honey, the cream cheese frosting is what takes these pumpkin bars from good to “I need the whole pan!” My simple version uses just 4 ingredients: cream cheese, butter, powdered sugar, and vanilla. Beat them together until fluffy – about 2 minutes does the trick. Want to get fancy? Stir in a pinch of cinnamon or top with toasted pecans for crunch. The tangy sweetness cuts through those warm spices perfectly. Pro tip: make sure your bars are completely cool before frosting – otherwise you’ll have pumpkin bar soup (been there, done that)!
Tips for Perfect Old Fashioned Pumpkin Bars
Okay, let me share my hard-earned secrets for pumpkin bar perfection! I’ve made every mistake possible so you don’t have to – from hockey puck bars to soupy frosting disasters. These little tricks make all the difference between “good” and “can I have the recipe?”
First up: room temperature eggs are non-negotiable. I know it’s tempting to use them straight from the fridge, but cold eggs don’t incorporate as well and can make your batter look curdled. Just set them out about 30 minutes before you start baking – or if you’re impatient like me, place them in a bowl of warm water for 5 minutes. You’ll notice the difference immediately!
Now let’s talk flour measurement – this is where most people go wrong. Always spoon your flour into the measuring cup and level it off. Don’t dunk the measuring cup directly into the flour bag – that packs it down and you’ll end up with almost 25% more flour than you need! Dense, dry pumpkin bars are the sad result. I keep a small scoop in my flour container just for this purpose.
Here’s my favorite pro tip: start testing for doneness a few minutes early. Ovens vary so much, and pumpkin bars go from perfectly moist to overbaked quickly. At 25 minutes, do the toothpick test, but also check if the edges are pulling away from the pan slightly. The center should spring back when you gently press it. Remember – they’ll continue cooking a bit as they cool!
For storage, these bars must be refrigerated in an airtight container because of the cream cheese frosting. They’ll stay fresh for about 5 days this way. I sometimes place parchment between layers if I’m stacking them. And here’s a bonus tip: they actually taste even better on day two when the flavors have really melded together!
Variations of Old Fashioned Pumpkin Bars
Listen, I love the classic version of these pumpkin bars more than I love cozy sweaters in October – but sometimes it’s fun to mix things up! Here are my favorite twists that still honor the spirit of the original recipe. The best part? Most just require tossing in an extra ingredient or two.
Chocolate Chip Pumpkin Bars
Oh wow, if you haven’t tried adding chocolate chips to your pumpkin bars, you’re missing out! Fold in 3/4 cup semi-sweet chocolate chips right at the end of mixing. The melty chocolate pockets against the spiced pumpkin are absolute magic. My kids go crazy for this version – and honestly, so do I! Mini chips work great too if you want more even distribution.
Pecan Pumpkin Bars
For that perfect autumn crunch, stir 1/2 cup chopped pecans into the batter before baking. I like to toast mine first for extra flavor – just 5 minutes in a 350°F oven does the trick. The nutty crunch takes these bars to another level. Bonus: sprinkle some extra pecans on top of the frosting for presentation points!
Maple Glazed Pumpkin Bars
Sometimes I skip the cream cheese frosting for a simpler maple glaze. Just mix 1 cup powdered sugar with 2 tablespoons maple syrup and 1 tablespoon milk until smooth. Drizzle it over cooled bars and let it set – it’s like fall in every bite! This version travels well for potlucks too.
Want something a bit more decadent? Try swirling the cream cheese frosting with caramel sauce before baking. Or for a breakfast-worthy treat, sprinkle the top with cinnamon sugar instead of frosting. The possibilities are endless – just don’t go too crazy and lose that wonderful pumpkin spice flavor we all love!
Serving Suggestions
Oh, let me tell you about serving these pumpkin bars – because presentation is half the fun! I’ve served them every which way over the years, and here are my absolute favorite ways to enjoy them:
Morning coffee break: Nothing beats a square of pumpkin bar with your first cup of coffee. The spices wake up your tastebuds just right. I like to cut them into smaller rectangles for this – feels more “breakfast appropriate” (though let’s be real, I’d eat the whole pan at any hour).
À la mode: Warm up a bar slightly and top with vanilla bean ice cream – the way the cold ice cream melts into the spiced pumpkin is pure heaven. My husband calls this “autumn sundae” and requests it weekly when the leaves start changing.
Potluck perfect: Cut them into neat little squares and arrange on a pretty platter for gatherings. They travel beautifully and always disappear first at fall parties. Pro tip: bring copies of the recipe – you’ll get asked for it!
Thanksgiving dessert: These make a lovely alternative to pumpkin pie on the holiday table. I sometimes arrange them on a cake stand with fresh cranberries and cinnamon sticks for decoration. Much easier than pie, but just as festive!
With seasonal fruit: Pair slices with apple slices or pear wedges for a lighter dessert. The fresh fruit complements the warm spices beautifully. My mom always served them this way after big holiday meals.
Honestly though? My favorite way is standing in the kitchen with a spatula, eating the corner piece straight from the pan while pretending I’m “just checking if they’re good.” Some traditions never change!
Nutritional Information
Okay, let’s talk numbers – but don’t let this scare you away from enjoying every delicious bite! Remember, these values are just estimates and can vary based on your specific ingredients and how you slice them. I always say one serving is however much makes you happy (wink). But if you’re keeping track, here’s what you can expect per bar:
- Calories: About 220 per bar (but who’s counting when it’s this good?)
- Fat: 10g (mostly from that vegetable oil keeping things moist)
- Carbs: 30g (warm spices make every carb worth it)
- Sugar: 18g (it’s dessert, people – live a little!)
- Protein: 3g (pumpkin power!)
These values assume you’re cutting the pan into 12 equal bars (though I won’t judge if your “equal” slices magically get bigger as the pan disappears). If you add nuts or chocolate chips, the numbers will change slightly. The cream cheese frosting adds about 80 calories per serving – but let’s be real, skipping it would be criminal!
My philosophy? Everything in moderation, including moderation. These pumpkin bars are meant to be savored and enjoyed as part of life’s sweet moments. Now go grab another one – I won’t tell!
Frequently Asked Questions
I’ve gotten so many questions about these pumpkin bars over the years – seems like everyone wants to make them just right! Here are the answers to the ones I hear most often. Trust me, I’ve tested all these scenarios myself (sometimes accidentally – oops!).
Can I use fresh pumpkin instead of canned?
Absolutely! I love using fresh pumpkin when they’re in season. Just roast or steam it until tender, then puree until smooth. The key is making sure your puree is thick like the canned stuff – if it’s watery, strain it through cheesecloth first. About 2 pounds of pumpkin will give you the 1 cup puree you need. But honestly? I keep canned pumpkin in my pantry year-round for emergencies (like sudden pumpkin bar cravings at midnight).
How long do these pumpkin bars last?
With cream cheese frosting, they’ll stay fresh in the fridge for about 5 days in an airtight container. Without frosting, you can keep them at room temperature for 2-3 days. Pro tip: they actually taste better on day two when the flavors have really settled in! If you need to store them longer, see my freezing tips below.
Can I freeze pumpkin bars?
You bet! Freeze them unfrosted for best results. Wrap individual bars tightly in plastic wrap, then place in a freezer bag for up to 3 months. Thaw overnight in the fridge, then frost before serving. The texture stays perfect this way. I always keep a batch in the freezer for last-minute guests – just pop one in the microwave for 15 seconds and it’s like fresh-baked!
Can I make these gluten-free?
Yes! I’ve had great success using a 1:1 gluten-free flour blend (like Bob’s Red Mill). The texture comes out nearly identical to the original. Just make sure your blend contains xanthan gum. And don’t skip the toothpick test – gluten-free baked goods can be a bit trickier to time perfectly.
Why did my bars turn out dry?
Oh no! Usually this means either the oven was too hot (get an oven thermometer to check!) or they baked too long. Remember, they continue cooking a bit as they cool. Also, make sure you’re measuring your flour correctly – packed flour leads to dry bars. And don’t skip the oil – it’s what keeps them moist for days!
Got more questions? Drop them in the comments – I love helping fellow bakers perfect their pumpkin bars!
Final Thoughts
Well friends, we’ve reached the end of our pumpkin bar journey together – but really, this is just the beginning! I hope you’re as excited to bake these as I am every fall. There’s something special about pulling that golden, spice-scented pan from the oven that never gets old.
I’d love to hear how your bars turn out! Did you stick with the classic recipe or try one of the fun variations? Maybe you’ve got your own family twist to share? Leave a comment below telling me all about your baking adventure – the triumphs, the mishaps (we’ve all been there!), and most importantly… how many bars disappeared before they even had a chance to cool!
Now go preheat that oven and get baking! Your kitchen is about to smell like all the best parts of autumn. Happy baking, pumpkin lovers!
PrintOld Fashioned Pumpkin Bars with Cream Cheese Frosting
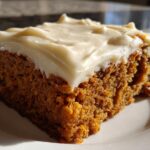
Classic pumpkin bars with a spiced flavor, topped with cream cheese frosting.
- Prep Time: 15 mins
- Cook Time: 25 mins
- Total Time: 40 mins
- Yield: 12 bars 1x
- Category: Dessert
- Method: Baking
- Cuisine: American
- Diet: Vegetarian
Ingredients
- 1 cup all-purpose flour
- 1 tsp baking powder
- 1/2 tsp baking soda
- 1 tsp cinnamon
- 1/2 tsp nutmeg
- 1/4 tsp cloves
- 1/4 tsp salt
- 2 eggs
- 1 cup sugar
- 1 cup pumpkin puree
- 1/2 cup vegetable oil
- 1 tsp vanilla extract
Instructions
- Preheat oven to 350°F (175°C). Grease a 9×13-inch baking pan.
- In a bowl, whisk flour, baking powder, baking soda, cinnamon, nutmeg, cloves, and salt.
- In another bowl, beat eggs, sugar, pumpkin puree, oil, and vanilla until smooth.
- Stir dry ingredients into wet ingredients until just combined.
- Pour batter into the prepared pan and spread evenly.
- Bake for 25-30 minutes or until a toothpick comes out clean.
- Let cool before frosting.
Notes
- Store bars in the refrigerator for up to 5 days.
- For extra flavor, add 1/2 cup chopped walnuts or pecans.
- Frost with cream cheese frosting for best results.
Nutrition
- Serving Size: 1 bar
- Calories: 220
- Sugar: 18g
- Sodium: 120mg
- Fat: 10g
- Saturated Fat: 2g
- Unsaturated Fat: 7g
- Trans Fat: 0g
- Carbohydrates: 30g
- Fiber: 1g
- Protein: 3g
- Cholesterol: 35mg


