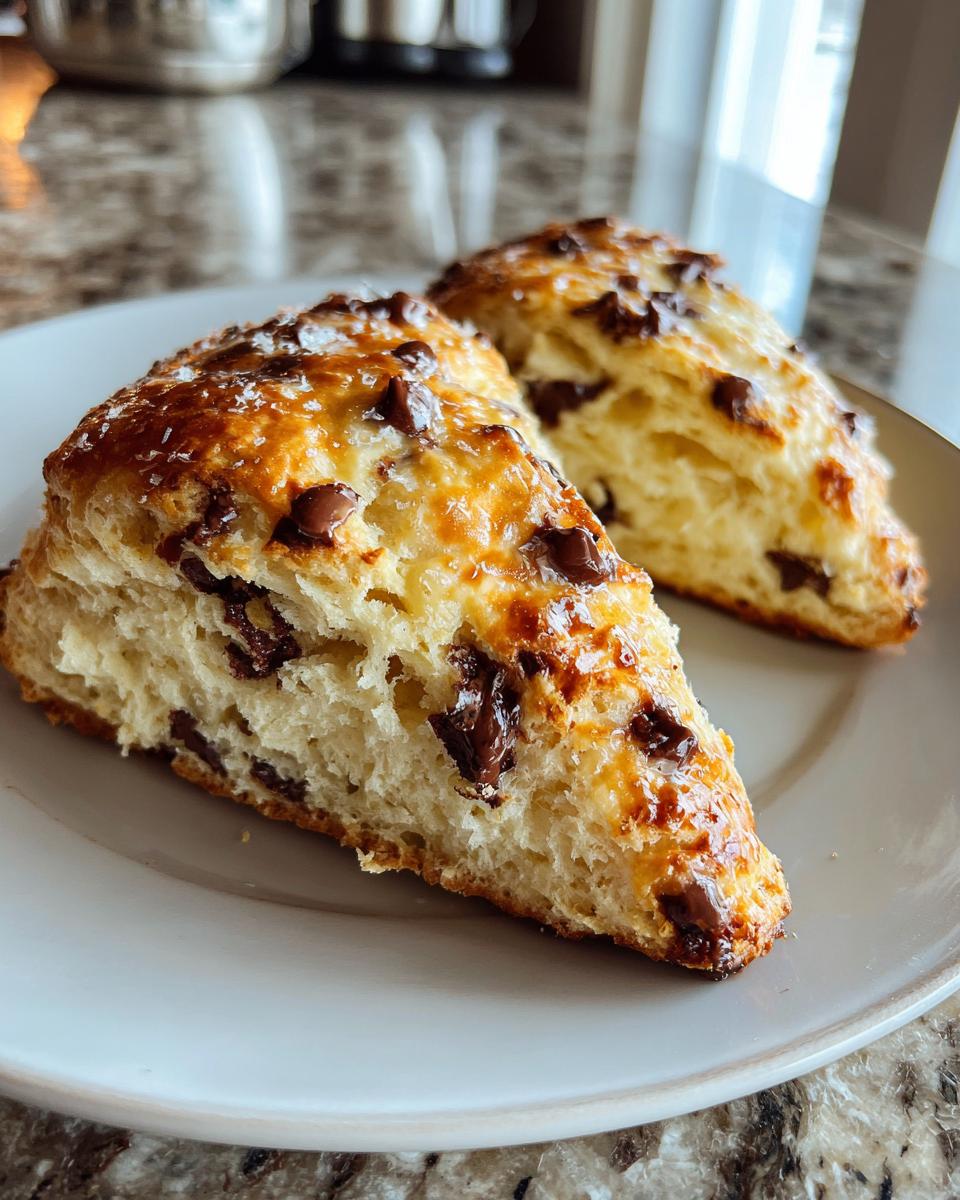
Oh my goodness, you guys! There’s just something so utterly comforting about a warm, freshly baked pastry, isn’t there? For me, that cozy feeling is perfectly captured in a batch of homemade chocolate chip scones. I remember the very first time I nailed a batch – the kitchen filled with that incredible buttery, sweet smell, and when I took a bite, it was pure bliss! Tender, crumbly, and those melty chocolate chips… *chef’s kiss*!
Honestly, I used to think scones were super fancy and complicated, something only a professional baker could tackle. But let me tell you, that’s just not true! This chocolate chip scones recipe is so incredibly easy, you’ll wonder why you haven’t been making them every weekend. I’ve tried so many scone recipes over the years, tweaking and perfecting, and this one, my friends, is THE one. It consistently delivers the most delicious, tender chocolate chip scones that disappear faster than I can bake them. Trust me, if I can do it, you absolutely can too!
Why You’ll Love These Chocolate Chip Scones
Okay, so why are these chocolate chip scones going to become your new favorite obsession? Let me count the ways! First off, they’re ridiculously quick to whip up – perfect for those sudden cravings or last-minute brunch plans. They taste absolutely divine, like a little hug in pastry form, with that perfect balance of buttery richness and sweet chocolate. Plus, they’re so versatile! Great for breakfast, an afternoon pick-me-up, or even a simple dessert. You just can’t go wrong!
Essential Equipment for Perfect Chocolate Chip Scones
Alright, before we dive into the deliciousness, let’s talk tools! You don’t need a fancy chef’s kitchen for these chocolate chip scones, but having the right gear makes the whole process so much smoother. Trust me, a few key pieces will make baking these beauties an absolute breeze. Think of them as your trusty sidekicks in the kitchen!
Tools for Mixing and Cutting Your Chocolate Chip Scones
For mixing, you’ll definitely want a good-sized bowl (or two!). And for cutting in that cold butter – my secret weapon is a pastry blender! It makes quick work of it, but your fingertips work great too. Oh, and a sharp knife or even a round cookie cutter if you want perfectly shaped chocolate chip scones!
Ingredients for Delicious Chocolate Chip Scones
Okay, now for the good stuff – the ingredients! This recipe uses everyday pantry staples, but trust me, the magic happens when they come together. You don’t need anything fancy, just good quality stuff to make these chocolate chip scones sing. Here’s what you’ll need:
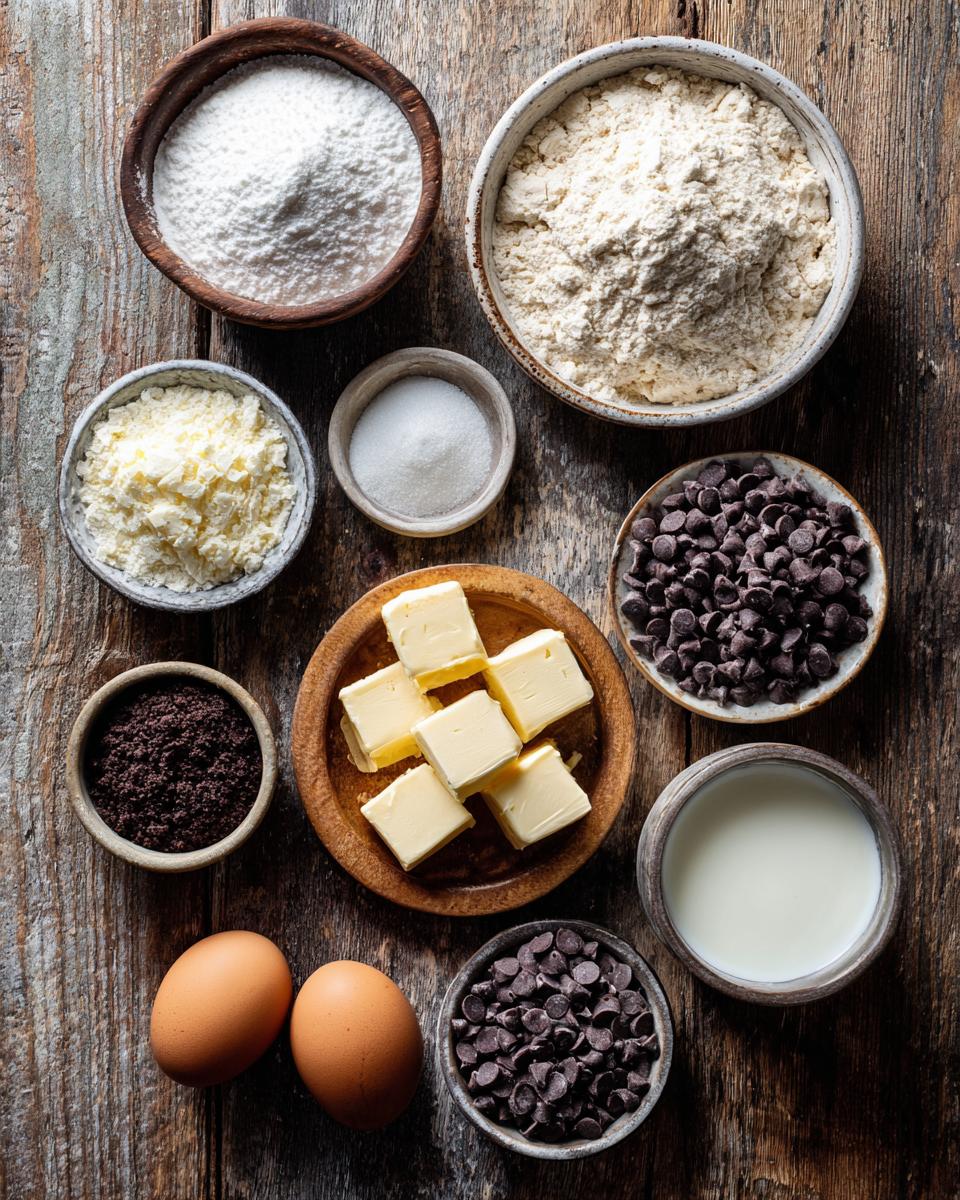
- 2 cups all-purpose flour: The backbone of our scones!
- 1/2 cup granulated sugar: Just enough sweetness to balance things out.
- 1 tablespoon baking powder: Our secret to that lovely lift and tenderness.
- 1/2 teaspoon salt: Don’t skip this! It enhances all the other flavors.
- 1/2 cup unsalted butter, cold and cubed: This is CRUCIAL for flaky, tender scones. More on this in a sec!
- 1/2 cup milk: Adds moisture and richness.
- 1 large egg: Binds everything together and adds richness.
- 1 teaspoon alcohol-free vanilla extract: For that warm, comforting flavor.
- 1 cup chocolate chips: Because, well, they’re chocolate chip scones! Use your favorite kind.
See? Simple, right? But each one plays a super important role in getting those perfect, buttery, chocolatey results!
Key Ingredients for Your Chocolate Chip Scones
Let’s talk about the stars of the show! That cold, cubed unsalted butter? It’s non-negotiable! When you cut cold butter into the flour, it creates little pockets that steam in the oven, giving your chocolate chip scones that amazing, flaky texture. If your butter is too warm, you’ll just end up with a greasy mess, and we don’t want that! And for the chocolate chips, use good quality ones! I love semi-sweet, but milk chocolate or even a mix of dark and milk would be divine. They’re what make these truly *chocolate chip* scones!
How to Bake Irresistible Chocolate Chip Scones
Alright, my friends, this is where the magic happens! Don’t be intimidated; baking these chocolate chip scones is much simpler than you might think. Just follow along, and I promise you’ll have a batch of warm, tender, chocolatey goodness in no time. We’re going to break it down step-by-step, just like Grandma taught me – no rushing, just enjoying the process!
First things first, let’s get that oven ready. You want it nice and hot for these scones to get that perfect rise and golden crust. Go ahead and preheat your oven to a good, strong 400°F (200°C). While that’s heating up, grab a baking sheet and line it with some parchment paper. This will make cleanup a breeze and ensure your precious chocolate chip scones don’t stick. Trust me, nothing’s worse than a scone stuck to the pan!
Now, let’s get our ingredients together. Precision is key here, but don’t stress too much. Just measure everything out and have it ready to go. We’re going to start with the dry ingredients, then move onto the wet, and finally, bring them all together to create that beautiful scone dough. It’s a dance, really – a delicious, buttery dance!
Remember, the goal is tender, flaky scones, so we’ll be gentle with our mixing. Overworking the dough is the enemy of a good scone, so we’ll treat it with care. Ready? Let’s bake some amazing chocolate chip scones!
Preparing the Dough for Your Chocolate Chip Scones
Okay, let’s get this dough going! In a big bowl, whisk together your flour, sugar, baking powder, and salt. Give it a good whisk to make sure everything is evenly distributed – you don’t want a pocket of just baking powder in one scone, right? Next, it’s time for that super cold, cubed butter. You can use a pastry blender, or just your fingertips, to cut the butter into the dry ingredients. You’re looking for a mixture that resembles coarse crumbs, almost like wet sand. Don’t let the butter melt too much with your hands; work quickly!
In a separate, smaller bowl, whisk together the milk, egg, and alcohol-free vanilla extract. Once that’s all combined, pour it into your dry mixture. Now, this is important: mix until just combined. Seriously, *just* combined. A few streaks of flour are totally fine! Overmixing develops gluten, and that leads to tough scones, and we want tender, melt-in-your-mouth chocolate chip scones, right? Finally, gently fold in those glorious chocolate chips. Don’t crush them! Just get them distributed throughout the dough.
Shaping and Baking Your Chocolate Chip Scones
Now that your dough is ready, turn it out onto a lightly floured surface. Don’t knead it or work it too much! Just gently pat it into an 8-inch circle, about 1 inch thick. You can use your hands, or a rolling pin if you’re feeling fancy. Next, grab a sharp knife and cut the circle into 8 wedges, just like you’re cutting a pizza. You can also use a round biscuit cutter for round scones, but I love the classic wedge shape!
Carefully transfer your scone wedges to your prepared baking sheet, leaving a little space between them so they can spread out. Pop them into your preheated 400°F (200°C) oven and let them bake for about 15-18 minutes. You’re looking for a beautiful golden brown color on top and around the edges. When they’re done, they’ll sound hollow if you tap the bottom. Take them out of the oven and let them cool on a wire rack for a bit. The hardest part is waiting to eat them, I know!
Tips for the Best Chocolate Chip Scones
So, you’ve got your beautiful chocolate chip scones baking, but I’ve got a few more tricks up my sleeve to make sure every batch is absolutely perfect! These little nuggets of wisdom come from years of trial and error (and a few scone disasters, I won’t lie!). Paying attention to these small details will elevate your scones from good to absolutely unforgettable. Trust me on this one; these tips are game-changers for getting that ideal texture and flavor every single time.
Ensuring Tender Chocolate Chip Scones
The secret to truly tender, flaky chocolate chip scones? It all comes down to two things: super cold ingredients and absolutely, positively, do not overmix the dough! Keep that butter chilled until the very last second, and when you combine your wet and dry ingredients, mix just until everything comes together. A few lumps? Some flour streaks? Perfect! That’s the sign of a scone that will melt in your mouth.
Serving and Storing Your Chocolate Chip Scones
Okay, so your kitchen smells divine, and you’ve got a batch of warm, golden chocolate chip scones cooling! My absolute favorite way to enjoy these is fresh from the oven, maybe with a smear of good quality butter, or alongside a hot cup of coffee or tea. They’re also fantastic with some fruit preserves or even a dollop of whipped cream for a real treat! If by some miracle you have any leftover (which rarely happens in my house!), store them in an airtight container at room temperature. They’ll stay fresh and delicious for up to two days, though honestly, they’re best on day one!
Frequently Asked Questions About Chocolate Chip Scones
I know you probably have some burning questions about these amazing chocolate chip scones, especially now that you’re practically a scone-making pro! Don’t worry, I’ve got you covered. I get asked these all the time, so let’s dive into some common queries and make sure you’re fully equipped to bake the best scones ever. Think of me as your personal scone hotline!
Can I Make Chocolate Chip Scones Ahead of Time?
Absolutely! You can prepare the dough, cut the scones, and then pop them on a baking sheet in the freezer. Once frozen solid, transfer them to a freezer bag. When you’re ready to bake, just place them on a parchment-lined baking sheet and bake from frozen, adding a few extra minutes to the baking time. So convenient!
What Are the Best Chocolate Chips for Chocolate Chip Scones?
Honestly, the “best” is whatever you love! I’m a big fan of semi-sweet chocolate chips because they offer a nice balance. But if you prefer a richer flavor, dark chocolate chips are fantastic. Milk chocolate chips make them extra sweet, which kids usually adore! You can even use mini chocolate chips for more chocolate in every bite.
How to Make Chocolate Chip Scones Dairy-Free?
Good news! You can totally make these dairy-free. Just swap out the regular milk for your favorite plant-based milk (almond or soy work great!). For the butter, use a good quality dairy-free butter alternative that comes in sticks, as they tend to hold up better for baking. And make sure your chocolate chips are dairy-free too!
Estimated Nutritional Information for Chocolate Chip Scones
Okay, for those of you who like to keep an eye on the numbers, here’s a quick peek at the estimated nutritional info for one of these delicious chocolate chip scones. Please keep in mind that these are just estimates, and the exact values can totally vary depending on the specific brands of ingredients you use. Think of it as a general guide, not a strict rule!
Share Your Chocolate Chip Scones Experience
Alright, you’ve got the recipe, you’ve got the tips – now it’s YOUR turn! I absolutely LOVE hearing from you all. Did you make these chocolate chip scones? How did they turn out? Did you add a sprinkle of something extra, or maybe try a different kind of chocolate chip? Share your photos, your stories, and any fun tweaks you made in the comments below! Let’s build a little community of scone lovers right here!
PrintChocolate Chip Scones From Scratch
These chocolate chip scones are a delightful treat, perfect for breakfast or a snack. They are easy to make and yield tender, buttery scones studded with melty chocolate chips.
- Prep Time: 15 minutes
- Cook Time: 18 minutes
- Total Time: 33 minutes
- Yield: 8 scones 1x
- Category: Breakfast
- Method: Baking
- Cuisine: American
- Diet: Vegetarian
Ingredients
- 2 cups all-purpose flour
- 1/2 cup granulated sugar
- 1 tablespoon baking powder
- 1/2 teaspoon salt
- 1/2 cup unsalted butter, cold and cubed
- 1/2 cup milk
- 1 large egg
- 1 teaspoon vanilla extract
- 1 cup chocolate chips
Instructions
- Preheat oven to 400°F (200°C). Line a baking sheet with parchment paper.
- In a large bowl, whisk together flour, sugar, baking powder, and salt.
- Cut in the cold butter using a pastry blender or your fingertips until the mixture resembles coarse crumbs.
- In a separate small bowl, whisk together milk, egg, and vanilla extract.
- Pour the wet ingredients into the dry ingredients and mix until just combined. Do not overmix.
- Fold in the chocolate chips.
- Turn the dough out onto a lightly floured surface and gently pat it into an 8-inch circle, about 1 inch thick.
- Cut the circle into 8 wedges.
- Place the wedges on the prepared baking sheet.
- Bake for 15-18 minutes, or until golden brown and cooked through.
- Let cool on a wire rack before serving.
Notes
- For a richer flavor, use heavy cream instead of milk.
- Do not overmix the dough, as this can lead to tough scones.
- Scones are best served warm on the day they are baked.
- Store leftover scones in an airtight container at room temperature for up to 2 days.
Nutrition
- Serving Size: 1 scone
- Calories: 350
- Sugar: 25g
- Sodium: 200mg
- Fat: 18g
- Saturated Fat: 11g
- Unsaturated Fat: 5g
- Trans Fat: 0g
- Carbohydrates: 40g
- Fiber: 2g
- Protein: 5g
- Cholesterol: 50mg


