Oh my goodness, friend, if you’re looking for a treat that’s ridiculously easy, super satisfying, and totally customizable, you HAVE to try this chocolate nut bark! It’s one of those magical recipes that feels fancy but takes practically no effort at all. Seriously, the combination of rich, smooth chocolate and crunchy, earthy nuts? It’s pure bliss in every bite. I first stumbled upon making bark when I needed a last-minute gift for a potluck and had some leftover chocolate and nuts. I whipped this up, and everyone RAVED! It’s become my go-to for quick snacks, thoughtful homemade gifts, or just when I need a little something sweet and satisfying.
Why You’ll Love This Chocolate Nut Bark
Trust me, this isn’t just *any* chocolate recipe; it’s a game-changer! You’ll fall head over heels for this chocolate nut bark because it’s so incredibly simple, whips up in a flash, and lets you play around with flavors. It’s truly a kitchen win, every single time!
Easy Chocolate Nut Bark
Honestly, if you can melt chocolate, you can make this! It’s super straightforward, perfect even if you’re just starting your baking adventure. No fuss, just deliciousness.
Quick Chocolate Nut Bark
Need a treat, like, yesterday? This is your recipe! With almost no actual “cooking” time, you’ll have a delightful snack ready in under an hour, chill time included.
Versatile Chocolate Nut Bark Options
This is where the fun really begins! You can mix and match your favorite chocolates and nuts, or even throw in some dried fruit. It’s your canvas, so get creative!
Essential Equipment for Your Chocolate Nut Bark
No need for fancy gadgets here, my friend! You probably have everything you need for this chocolate nut bark adventure already lurking in your kitchen. We’re talking super basic stuff that makes this process a breeze.
Basic Tools for Chocolate Nut Bark
You’ll definitely want a sturdy baking sheet and some parchment paper. Trust me on the parchment paper – it makes cleanup a dream and ensures your bark pops right off!
Melting Chocolate Nut Bark Equipment
For melting that glorious chocolate, a microwave-safe bowl works perfectly. If you’re feeling a bit more traditional, a double boiler (or even just a heatproof bowl over a simmering pot of water) does the trick too!
Ingredients for Delicious Chocolate Nut Bark
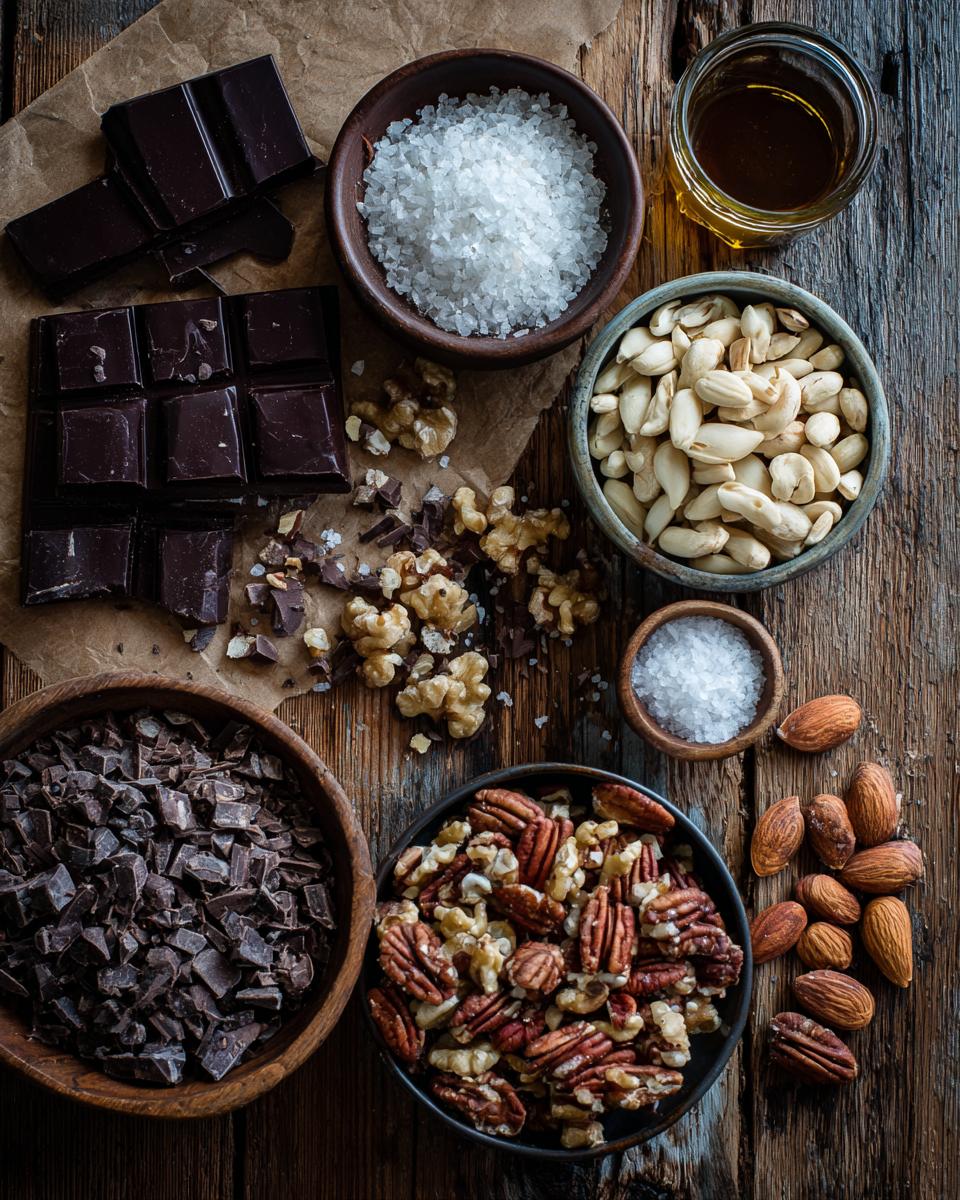
Alright, let’s talk ingredients! For something so simple, the quality of what you put in really shines through. We’re keeping it minimal, but each component plays a starring role in making this chocolate nut bark absolutely irresistible. Don’t skimp here, okay?
Choosing Your Chocolate Nut Bark
This is your moment to shine! Grab about 12 ounces of your favorite good quality chocolate. Dark, milk, white – whatever makes your heart sing! Just make sure it’s good stuff, not some waxy impostor. And chop it up, please! Smaller pieces melt much more evenly, which is key for that smooth finish.
Perfect Nuts for Chocolate Nut Bark
Now for the crunch! You’ll need about a cup of mixed nuts. I love a blend of almonds, walnuts, and pecans, but truly, any nut you adore will work. Just give them a good, rough chop – we want distinct pieces, not powdery bits. And for a little extra somethin’-somethin’, a tiny sprinkle of sea salt at the end is pure magic!
How to Make Chocolate Nut Bark
Okay, you’ve got your awesome ingredients and your simple tools ready. Now for the fun part – actually making this incredible chocolate nut bark! Don’t blink, because it happens fast. We’re going to walk through each step, and before you know it, you’ll have a tray of chocolatey goodness chilling in your fridge!
Preparing Your Workstation for Chocolate Nut Bark
First things first, let’s get that baking sheet ready. Grab your trusty sheet and line it generously with parchment paper. This is SO important! It’s like building the perfect stage for your chocolate masterpiece, and it guarantees that your beautiful bark won’t stick, making it super easy to remove later. Trust me, you’ll thank yourself for this step!
Melting the Chocolate for Nut Bark
Now for the main event: melting that chocolate! If you’re going the microwave route, pop your chopped chocolate into a microwave-safe bowl. Heat it up in short bursts, about 30 seconds at a time. The trick here is to stir, stir, stir after each interval, even if it doesn’t look fully melted yet. Carry on until it’s gloriously smooth and free of any lumps. If you’re using a double boiler, just keep stirring gently over the simmering water until it’s perfectly silky. Don’t let it get too hot!
Assembling Your Chocolate Nut Bark
Once your chocolate is a beautiful, smooth river of deliciousness, it’s time to build your bark! Carefully pour that melted chocolate right onto your prepared baking sheet. Grab a spatula or the back of a spoon and spread it out evenly into a thin layer. You don’t want it too thick, or it’ll be hard to break later. Then, quickly, before the chocolate sets, sprinkle those chopped nuts all over the top. If you’re adding that little dash of sea salt, now’s the moment for that too – just a light sprinkle, okay?
Chilling and Breaking Your Chocolate Nut Bark
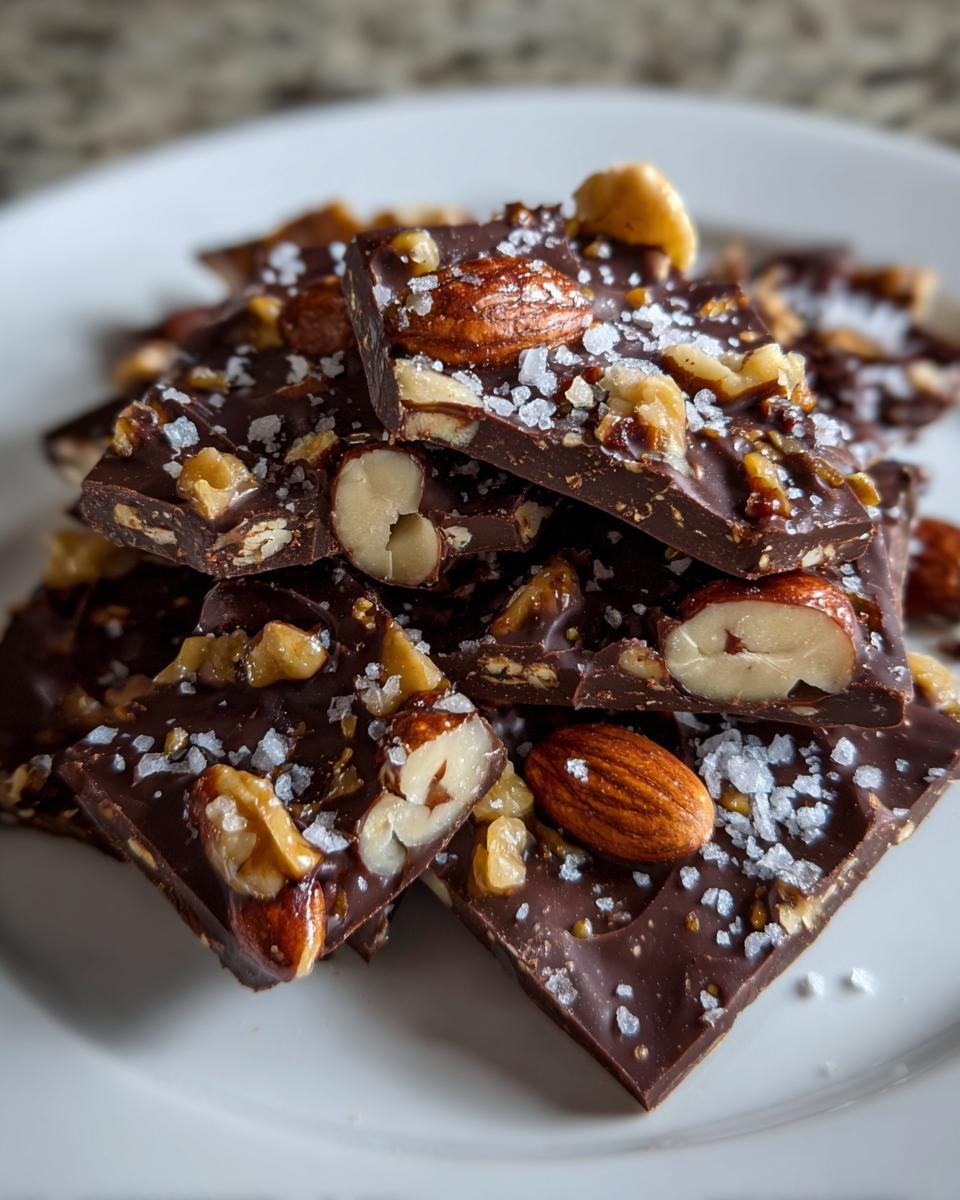
Almost there! With your nuts and salt perfectly placed, gently transfer your baking sheet into the refrigerator. Let it chill for at least 30 minutes, or until the chocolate is completely firm and solid. You’ll know it’s ready when it has that satisfying snap! Once it’s firm, take it out and just break it into irregular, delicious pieces. No need for perfection here; the rustic look is part of its charm!
Tips for Perfect Chocolate Nut Bark Every Time
Alright, so you’ve whipped up your first batch of chocolate nut bark, and it’s probably already amazing! But I’ve got a few extra little secrets to share that’ll make your bark go from “great” to “OMG, you HAVE to try this!” These tiny tweaks can really elevate your game and help you avoid any little hiccups along the way.
Customizing Your Chocolate Nut Bark
This is where you can really let your culinary imagination run wild! Beyond just different nuts, think about adding some dried fruits – dried cranberries or cherries add a lovely tartness. Or, for a truly show-stopping look, melt a little contrasting chocolate (like white chocolate over dark) and drizzle it artfully over the nuts before chilling. So pretty!
Achieving Smooth Chocolate Nut Bark
The secret to that beautiful, glossy finish? Patience, my friend, patience! When you’re melting your chocolate, make absolutely sure it’s completely smooth before you pour it. Even tiny unmelted bits can make your bark look lumpy. Stir, stir, stir until every single morsel is melted and fluid. It makes all the difference, trust me!
Storing and Serving Your Chocolate Nut Bark
You’ve made this incredible chocolate nut bark, and now you want to make sure it stays perfect, right? Good news! It’s super easy to store, and there are so many fun ways to enjoy it. Let’s make sure every last piece is savored!
Keeping Chocolate Nut Bark Fresh
To keep your bark tasting amazing, just pop it into an airtight container. You can store it at room temperature for a good week, or if you prefer it extra firm, the refrigerator works great too!
Creative Ways to Serve Chocolate Nut Bark
Oh, the possibilities! This bark is absolutely divine with a cup of hot coffee or tea. But honestly, my favorite thing is to wrap up little bags of it with a pretty ribbon and give them as homemade gifts. Everyone loves getting a delicious, handmade treat!
Chocolate Nut Bark: Frequently Asked Questions
Okay, so you’ve got questions, and I’ve got answers! This chocolate nut bark is pretty forgiving, but a few common questions pop up. I’m here to clear things up so you can bake with total confidence and create your perfect batch every single time!
Can I use different types of chocolate for my chocolate nut bark?
Absolutely, yes! That’s one of my favorite things about this recipe. You can totally mix it up with dark, milk, or white chocolate, or even a combination! I often do half dark, half milk for a really balanced flavor. Just make sure whatever you choose is good quality – it really makes all the difference in the final taste and texture!
How long does homemade chocolate nut bark last?
If you can resist eating it all in one go, your homemade chocolate nut bark will stay wonderfully fresh for about 1-2 weeks when stored in an airtight container at room temperature. If you pop it in the fridge, it can last even longer, maybe up to 3-4 weeks. Just make sure it’s sealed tight to keep out any moisture or strange fridge smells!
Can I add other ingredients to my chocolate nut bark?
Oh, you betcha! This is where you get to be a mad scientist in the kitchen! Besides nuts, I love adding dried cranberries, raisins, or even chopped dried apricots. A little sprinkle of cinnamon or a tiny dash of alcohol-free vanilla extract in the melted chocolate can also be amazing. Feel free to experiment and find your favorite combo!
Estimated Nutritional Information
Alright, for those of you who like to keep an eye on things, here’s a little peek at the estimated nutrition for one serving of this delicious chocolate nut bark. We’re looking at around 200 calories, 15g of fat (with 8g of saturated fat), 18g of carbs, 2g of fiber, and 3g of protein. Just remember, these numbers are estimates, and they can totally change depending on the specific brands of chocolate and nuts you use. Think of it as a helpful guide, not a strict rule!
Chocolate Nut Bark
This chocolate nut bark recipe is a simple and delicious treat. It is perfect for a quick snack or a homemade gift. The combination of rich chocolate and crunchy nuts creates a satisfying texture and flavor.
- Prep Time: 15 minutes
- Cook Time: 0 minutes
- Total Time: 45 minutes
- Yield: 12 servings 1x
- Category: Dessert
- Method: No Bake
- Cuisine: American
- Diet: Vegetarian
Ingredients
- 12 ounces good quality chocolate (dark, milk, or white), chopped
- 1 cup mixed nuts (almonds, walnuts, pecans), roughly chopped
- Optional: sea salt for sprinkling
Instructions
- Line a baking sheet with parchment paper.
- Melt the chocolate using a double boiler or microwave. If using a microwave, heat in 30-second intervals, stirring until smooth.
- Pour the melted chocolate onto the prepared baking sheet. Spread it evenly into a thin layer.
- Sprinkle the chopped nuts over the melted chocolate. If desired, sprinkle lightly with sea salt.
- Refrigerate for at least 30 minutes, or until the chocolate is firm.
- Once firm, break the chocolate bark into pieces.
- Store in an airtight container at room temperature or in the refrigerator.
Notes
- You can customize this bark with your favorite nuts or even add dried fruits like cranberries or raisins.
- For a festive touch, drizzle with a contrasting melted chocolate color before chilling.
- Ensure the chocolate is completely melted and smooth for a good consistency.
Nutrition
- Serving Size: 1 piece
- Calories: 200
- Sugar: 15g
- Sodium: 10mg
- Fat: 15g
- Saturated Fat: 8g
- Unsaturated Fat: 7g
- Trans Fat: 0g
- Carbohydrates: 18g
- Fiber: 2g
- Protein: 3g
- Cholesterol: 5mg


