Oh my goodness, gather ’round, because today I’m spilling the beans (or should I say, the chocolate and biscuits?) on one of my all-time favorite, ridiculously easy, and utterly delicious treats: Chocolate Tiffin! If you’ve never had the joy of biting into a perfectly chilled, rich, and chewy square of Chocolate Tiffin, you are in for such a treat. This isn’t just any dessert; it’s a no-bake wonder that comes together with minimal fuss and zero oven time. Perfect for those days when the kitchen is already sweltering, or you just need a quick win!
I remember the first time I made Chocolate Tiffin. It was for a last-minute potluck, and I was in a panic about what to bring. A friend suggested this “biscuit cake” thing, and honestly, I was skeptical. No baking? Really? But I gave it a shot, and wow, did it deliver! It was the star of the show, and everyone was asking for the recipe. Since then, Chocolate Tiffin has become my secret weapon for parties, unexpected guests, or just when I need a little chocolatey pick-me-up without turning on the oven. It’s truly a classic for a reason, and I can’t wait for you to experience its magic!
Why You’ll Love This Chocolate Tiffin Recipe
The Irresistible Charm of Chocolate Tiffin
Honestly, what’s not to love about a dessert that practically makes itself? This Chocolate Tiffin recipe is a total game-changer, especially when you’re craving something sweet but don’t want to spend hours in the kitchen. It’s got that perfect balance of rich chocolatey goodness and satisfying chewiness, and it just hits the spot every single time. Trust me, once you try it, you’ll wonder where this no-bake wonder has been all your life!
- Quick & Easy: Perfect for busy schedules, because who has endless time?
- No-Bake: No oven, no fuss! Ideal for every skill level, even if you’re a kitchen novice.
- Customizable: Feel free to play around with it! Add your favorite nuts or different dried fruits.
- Crowd-Pleaser: Everyone, and I mean *everyone*, absolutely adores this treat.
- Rich & Decadent: It truly satisfies those deep, dark chocolate cravings without being overly heavy.
Essential Ingredients for Your Chocolate Tiffin
Gathering Your Chocolate Tiffin Components
Alright, let’s get down to the good stuff – what you’ll need to make this incredible Chocolate Tiffin! The beauty here is that the ingredients are super simple, but getting them just right makes all the difference. We’re talking specific measurements and forms, because that’s how we get that perfect, irresistible texture and flavor. No guesswork needed, just follow along!
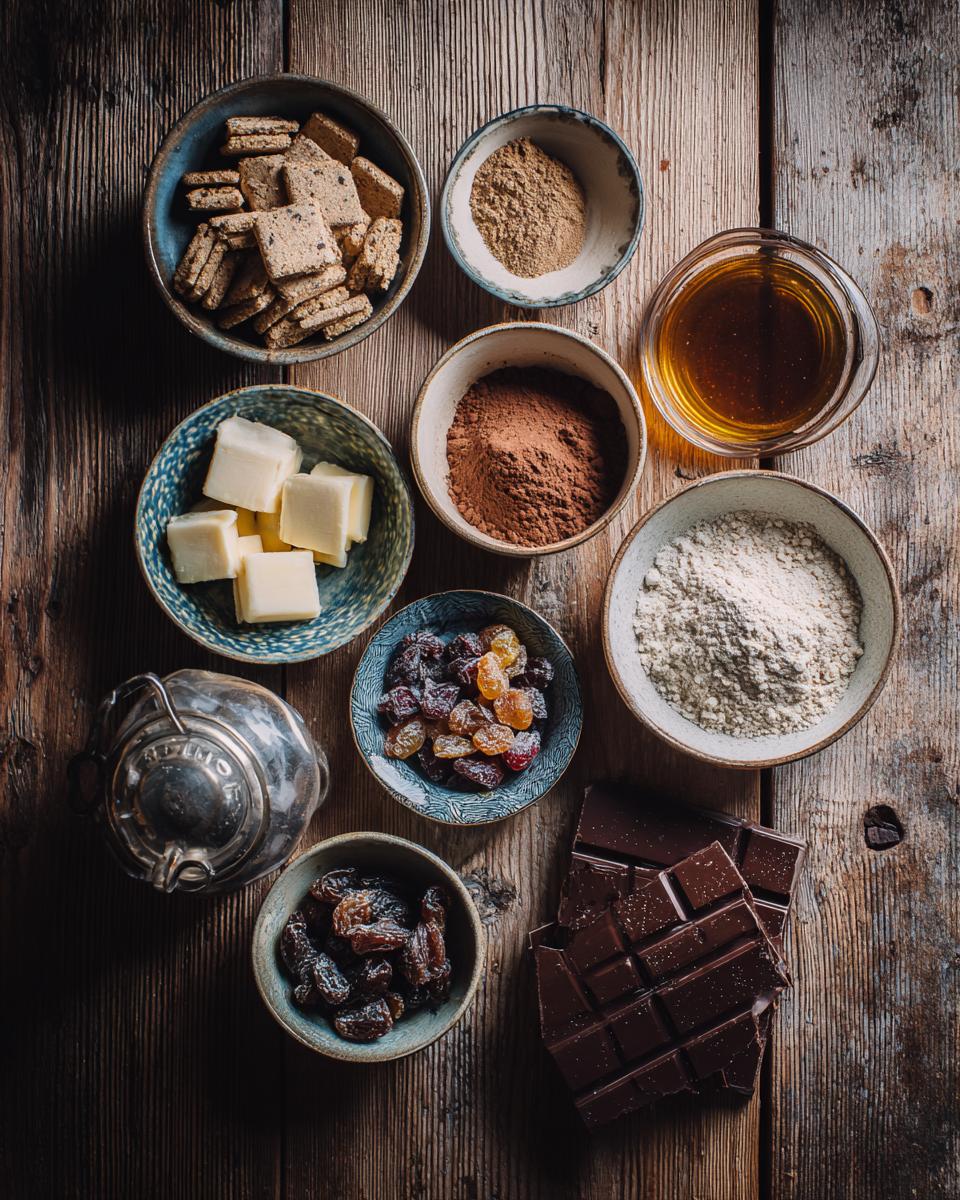
- 100g digestive biscuits (you’ll want these finely crushed, almost like coarse sand)
- 50g unsalted butter (please, use real butter! It makes a huge difference)
- 2 tablespoons unsweetened cocoa powder (the good stuff, if you have it, really shines through)
- 2 tablespoons golden syrup (this is key for that lovely sticky texture)
- 50g mixed dried fruit (I love a mix of raisins and sultanas, but whatever you fancy!)
- 50g dark chocolate (for topping, totally optional, but so worth melting and drizzling over the top!)
Step-by-Step Guide to Making Chocolate Tiffin
Preparing Your Perfect Chocolate Tiffin
Okay, you’ve got your ingredients ready, your enthusiasm is bubbling, and you’re practically tasting that delicious Chocolate Tiffin already! Let’s get this party started. This is where the magic happens, and don’t worry, it’s super straightforward. Just follow these steps, and you’ll have a gorgeous, no-bake treat in no time!
- Prepare the tin: First things first, grab your 8-inch square tin. You’ll want to line it with parchment paper, making sure the paper hangs over the sides a bit. This is your secret weapon for easily lifting out your beautiful Chocolate Tiffin later – trust me, it saves so much hassle!
- Melt the base: Now, get a medium-sized saucepan and pop in your butter, cocoa powder, and golden syrup. Place it over a low heat. We’re not trying to boil anything here, just gently melt it all together. Stir continuously until everything is beautifully smooth and combined. It’ll smell amazing, I promise!
- Combine ingredients: Take that saucepan off the heat. This is important! Now, tip in your finely crushed digestive biscuits and all that lovely mixed dried fruit. Stir, stir, stir until every single crumb and piece of fruit is coated in that gorgeous chocolatey mixture. You want it all looking happy and glossy.
- Press and chill: Time to get hands-on (or spoon-on!). Transfer the whole mixture into your prepared tin. Now, here’s a crucial step for a perfect Chocolate Tiffin: press it down *really* firmly and evenly. Use the back of a spoon, or even your clean hands if you don’t mind getting a little sticky. The firmer you press, the less likely it is to crumble when you cut it later.
- Add optional topping: If you’re going for that extra touch of decadence (and why wouldn’t you?), it’s time for the dark chocolate topping. Melt your chocolate in a microwave-safe bowl (in short bursts, stirring often!) or over a double boiler. Once it’s smooth and glossy, pour it over your pressed mixture and spread it out evenly with a spatula. It looks so professional!
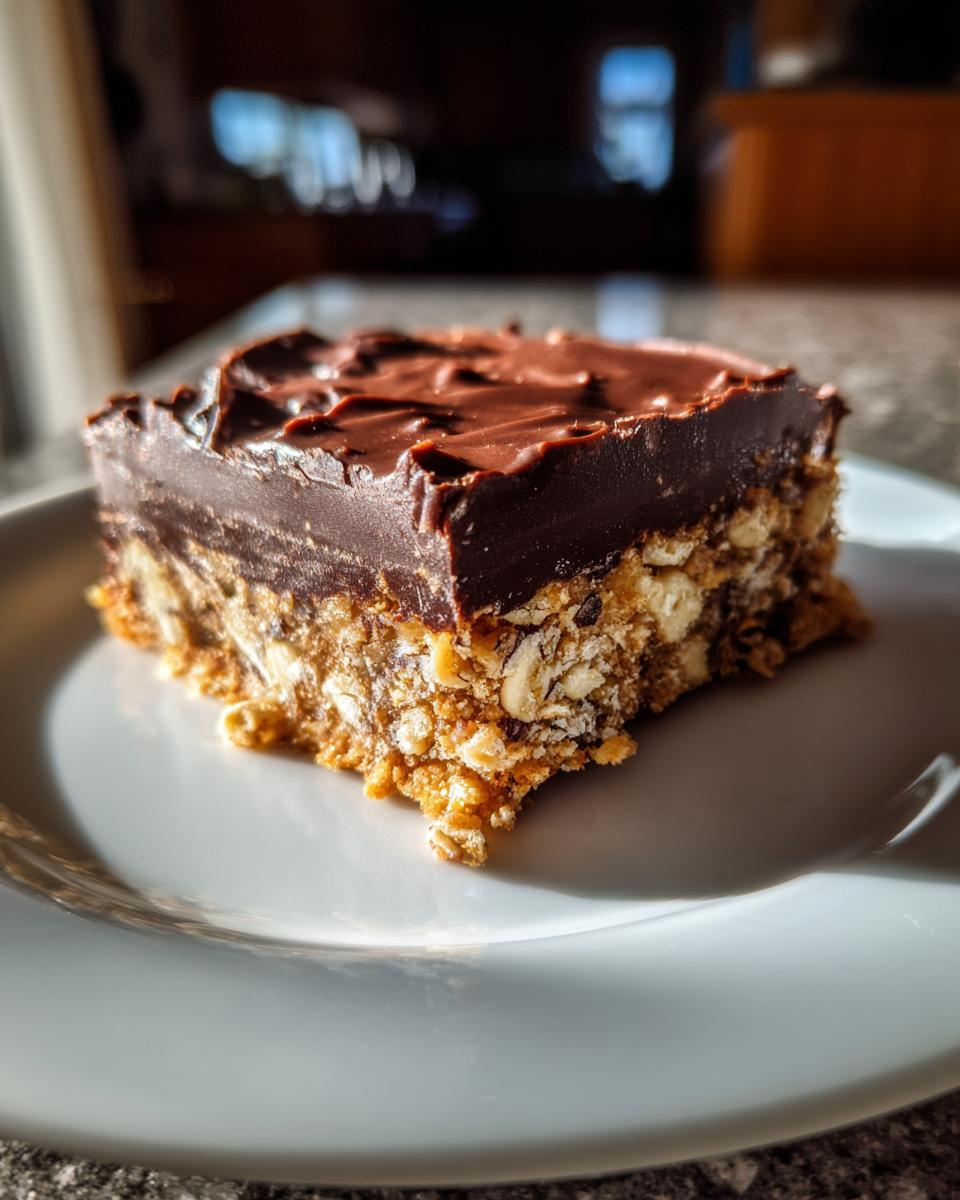
- Set the Chocolate Tiffin: Almost there! Pop that tin into the refrigerator for at least 2 hours. This chilling time is essential for your Chocolate Tiffin to become completely firm and easy to cut. You can even leave it longer, or overnight, if you’re super organised.
- Serve: Once it’s rock solid, lift the Chocolate Tiffin out of the tin using those parchment paper overhangs. Place it on a cutting board, grab a sharp knife, and cut it into 9 to 12 lovely squares. And there you have it – your very own, perfect Chocolate Tiffin, ready to be devoured!
Pro Tips for Your Best Chocolate Tiffin
Achieving Chocolate Tiffin Perfection
Okay, so you’ve whipped up your first batch of Chocolate Tiffin, and it’s probably already amazing! But if you want to take it from “great” to “OMG, you HAVE to try this!”, I’ve got a few little secrets up my sleeve. These are the things that really make your Chocolate Tiffin sing and ensure it’s perfect every single time. Little tweaks, big impact!
- Biscuit Choice: While I’m a huge fan of digestive biscuits for that classic, slightly crumbly yet tender texture, don’t be afraid to experiment! Rich tea biscuits or even ginger snaps (if you like a little zing!) can work beautifully. Just make sure they’re plain so they don’t overpower the chocolate.
- Fruit & Nut Additions: This is where you can really get creative! I love mixed dried fruit, but sometimes I swap in dried cranberries for a tart kick, or even chopped dried apricots. And if you’re a nut person, a handful of chopped walnuts or pecans adds a fantastic crunch. Just remember to chop them fairly small so they distribute nicely.
- Cocoa Quality: Trust me on this one – the better your cocoa powder, the richer and deeper your Chocolate Tiffin will taste. If you usually grab the cheapest one, try a slightly higher quality brand next time. You’ll definitely notice the difference in that chocolatey goodness!
- Pressing Firmly: I cannot stress this enough! When you’re pressing the mixture into the tin, really put some muscle into it. If it’s not packed down tightly, it’ll be crumbly when you try to cut it, and nobody wants a messy tiffin. Use the back of a spoon, or even a smaller, flat-bottomed glass to get it super compact.
- Storage: Chocolate Tiffin is a fantastic make-ahead dessert. Once it’s set, keep any leftovers (if there are any!) in an airtight container in the refrigerator. It’ll stay fresh and delicious for up to a week. Perfect for a little treat whenever a craving hits!
Frequently Asked Questions About Chocolate Tiffin
Your Chocolate Tiffin Questions Answered
Okay, so you’ve got your Chocolate Tiffin chilling (or maybe already devoured it!), and you might have a few lingering questions. That’s totally normal! I get asked these all the time, so let’s clear them up so you can make your best Chocolate Tiffin every single time.
- Can I make Chocolate Tiffin ahead of time? Absolutely! In fact, Chocolate Tiffin is a fantastic make-ahead dessert. It needs at least 2 hours to chill and firm up, but honestly, it gets even better if you let it sit overnight. You can keep it happily in the refrigerator for up to a week, making it perfect for parties or just having a treat ready.
- What can I use instead of golden syrup in Chocolate Tiffin? Good question! Golden syrup gives it that unique flavor and sticky texture, but if you don’t have it, light corn syrup or even maple syrup can work as a substitute. Just be aware that the flavor profile will be a little different, but it’ll still bind everything together nicely for your no-bake biscuit cake.
- Why is my Chocolate Tiffin crumbling? Oh no, that’s frustrating! Usually, this happens for one of two reasons: either the mixture wasn’t pressed firmly enough into the tin (remember how I said to really lean into it?), or the ratio of wet to dry ingredients might be a little off. Make sure you’re pressing it down *really* well to ensure it holds its shape when you cut it.
- Can I freeze Chocolate Tiffin? You can, but I’d be a little cautious. While it technically freezes, the texture can sometimes change slightly upon thawing, making it a bit softer. I always recommend enjoying it fresh from the refrigerator within a week for the best experience.
- Can I make this Chocolate Tiffin without dark chocolate topping? Yes, absolutely! The dark chocolate topping is totally optional. It adds a lovely extra layer of flavor and makes it look super fancy, but your Chocolate Tiffin will be utterly delicious and satisfying even without it. Sometimes simplicity is key!
Estimated Nutritional Information for Chocolate Tiffin
Understanding Your Chocolate Tiffin’s Nutrition
Okay, so we’ve talked about how delicious this Chocolate Tiffin is, and how easy it is to make! Now, for those of you who like to keep an eye on the numbers, I’ve got some estimated nutritional information for you. But, and this is a big “but,” please remember that these are just *estimates*!
Every brand of biscuit, every type of cocoa powder, and even the specific kind of dried fruit you use can change these numbers. So, think of this as a general guide, not a strict rulebook. I’m just sharing what’s likely for a typical serving, but it’s not a substitute for professional dietary advice or if you’re tracking things super precisely. Just enjoy your Chocolate Tiffin in moderation, and know you’re treating yourself to something wonderful!
- The nutritional information provided is an estimate only. Actual values may vary significantly based on specific brands, ingredient substitutions, and preparation methods. This information is not intended as medical or dietary advice.
Share Your Chocolate Tiffin Creations
We’d Love to See Your Chocolate Tiffin
Well, there you have it! My absolute favorite, super-easy Chocolate Tiffin recipe. I really hope you had as much fun making it as I do every single time. Now it’s your turn – I’d absolutely love to see your amazing creations! Snap a pic, tell me what you thought, and don’t forget to leave a rating in the comments below. Your feedback helps so many other home cooks find and fall in love with this no-bake wonder!
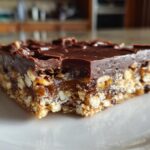
PrintChocolate Tiffin
Chocolate Tiffin is a classic no-bake dessert. It features crushed biscuits, dried fruit, and cocoa, all bound together with melted butter and syrup, then chilled until firm.
- Prep Time: 15 minutes
- Cook Time: 5 minutes
- Total Time: 2 hours 20 minutes
- Yield: 9-12 squares 1x
- Category: Dessert
- Method: No-bake
- Cuisine: British
- Diet: Vegetarian
Ingredients
- 100g digestive biscuits, crushed
- 50g butter
- 2 tablespoons cocoa powder
- 2 tablespoons golden syrup
- 50g mixed dried fruit
- 50g dark chocolate, melted (for topping, optional)
Instructions
- Line an 8-inch square tin with parchment paper.
- Melt the butter, cocoa powder, and golden syrup in a saucepan over low heat, stirring until smooth.
- Remove from heat and stir in the crushed biscuits and mixed dried fruit until evenly coated.
- Press the mixture firmly into the prepared tin.
- If desired, pour melted dark chocolate over the top and spread evenly.
- Chill in the refrigerator for at least 2 hours, or until firm.
- Once set, cut into squares and serve.
Notes
- You can use any type of plain biscuit for this recipe.
- Add nuts or other dried fruits for variation.
- For a richer flavor, use a higher quality cocoa powder.
- Store in an airtight container in the refrigerator for up to a week.
Nutrition
- Serving Size: 1 square (approx. 50g)
- Calories: 250
- Sugar: 20g
- Sodium: 100mg
- Fat: 15g
- Saturated Fat: 8g
- Unsaturated Fat: 5g
- Trans Fat: 0.1g
- Carbohydrates: 25g
- Fiber: 2g
- Protein: 3g
- Cholesterol: 25mg


