Oh my goodness, friends, do I have a treat for you today! We’re diving headfirst into the glorious world of the Chocolate Roll, or as some call it, the elegant Swiss Roll. Seriously, this isn’t just a dessert; it’s an experience. Imagine a cloud-like chocolate sponge, so light and airy it practically melts in your mouth, all wrapped up with a swirl of creamy, dreamy whipped filling. It’s pure magic!
I remember the first time I ever attempted one – I was so intimidated by that perfect spiral! But honestly, it’s much simpler than it looks. My first one was a little lopsided, but it tasted utterly divine, and that’s when I fell in love. Since then, I’ve baked countless Chocolate Rolls, perfecting the technique, learning all the little secrets to make it look as good as it tastes. Whether it’s a fancy dinner party or just a Tuesday night craving (no judgment here!), this Chocolate Roll recipe is your new best friend. Trust me, you’ve got this, and I’m going to walk you through every delicious step!
Why You’ll Love This Chocolate Roll (Swiss Roll) Recipe
You’re going to adore this Chocolate Roll recipe, I just know it! It’s got that wow-factor without being overly complicated, which is my kind of baking. Here’s why it’ll become your new go-to:
- It’s surprisingly easy to master, truly!
- The flavor balance is spot-on – rich chocolate, light cream, pure bliss.
- It looks absolutely stunning, making you look like a pro baker!
- Perfect for celebrations or just a cozy night in.
The Perfect Dessert for Any Occasion
Seriously, this Chocolate Roll is a showstopper for any event! Holidays, birthdays, a casual Sunday brunch – it fits right in. Its elegant spiral and rich chocolatey goodness always get rave reviews. Plus, who can resist a slice of something so visually appealing and utterly delicious? It’s a guaranteed crowd-pleaser, every single time!
Essential Equipment for Your Chocolate Roll (Swiss Roll)
Alright, before we get our hands delightfully messy, let’s talk tools! Having the right gear makes all the difference for a smooth baking experience. You don’t need anything super fancy, just a few essentials:
- Jelly Roll Pan (10×15 inches): This is non-negotiable! It’s the perfect size for our thin sponge cake.
- Parchment Paper: Seriously, don’t skip this. It’s your best friend for preventing sticking and making that crucial first roll easy.
- Electric Mixer (stand or hand-held): Whipping those egg whites and cream to perfection needs power.
- Clean Kitchen Towel: This might sound odd, but it’s key for rolling the warm cake without cracks. Trust me on this one!
Ingredients for Your Delicious Chocolate Roll (Swiss Roll)
Okay, let’s gather our treasures! The beauty of this Chocolate Roll is that it uses pretty standard pantry staples, but getting the measurements just right is super important for that perfect texture. Here’s what you’ll need to make this magic happen:

- 4 large eggs, separated (this is key for that light sponge!)
- 1/2 cup granulated sugar, divided
- 1/4 cup unsweetened cocoa powder (use a good quality one, it makes a difference!)
- 1/4 cup all-purpose flour
- 1 teaspoon baking powder
- 1/4 teaspoon salt
- 1 teaspoon alcohol-free vanilla extract (for the cake)
- 1 1/2 cups heavy cream, very cold (straight from the fridge!)
- 1/4 cup powdered sugar (for the filling)
- 1/2 teaspoon alcohol-free vanilla extract (for the filling)
Key Ingredients for the Chocolate Sponge
For our glorious chocolate sponge, we’re focusing on a few things. Those separated eggs? They’re going to give us that incredible lift and airiness. And don’t skimp on the cocoa powder; a rich, unsweetened kind will give you that deep chocolate flavor we’re after. The flour, baking powder, and a touch of salt will complete our dreamy cake base!
Creamy Filling for Your Chocolate Roll (Swiss Roll)
Now, for the creamy heart of our Chocolate Roll! The star here is definitely the heavy cream. Make sure it’s super cold – I mean, like, straight-from-the-back-of-the-fridge cold. That’s our secret for getting it to whip up thick and fluffy. A little powdered sugar and alcohol-free vanilla extract will sweeten and flavor it perfectly.
Step-by-Step Guide to Making Chocolate Roll (Swiss Roll)
Alright, this is where the real fun begins! Don’t be intimidated; I’m going to walk you through each step for making your Chocolate Roll absolutely perfect. Just follow along, and you’ll be amazed at what you can create. We’ll start with the cake, then the crucial rolling, and finally, the luscious filling and assembly. Get ready for some baking magic!
Preparing the Perfect Chocolate Sponge
First things first, preheat your oven to a good 375°F (190°C) and get that jelly roll pan ready! Line it with parchment paper, making sure it hangs over the sides a bit – trust me, this makes life so much easier later. Now, grab a big bowl and beat those egg yolks with half of your granulated sugar until they’re light and fluffy, almost pale yellow. Stir in the cake’s vanilla extract. In another bowl, whisk together your cocoa powder, flour, baking powder, and salt. Gently fold these dry ingredients into your yolk mixture until everything’s just combined; don’t overmix! Now for the egg whites – in a super clean bowl (no grease allowed!), beat them until soft peaks form. Gradually add the rest of the granulated sugar, beating until they’re stiff and glossy. This is what gives us that light, airy cake! Gently fold about a third of the egg whites into your chocolate batter to lighten it up, then carefully fold in the rest. Be super gentle here; we want to keep all that air! Spread it evenly into your prepared pan and bake for just 12-15 minutes. It’s done when it springs back when you gently touch it.
Rolling the Cake for Your Chocolate Roll (Swiss Roll)
This next step is super important for avoiding cracks! While your cake is baking, lay out a clean kitchen towel on your counter and dust it lightly with powdered sugar. The moment that cake comes out of the oven, immediately invert it onto your prepared towel. Carefully peel off the parchment paper. Now, here’s the crucial part: starting from a short end, gently roll the warm cake and the towel together. Yes, the towel stays inside! Let it cool completely in this rolled position on a wire rack. This “trains” the cake to keep its rolled shape and prevents it from cracking when you unroll it later.
Crafting the Creamy Filling and Final Assembly
Once your cake is completely cool (seriously, wait for it!), it’s time for the dreamy filling. Grab a cold bowl and your super cold heavy cream, powdered sugar, and the filling’s vanilla extract. Beat them together until you have beautiful, stiff peaks. Now, gently unroll your cooled cake. Spread that glorious whipped cream filling evenly over the entire surface, leaving a little border around the edges. Then, carefully re-roll the cake, this time without the towel, into a tight spiral. Don’t worry if it’s not absolutely perfect; it’s homemade! Trim the ends for a neat, pretty appearance, and if you’re feeling fancy, dust it with more powdered sugar or even a little chocolate ganache. Pop it in the fridge for at least 30 minutes to chill and set before slicing. Enjoy!
Tips for a Flawless Chocolate Roll (Swiss Roll)
Okay, you’re almost a Chocolate Roll master! But even the best of us can hit a snag. I’ve learned a few tricks over the years that’ll help you avoid common pitfalls and make your Swiss Roll absolutely perfect every single time. These little secrets are what take it from “good” to “wow!” Trust me, a tiny bit of extra care here makes all the difference.
Avoiding Cracks in Your Chocolate Roll (Swiss Roll)
The number one fear of any Swiss Roll baker is cracks! But don’t you worry, I’ve got you. The absolute golden rule is to roll the cake while it’s still warm, immediately after it comes out of the oven. This “trains” the cake to hold its shape. Also, don’t overbake it! An overbaked cake will be dry and brittle, making it super prone to cracking when you try to roll it. Keep that oven door closed!
Enhancing the Chocolate Flavor
Want to really kick up that chocolate flavor? I love adding a tablespoon of instant espresso powder (not brewed coffee, just the powder!) to the dry ingredients for the cake batter. It won’t make your cake taste like coffee, but it seriously deepens and intensifies the chocolate notes. It’s my little secret weapon for an extra rich, decadent chocolate experience!
Serving and Storing Your Chocolate Roll (Swiss Roll)
Once your beautiful Chocolate Roll has chilled and set, it’s ready to be devoured! I love to slice it with a sharp knife, wiping it clean between each cut for the prettiest presentation. For any magical leftovers (if that even happens!), wrap the roll tightly in plastic wrap or pop it into an airtight container. It’ll stay absolutely delicious in the refrigerator for up to 3 days. There’s no reheating needed; it’s perfect served cold straight from the fridge!
Presentation Ideas for Your Chocolate Roll (Swiss Roll)
Want to make it extra special? Dust with a little extra powdered sugar, drizzle with a simple chocolate ganache, or even add some fresh berries like raspberries or strawberries. A sprig of fresh mint always looks elegant too!
Common Questions About Chocolate Roll (Swiss Roll)
I know you might have a few questions bubbling up as you embark on your Chocolate Roll adventure, and that’s totally normal! I’ve been asked everything under the sun about this classic dessert, so let’s tackle some of the most common ones. Don’t let any little worry stop you from making this gorgeous Swiss Roll!
Can I make the Chocolate Roll (Swiss Roll) ahead of time?
Absolutely, yes! This is one of my favorite things about a good Chocolate Roll. You can definitely bake and assemble it a day in advance. Just make sure to store it properly wrapped in the refrigerator, and it’ll be perfect for serving the next day. The flavors even meld a bit more!
What if my Chocolate Roll (Swiss Roll) cracks?
Oh, don’t you worry your pretty little head about a small crack! It happens to the best of us, especially when you’re first learning. A little crack won’t affect the taste one bit. You can totally hide it with extra powdered sugar, a dollop of whipped cream, or a drizzle of chocolate ganache. It’s homemade, after all!
Can I use a different filling for my Chocolate Roll (Swiss Roll)?
You bet! While the classic whipped cream filling is divine, feel free to get creative! You could try a chocolate mousse filling, a raspberry jam and cream combo, or even a cream cheese frosting for a richer twist. Just make sure your alternative filling isn’t too heavy or watery to avoid squishing your beautiful chocolate cake roll.
Estimated Nutritional Information for Chocolate Roll (Swiss Roll)
Now, I know some of you like to keep an eye on the numbers, so here’s a general idea of the nutritional breakdown for one slice of this delicious Chocolate Roll. Please remember, these are just estimates, and they can totally vary depending on the specific brands of ingredients you use. Think of it as a guide, not a strict rule!
- Serving Size: 1 slice
- Calories: 280
- Fat: 18g
- Protein: 5g
- Carbohydrates: 27g
- Sugar: 25g
- Sodium: 110mg
- Cholesterol: 120mg
- Fiber: 2g
Share Your Chocolate Roll (Swiss Roll) Creations!
Okay, now that you’re armed with all my best tips and tricks, I am SO excited to see your beautiful Chocolate Rolls! Please, please, please don’t be shy. Leave a comment below and tell me how it went, rate the recipe, or even better – share a photo of your stunning Swiss Roll on social media! Tag me, I’d absolutely love to celebrate your baking triumphs with you. Let’s build a little community of Chocolate Roll enthusiasts!
PrintEasy Chocolate Roll with Cream Filling

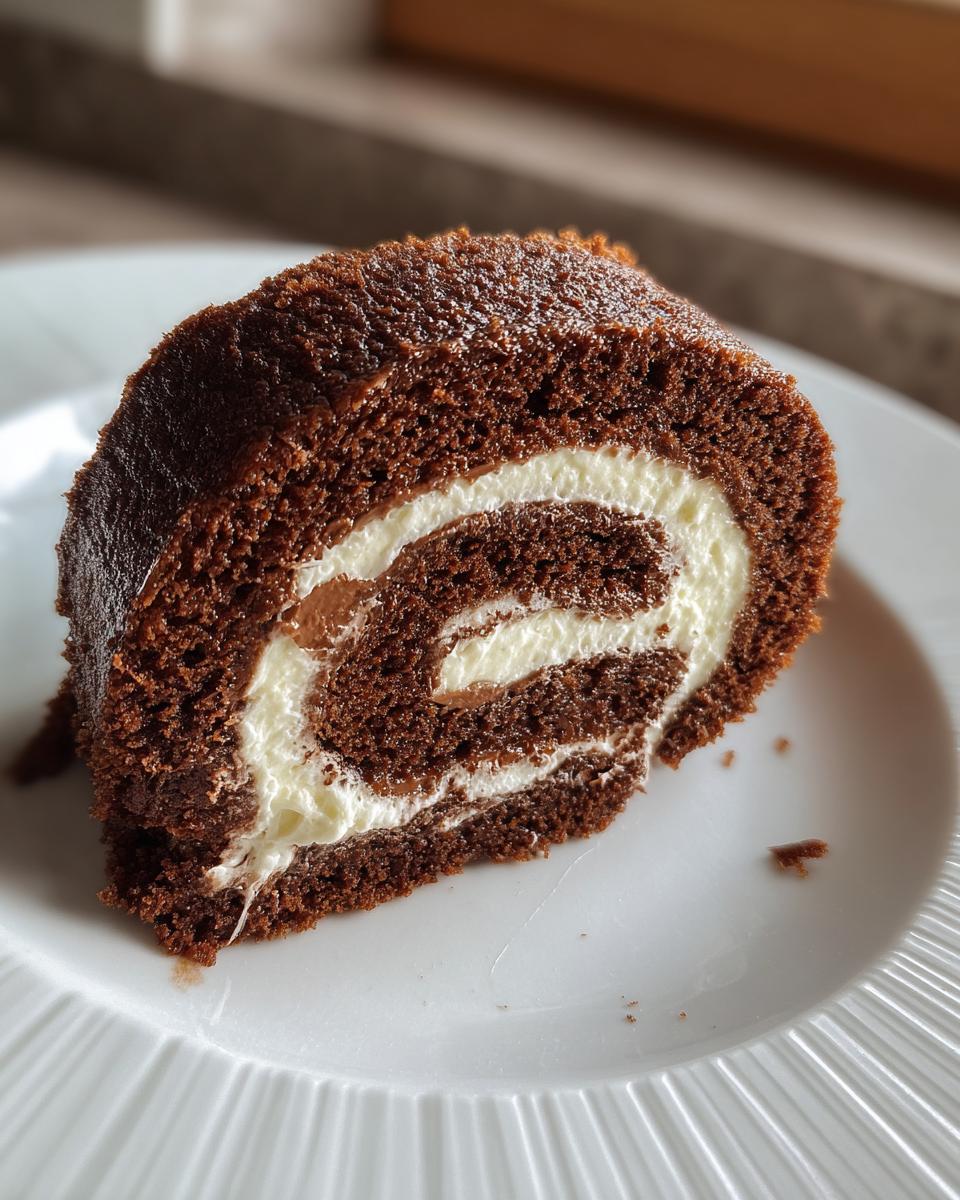
Chocolate Roll, also known as Swiss Roll, is a classic dessert. It features a light and airy chocolate sponge cake, generously filled with a creamy whipped filling, and then rolled into a beautiful spiral. This elegant dessert is perfect for any occasion.
- Prep Time: 30 minutes
- Cook Time: 15 minutes
- Total Time: 1 hour 45 minutes
- Yield: 10-12 servings 1x
- Category: Dessert
- Method: Baking
- Cuisine: European
- Diet: Vegetarian
Ingredients
- 4 large eggs, separated
- 1/2 cup granulated sugar, divided
- 1/4 cup unsweetened cocoa powder
- 1/4 cup all-purpose flour
- 1 teaspoon baking powder
- 1/4 teaspoon salt
- 1 teaspoon vanilla extract
- 1 1/2 cups heavy cream
- 1/4 cup powdered sugar
- 1/2 teaspoon vanilla extract (for filling)
Instructions
- Preheat your oven to 375°F (190°C). Line a 10×15 inch jelly roll pan with parchment paper, extending the paper over the sides.
- In a large bowl, beat the egg yolks with 1/4 cup of granulated sugar until light and fluffy. Stir in the vanilla extract.
- In a separate bowl, whisk together the cocoa powder, flour, baking powder, and salt. Gradually add the dry ingredients to the egg yolk mixture, mixing until just combined.
- In a clean bowl, beat the egg whites until soft peaks form. Gradually add the remaining 1/4 cup of granulated sugar, beating until stiff, glossy peaks form.
- Gently fold one-third of the egg whites into the chocolate batter to lighten it, then gently fold in the remaining egg whites until no streaks remain. Be careful not to deflate the batter.
- Spread the batter evenly into the prepared jelly roll pan. Bake for 12-15 minutes, or until the cake springs back when lightly touched.
- While the cake is baking, lay a clean kitchen towel on a flat surface and dust it lightly with powdered sugar.
- Immediately after removing the cake from the oven, invert it onto the prepared towel. Carefully peel off the parchment paper.
- Starting from a short end, carefully roll the warm cake and towel together. Let it cool completely in the rolled position on a wire rack.
- For the filling, in a cold bowl, beat the heavy cream, powdered sugar, and 1/2 teaspoon vanilla extract until stiff peaks form.
- Once the cake is completely cool, carefully unroll it. Spread the whipped cream filling evenly over the cake, leaving a small border around the edges.
- Carefully re-roll the cake, without the towel, into a tight spiral.
- Trim the ends of the roll for a neat appearance. Dust with additional powdered sugar or drizzle with chocolate ganache, if desired.
- Chill for at least 30 minutes before slicing and serving.
Notes
- Do not overbake the cake, as it can become dry and crack when rolled.
- Rolling the cake while warm helps prevent it from cracking as it cools.
- Ensure the cake is completely cool before filling to prevent the whipped cream from melting.
- For a richer chocolate flavor, you can add a tablespoon of instant espresso powder to the cake batter.
- Store leftover chocolate roll in an airtight container in the refrigerator for up to 3 days.
Nutrition
- Serving Size: 1 slice
- Calories: 280
- Sugar: 25g
- Sodium: 110mg
- Fat: 18g
- Saturated Fat: 11g
- Unsaturated Fat: 5g
- Trans Fat: 0.5g
- Carbohydrates: 27g
- Fiber: 2g
- Protein: 5g
- Cholesterol: 120mg


