Let me tell you about my go-to treat when I’m craving something sweet but don’t want to spend hours in the kitchen—this Easy Puff Pastry Cheese Danish. It’s the kind of recipe that feels fancy but is honestly so simple, you’ll wonder why you didn’t make it sooner. Flaky puff pastry? Check. Creamy, dreamy cheese filling? Double check. And the best part? It’s ready in about 30 minutes. Whether it’s a lazy weekend breakfast or a last-minute dessert for guests, these danishes always hit the spot. Trust me, once you try them, they’ll become a regular in your rotation.
Why You’ll Love This Easy Puff Pastry Cheese Danish
Let me count the ways this recipe will become your new favorite:
- Crazy quick: From fridge to table in under 30 minutes – perfect for those “I need something sweet NOW” moments
- No fancy skills needed: If you can spread cream cheese and fold paper, you can make these
- That flaky magic: Store-bought puff pastry bakes up golden and crisp like you spent hours laminating dough
- Dreamy filling: The cream cheese mixture is like cheesecake’s more elegant cousin
- Endless options: Dress it up with berries, jam, or lemon zest – your breakfast, your rules!
Honestly? These disappear faster than I can make them. My kids start hovering near the oven the second they smell that buttery pastry baking.
Ingredients for Easy Puff Pastry Cheese Danish
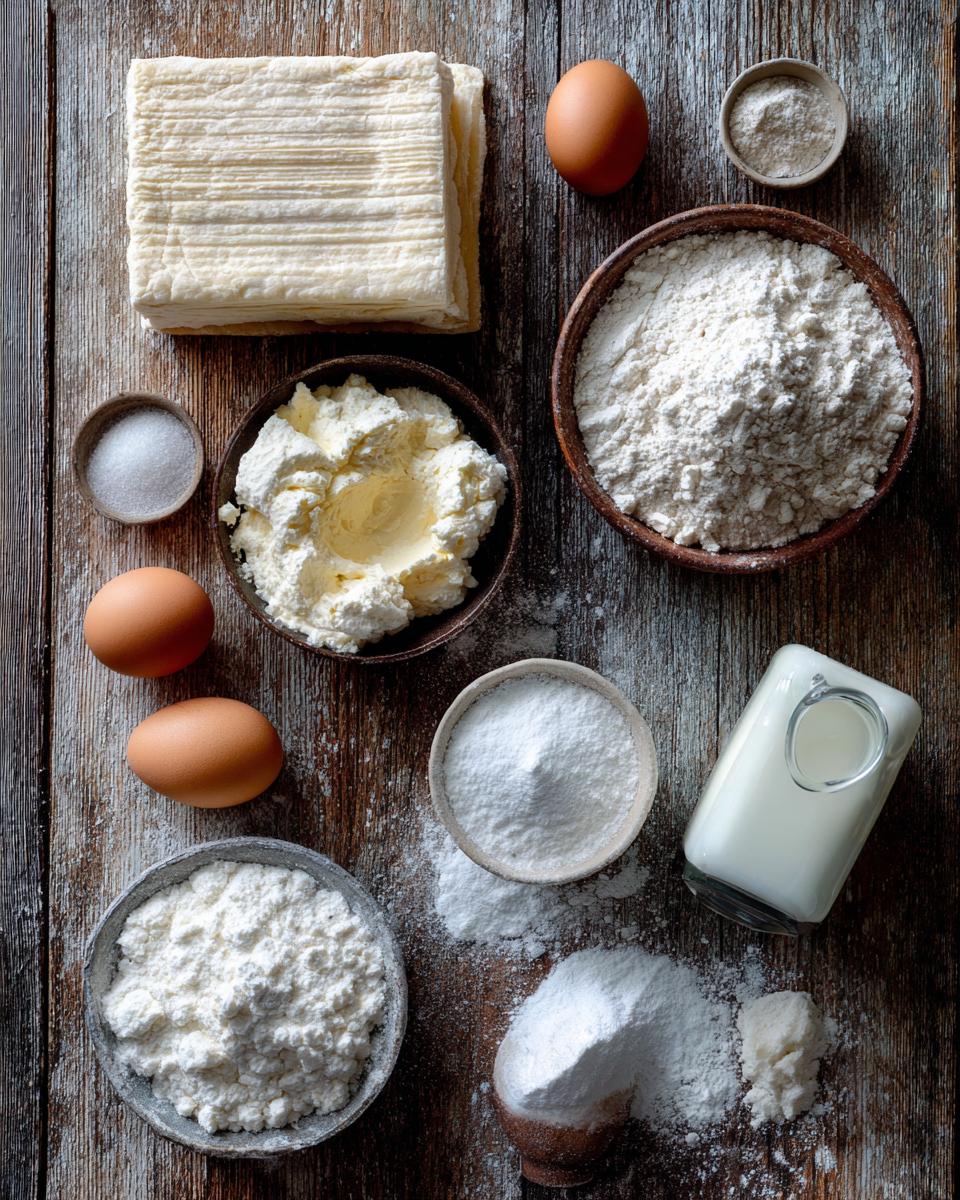
Here’s everything you’ll need to make these irresistible pastries – I promise it’s all simple stuff you might already have:
- 1 sheet puff pastry (thawed but still cold – trust me, this makes all the difference)
- 4 oz cream cheese (softened to room temp so it mixes smoothly)
- 2 tbsp sugar (I use regular granulated, but brown sugar adds a nice caramel note)
- 1 tsp vanilla extract (the good stuff – it really shines through)
- 1 egg (beaten, for that gorgeous golden sheen)
- 1 tbsp milk (any kind works – I’ve even used almond milk in a pinch)
- Powdered sugar (for that picture-perfect snowy dusting at the end)
See? Nothing fancy – just pantry staples transformed into something magical. Now let’s get baking!
Equipment You’ll Need
Grab these basics from your kitchen, and you’re all set:
- Baking sheet (lined with parchment paper for easy cleanup)
- Mixing bowl (for that dreamy cream cheese filling)
- Pastry brush (a silicone one works great for the egg wash)
That’s it! No special gadgets required – just simple tools for delicious results.
How to Make Easy Puff Pastry Cheese Danish
Okay, let’s dive into the fun part – turning these simple ingredients into golden, flaky perfection! Don’t let the fancy look fool you – these come together faster than you can say “second breakfast.” Here’s exactly how I do it:
Step 1: Prep the Puff Pastry
First, preheat your oven to 400°F (200°C) – this gives it time to get nice and hot while we prep. Lightly flour your counter (just a dusting – too much makes the pastry tough) and unfold your thawed puff pastry sheet. I like to give it a gentle roll with a rolling pin just to smooth out any creases – no need to go crazy thin here. Then comes the fun part: cutting! I usually go for squares (about 4×4 inches), but rectangles or even triangles work great too. Pro tip: use a pizza cutter for clean edges!
Step 2: Make the Cheese Filling
While the oven heats, let’s whip up that dreamy filling. In a medium bowl, beat the softened cream cheese until it’s smooth – no lumps allowed! Then mix in the sugar and vanilla. You’ll know it’s ready when it’s creamy like frosting and holds soft peaks when you lift the spoon. Taste it (I always do!) – if you want it sweeter, add another teaspoon of sugar. Sometimes I add a pinch of lemon zest for brightness – totally optional but oh-so-good.
Step 3: Assemble and Bake
Now for the magic! Place about a tablespoon of filling in the center of each pastry square – don’t overfill or it’ll ooze out (learned that the messy way!). Fold two opposite corners toward the center, pressing gently where they meet. Brush each pastry with the egg wash (just beat the egg with a splash of milk) – this gives them that gorgeous golden shine. Pop them in the oven for 15-20 minutes until they’re puffed and golden brown like little edible suns. Your kitchen will smell AMAZING. Let them cool just slightly before that final snowy dusting of powdered sugar. Then try not to eat them all at once!

Tips for Perfect Easy Puff Pastry Cheese Danish
After making these more times than I can count (blame my sweet tooth!), here are my foolproof secrets:
- Thaw smart: Let puff pastry sit in the fridge overnight – thawing too fast makes it sticky and hard to work with
- Seal tight: Press edges firmly so your filling doesn’t escape during baking (been there, cleaned that!)
- Less is more: About 1 tbsp filling per pastry keeps things neat – they puff up more than you’d think
- Egg wash magic: Don’t skip it! That golden shine makes them look bakery-worthy
- Watch closely: Ovens vary – mine are perfect at 18 minutes, but start checking at 15
Follow these, and you’ll get flaky, golden perfection every single time!
Variations for Easy Puff Pastry Cheese Danish
The beauty of these danishes? You can dress them up however your heart desires! Here are my favorite twists:
- Berry bliss: Dot the filling with raspberry or strawberry jam before folding – the tangy-sweet swirl is irresistible
- Citrus spark: Mix lemon zest into the cream cheese filling and top with a lemon glaze instead of powdered sugar
- Nutty delight: Sprinkle chopped pecans or almonds on top before baking for crunch
The possibilities are endless – get creative and make them your own!
Serving and Storing Easy Puff Pastry Cheese Danish
These danishes are absolute heaven when served warm – the pastry stays crisp, and that cream cheese filling turns extra dreamy. I always dust them with a generous shower of powdered sugar right before serving (it makes them look so pretty!). If you have leftovers (a rare occurrence in my house!), just pop them in an airtight container. They’ll keep for about 2 days at room temperature, though the pastry won’t stay quite as crisp. A quick 5-10 second zap in the microwave brings back that just-baked warmth if needed!
Nutritional Information
Now, I’m no nutritionist, but I know we all like to have a general idea of what we’re eating. These Easy Puff Pastry Cheese Danishes are definitely a treat – that flaky pastry and creamy filling aren’t exactly health food, but everything in moderation, right? The nutritional values will vary depending on your exact ingredients (like full-fat vs reduced-fat cream cheese) and how big you make your pastries. As a general rule, one danish will give you a nice energy boost with some protein from the cream cheese and egg. Just remember – life’s too short not to enjoy buttery pastries sometimes!
FAQs About Easy Puff Pastry Cheese Danish
Can I add fruit to these danishes? Absolutely! My favorite trick is dropping a teaspoon of your favorite jam or fresh berries on top of the cream cheese filling before folding. Just don’t go overboard – too much liquid can make the pastry soggy. Frozen berries work too, but pat them dry first.
Why did my pastry turn out soggy? Oh no! This usually happens if the puff pastry wasn’t cold enough when it went in the oven. Make sure it’s thawed but still chilly, and don’t overfill with the cream cheese mixture. A hot oven (that 400°F is crucial!) helps the layers puff up properly.
Can I make these ahead of time? You can prep the unbaked danishes up to a day in advance – just keep them covered in the fridge. The egg wash is best added right before baking though. Fresh from the oven is always ideal, but they do reheat nicely for about 10 seconds in the microwave.
What if I don’t have a pastry brush? No worries! I’ve used my fingers to spread the egg wash in a pinch. A folded paper towel works too – just dab it lightly. The goal is just to get a thin, even coating for that beautiful golden color.
Final Thoughts
There you have it – my foolproof way to make bakery-worthy danishes with minimal effort! I hope you’ll give this recipe a try and experience that magical moment when flaky pastry meets creamy filling. Don’t be surprised if these become your new go-to treat – they’ve certainly earned a permanent spot in my recipe rotation. Happy baking, friends!
PrintEasy Puff Pastry Cheese Danish

This Easy Puff Pastry Cheese Danish is a quick and delicious treat. Perfect for breakfast or dessert, it combines flaky puff pastry with a creamy cheese filling.
- Prep Time: 10 minutes
- Cook Time: 20 minutes
- Total Time: 30 minutes
- Yield: 8 pastries 1x
- Category: Dessert
- Method: Baking
- Cuisine: Danish
- Diet: Vegetarian
Ingredients
- 1 sheet puff pastry, thawed
- 4 oz cream cheese, softened
- 2 tbsp sugar
- 1 tsp vanilla extract
- 1 egg, beaten
- 1 tbsp milk
- Powdered sugar for dusting
Instructions
- Preheat your oven to 400°F (200°C).
- Roll out the puff pastry sheet on a floured surface.
- In a bowl, mix cream cheese, sugar, and vanilla extract until smooth.
- Cut the puff pastry into squares or rectangles.
- Place a spoonful of the cream cheese mixture in the center of each piece.
- Fold the corners of the pastry over the filling, pressing gently to seal.
- Brush the pastries with the beaten egg mixed with milk.
- Bake for 15-20 minutes, or until golden brown.
- Let cool slightly, then dust with powdered sugar before serving.
Notes
- Ensure the puff pastry is fully thawed before use.
- You can add fruit preserves on top of the cheese filling for extra flavor.
- Store leftovers in an airtight container for up to 2 days.
Nutrition
- Serving Size: 1 pastry
- Calories: 250
- Sugar: 8g
- Sodium: 180mg
- Fat: 18g
- Saturated Fat: 8g
- Unsaturated Fat: 8g
- Trans Fat: 0g
- Carbohydrates: 18g
- Fiber: 1g
- Protein: 5g
- Cholesterol: 45mg


